Deployments using Azure Bicep templates
Student lab manual
Lab requirements
-
This lab requires Microsoft Edge or an Azure DevOps supported browser.
-
Set up an Azure DevOps organization: If you don’t already have an Azure DevOps organization that you can use for this lab, create one by following the instructions available at Create an organization or project collection.
-
Identify an existing Azure subscription or create a new one.
-
Verify that you have a Microsoft account or a Microsoft Entra account with the Owner role in the Azure subscription and the Global Administrator role in the Microsoft Entra tenant associated with the Azure subscription. For details, refer to List Azure role assignments using the Azure portal and View and assign administrator roles in Azure Active Directory.
Lab overview
In this lab, you’ll create an Azure Bicep template and modularize it using the Azure Bicep Modules concept. You’ll then modify the main deployment template to use the module and finally deploy all the resources to Azure.
Objectives
After you complete this lab, you will be able to:
- Understand an Azure Bicep template’s structure.
- Create a reusable Bicep module.
- Modify the main template to use the module
- Deploy all the resources to Azure using Azure YAML pipelines.
Estimated timing: 45 minutes
Instructions
Exercise 0: Configure the lab prerequisites
In this exercise, you will set up the prerequisites for the lab, which consist of a new Azure DevOps project with a repository based on the eShopOnWeb.
Task 1: (skip if done) Create and configure the team project
In this task, you will create an eShopOnWeb Azure DevOps project to be used by several labs.
-
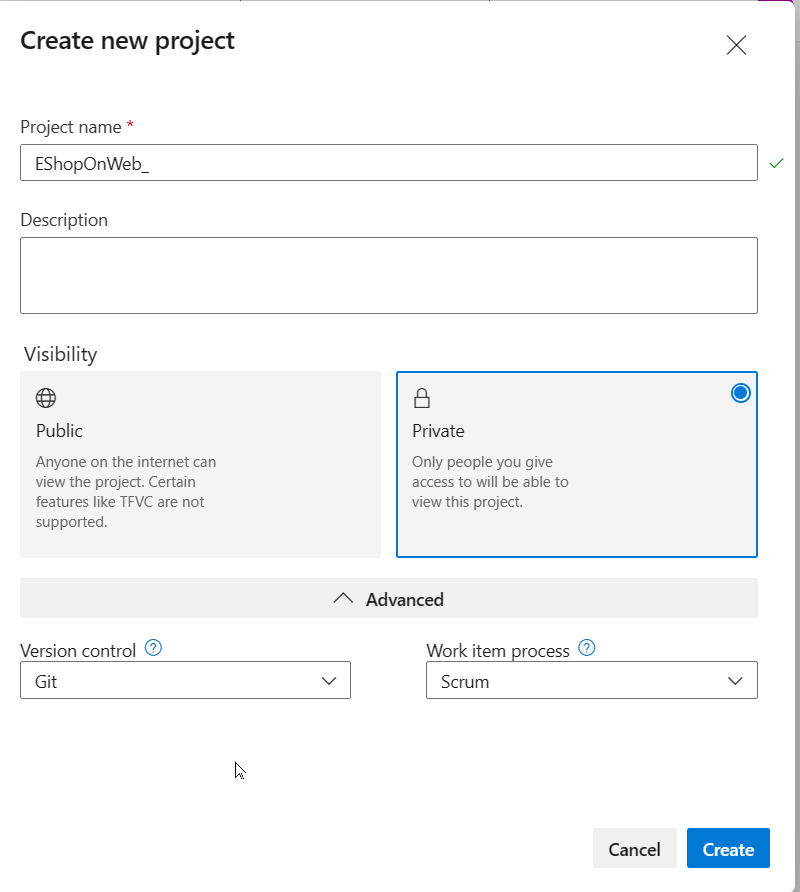
On your lab computer, in a browser window open your Azure DevOps organization. Click on New Project. Give your project the name eShopOnWeb and leave the other fields with defaults. Click on Create.
Task 2: (skip if done) Import eShopOnWeb Git Repository
In this task you will import the eShopOnWeb Git repository that will be used by several labs.
-
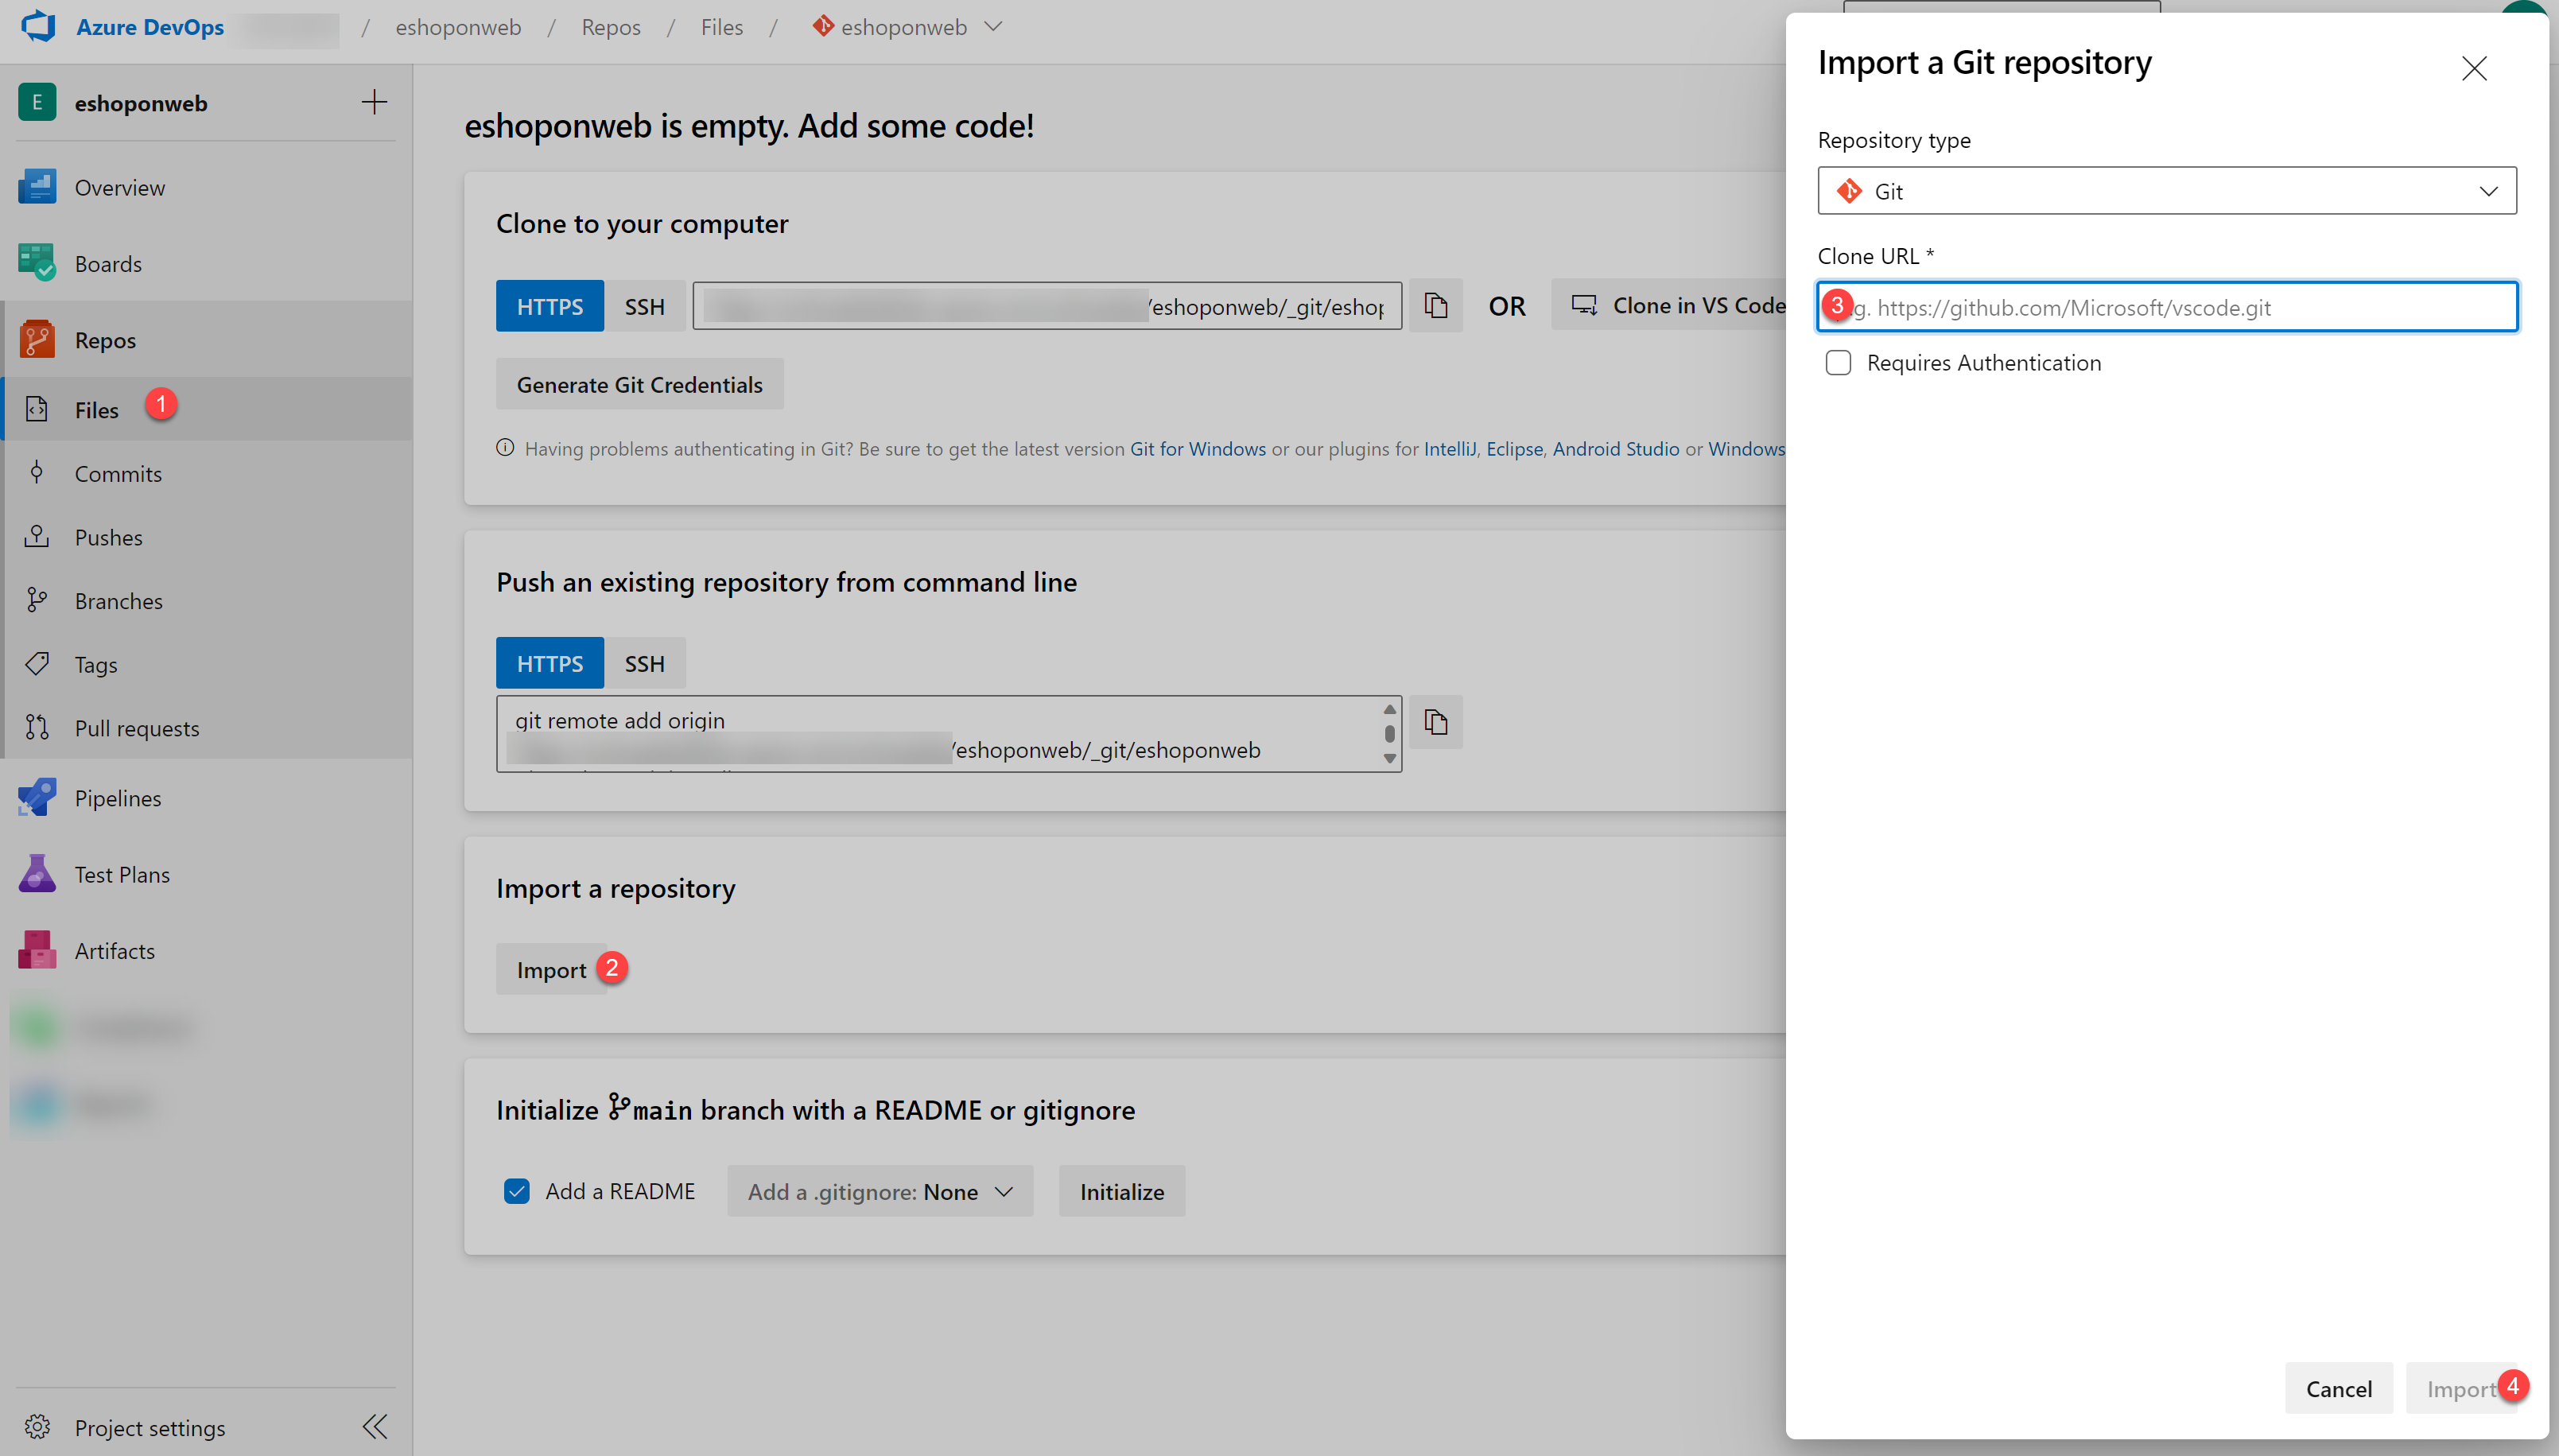
On your lab computer, in a browser window open your Azure DevOps organization and the previously created eShopOnWeb project. Click on Repos>Files , Import a Repository. Select Import. On the Import a Git Repository window, paste the following URL https://github.com/MicrosoftLearning/eShopOnWeb.git and click Import:
-
The repository is organized the following way:
- .ado folder contains Azure DevOps YAML pipelines.
- .devcontainer folder container setup to develop using containers (either locally in VS Code or GitHub Codespaces).
- infra folder contains Bicep&ARM infrastructure as code templates used in some lab scenarios.
- .github folder container YAML GitHub workflow definitions.
- src folder contains the .NET 8 website used on the lab scenarios.
Exercise 1: Understand an Azure Bicep template and simplify it using a reusable module
In this lab, you will review an Azure Bicep template and simplify it using a reusable module.
Task 1: Create Azure Bicep template
In this task, you will use Visual Studio Code to create an Azure Bicep template
-
In the browser tab you have your Azure DevOps project open, navigate to Repos and Files. Open the
infrafolder and find thesimple-windows-vm.bicepfile.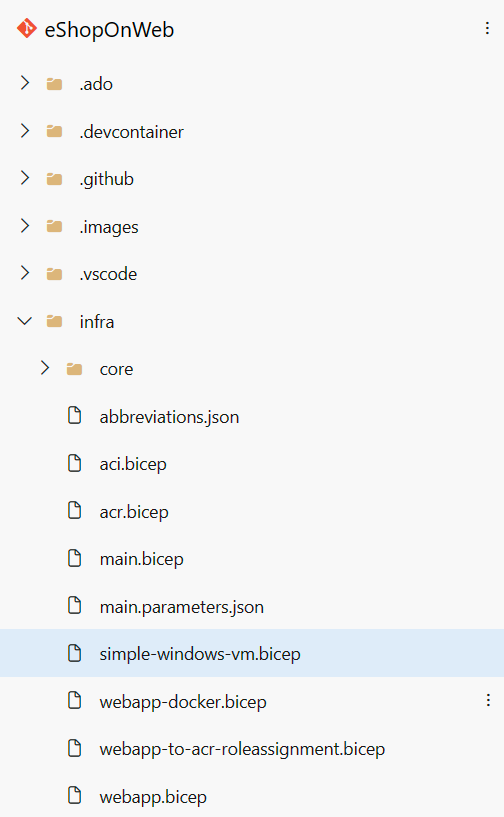
-
Review the template to get a better understanding of its structure. There are some parameters with types, default values and validation, some variables, and quite a few resources with these types:
- Microsoft.Storage/storageAccounts
- Microsoft.Network/publicIPAddresses
- Microsoft.Network/virtualNetworks
- Microsoft.Network/networkInterfaces
- Microsoft.Compute/virtualMachines
-
Pay attention to how simple the resource definitions are and the ability to implicitly reference symbolic names instead of explicit
dependsOnthroughout the template.
Task 2: Create a bicep module for storage resources
In this task, you will create a storage template module storage.bicep which will create a storage account only and will be imported by the main template. The storage template module needs to pass a value back to the main template, main.bicep, and this value will be defined in the outputs element of the storage template module.
-
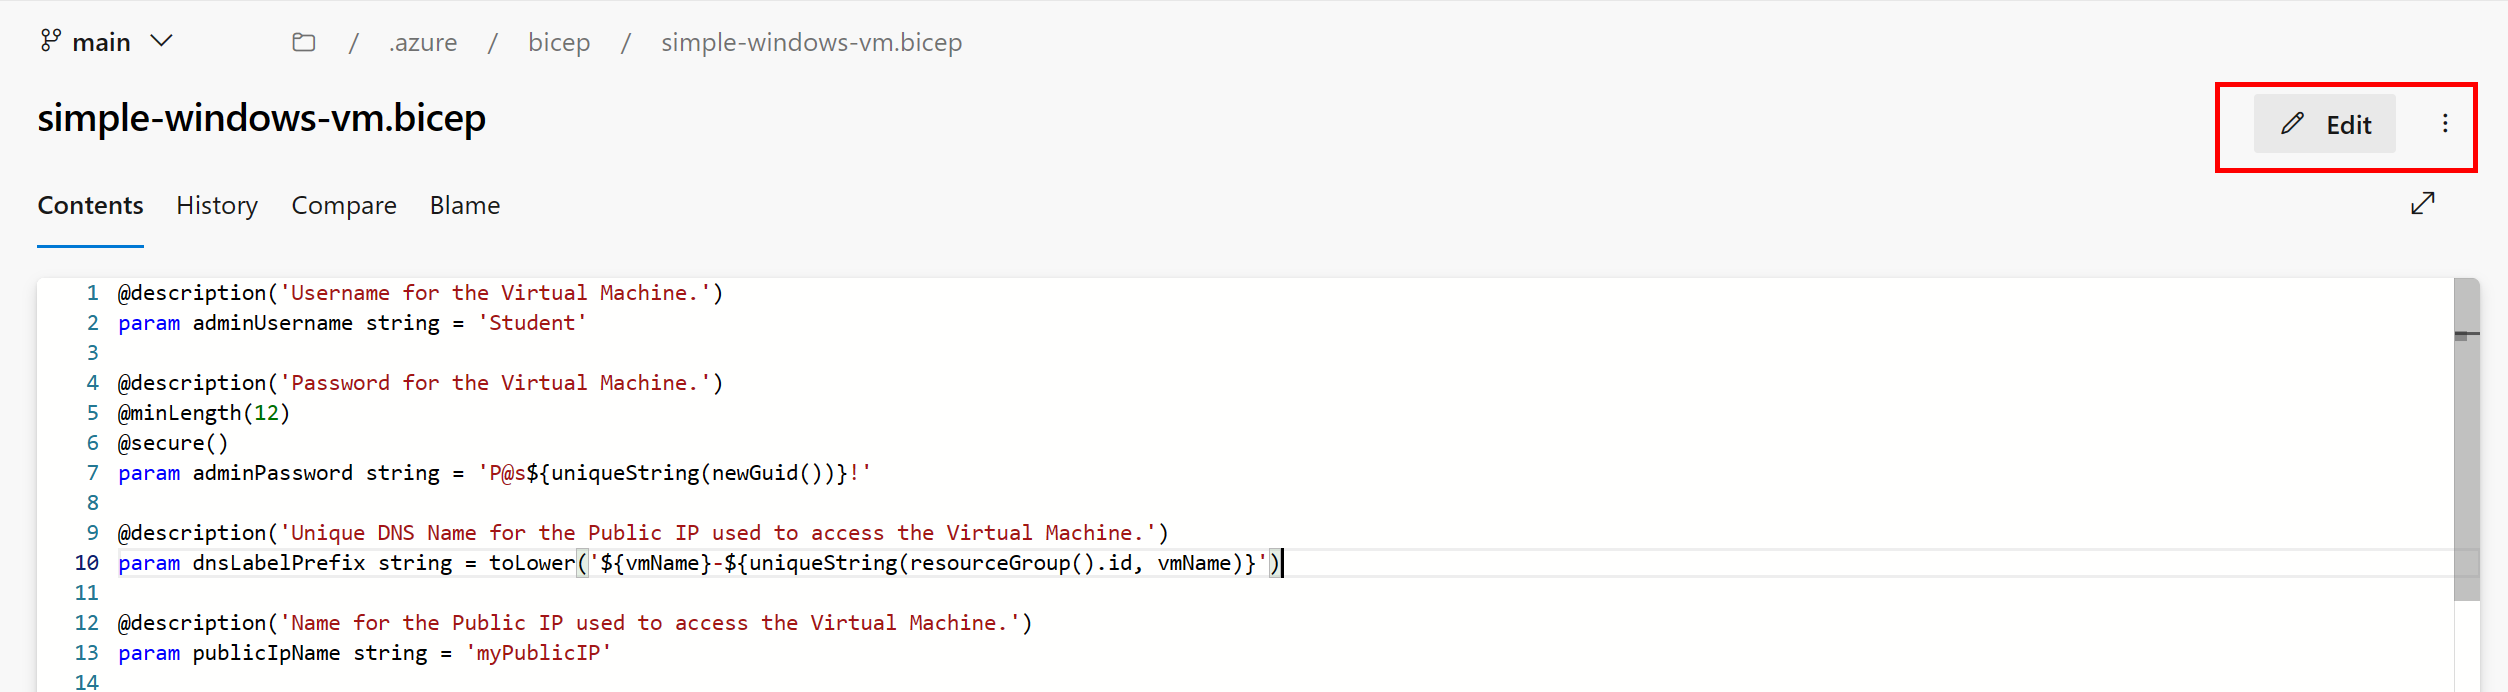
First we need to remove the storage resource from our main template. From the top right corner of your browser window click the Edit button:
-
Now delete the storage resource:
resource storageAccount 'Microsoft.Storage/storageAccounts@2022-05-01' = { name: storageAccountName location: location sku: { name: 'Standard_LRS' } kind: 'Storage' } -
Commit the file, however, we’re not done with it yet.

-
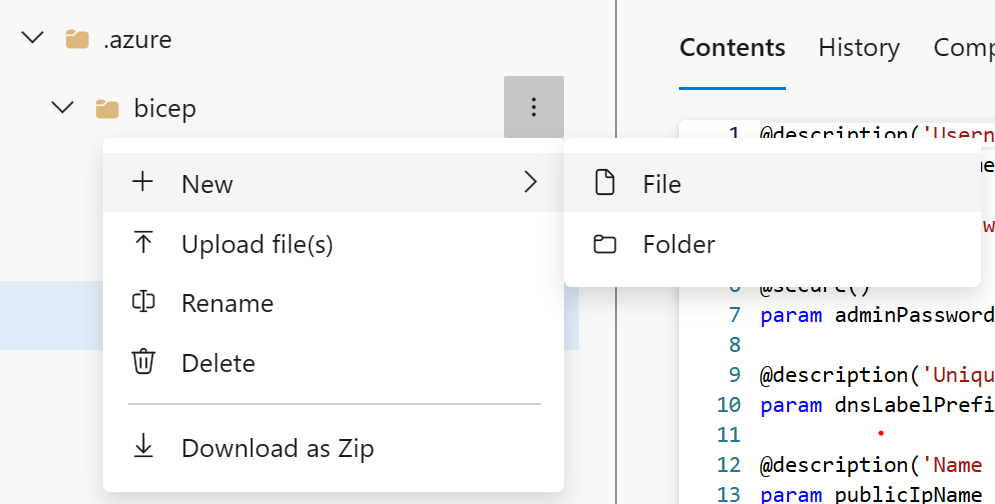
Next, hover your mouse over the bicep folder and click the ellipsis icon, then select New, and File. Enter storage.bicep for the name and click Create.
-
Now copy the following code snippet into the file and commit your changes:
@description('Location for all resources.')
param location string = resourceGroup().location

@description('Name for the storage account.')
param storageAccountName string

resource storageAccount 'Microsoft.Storage/storageAccounts@2022-05-01' = {
  name: storageAccountName
  location: location
  sku: {
    name: 'Standard_LRS'
  }
  kind: 'Storage'
}

output storageURI string = storageAccount.properties.primaryEndpoints.blob
Task 3: Modify the main template to use the template module
In this task, you will modify the main template to reference the template module you created in the previous task.
-
Navigate back to the
simple-windows-vm.bicepfile and click on the Edit button once again. -
Next, add the following code after the variables:
module storageModule './storage.bicep' = { name: 'linkedTemplate' params: { location: location storageAccountName: storageAccountName } } -
We also need to modify the reference to the storage account blob URI in our virtual machine resource to use the output of the module instead. Find the virtual machine resource and replace the diagnosticsProfile section with the following:
diagnosticsProfile: { bootDiagnostics: { enabled: true storageUri: storageModule.outputs.storageURI } } -
Review the following details in the main template:
- A module in the main template is used to link to another template.
- The module has a symbolic name called
storageModule. This name is used for configuring any dependencies. - You can only use Incremental deployment mode when using template modules.
- A relative path is used for your template module.
- Use parameters to pass values from the main template to the template modules.
-
Commit the template.
Exercise 2: Deploying the templates to Azure using YAML pipelines
In this lab, you will create a service connection and use it in an Azure DevOps YAML pipeline to deploy your template to your Azure environment.
Task 1: (skip if done) Create a Service Connection for deployment
In this task, you will create a Service Principal by using the Azure CLI, which will allow Azure DevOps to:
- Deploy resources on your Azure subscription.
- Have read access on the later created Key Vault secrets.
Note: If you do already have a Service Principal, you can proceed directly to the next task.
You will need a Service Principal to deploy Azure resources from Azure Pipelines. Since we are going to retrieve secrets in a pipeline, we will need to grant permission to the service when we create the Azure Key Vault.
A Service Principal is automatically created by Azure Pipelines, when you connect to an Azure subscription from inside a pipeline definition or when you create a new Service Connection from the project settings page (automatic option). You can also manually create the Service Principal from the portal or using Azure CLI and re-use it across projects.
- From the lab computer, start a web browser, navigate to the Azure Portal, and sign in with the user account that has the Owner role in the Azure subscription you will be using in this lab and has the role of the Global Administrator in the Microsoft Entra tenant associated with this subscription.
- In the Azure portal, click on the Cloud Shell icon, located directly to the right of the search textbox at the top of the page.
-
If prompted to select either Bash or PowerShell, select Bash.
Note: If this is the first time you are starting Cloud Shell and you are presented with the You have no storage mounted message, select the subscription you are using in this lab, and select Create storage.
-
From the Bash prompt, in the Cloud Shell pane, run the following commands to retrieve the values of the Azure subscription ID and subscription name attributes:
az account show --query id --output tsv az account show --query name --output tsvNote: Copy both values to a text file. You will need them later in this lab.
-
From the Bash prompt, in the Cloud Shell pane, run the following command to create a Service Principal (replace the myServicePrincipalName with any unique string of characters consisting of letters and digits) and mySubscriptionID with your Azure subscriptionId :
az ad sp create-for-rbac --name myServicePrincipalName \ --role contributor \ --scopes /subscriptions/mySubscriptionIDNote: The command will generate a JSON output. Copy the output to text file. You will need it later in this lab.
-
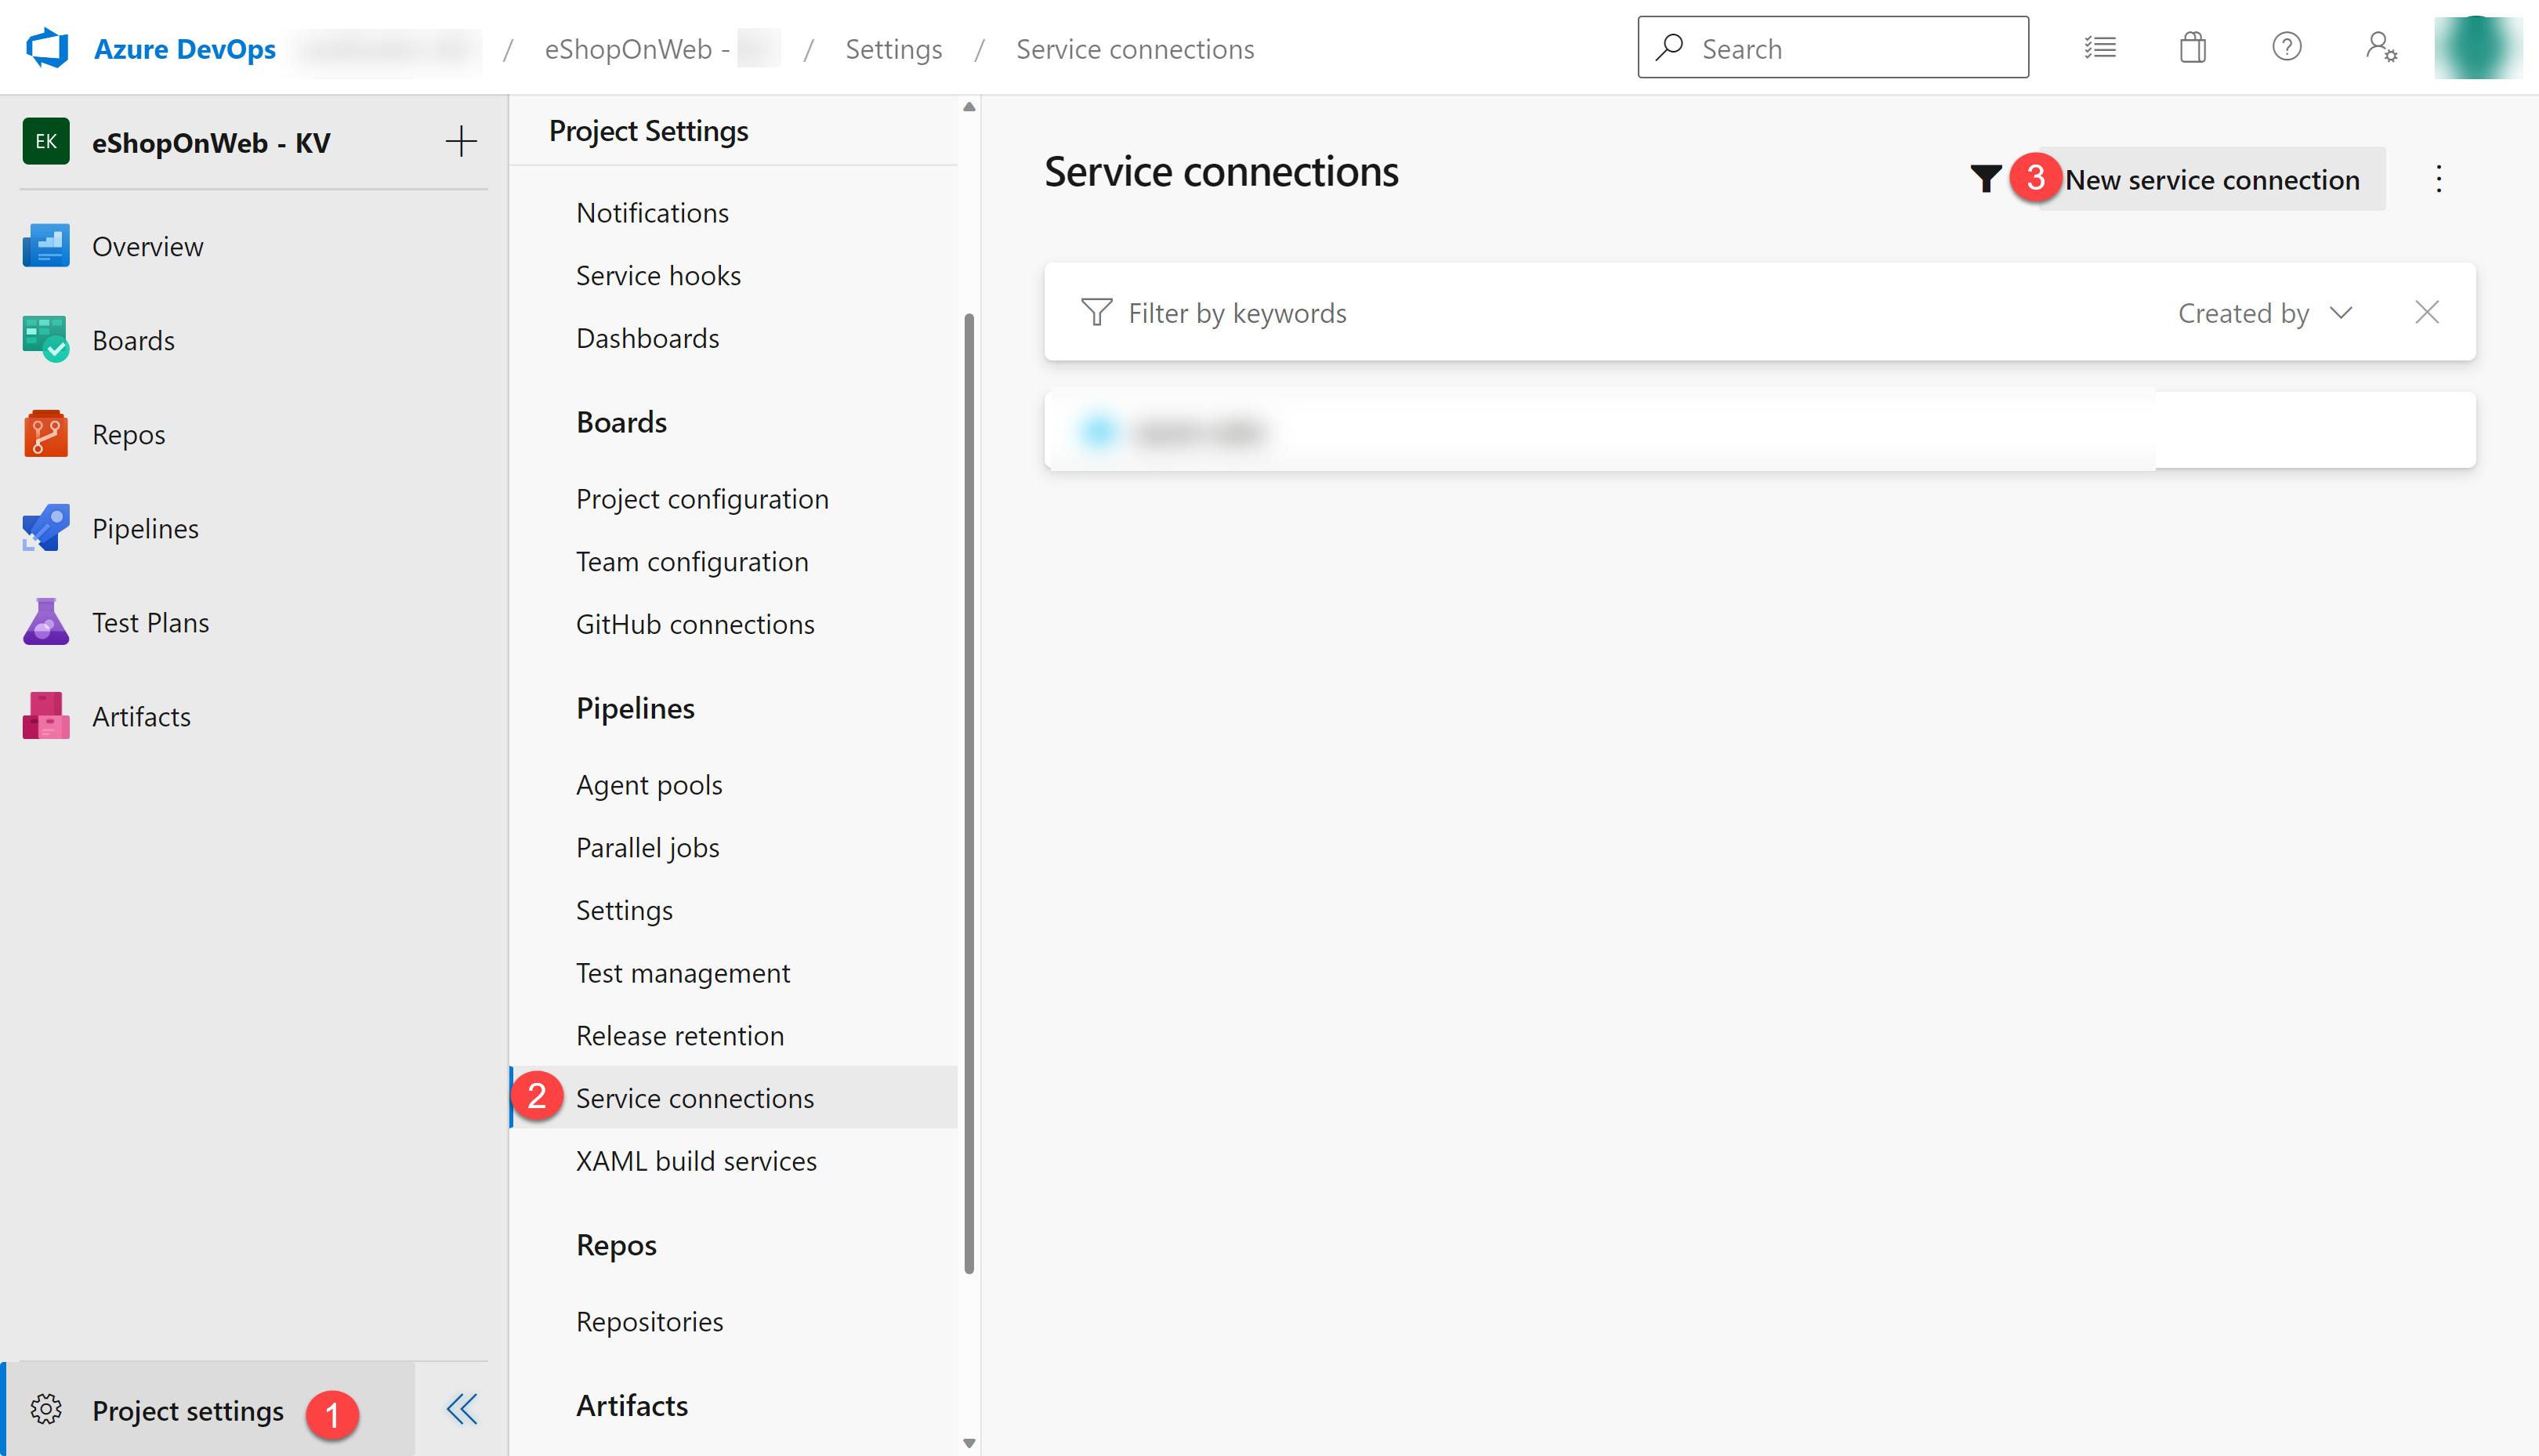
Next, from the lab computer, start a web browser, navigate to the Azure DevOps eShopOnWeb project. Click on Project Settings>Service Connections (under Pipelines) and New Service Connection.
-
On the New service connection blade, select Azure Resource Manager and Next (may need to scroll down).
-
The choose Service Principal (manual) and click on Next.
- Fill in the empty fields using the information gathered during previous steps:
- Subscription Id and Name.
- Service Principal Id (appId), Service principal key (password) and Tenant ID (tenant).
- In Service connection name type azure subs. This name will be referenced in YAML pipelines when needing an Azure DevOps Service Connection to communicate with your Azure subscription.
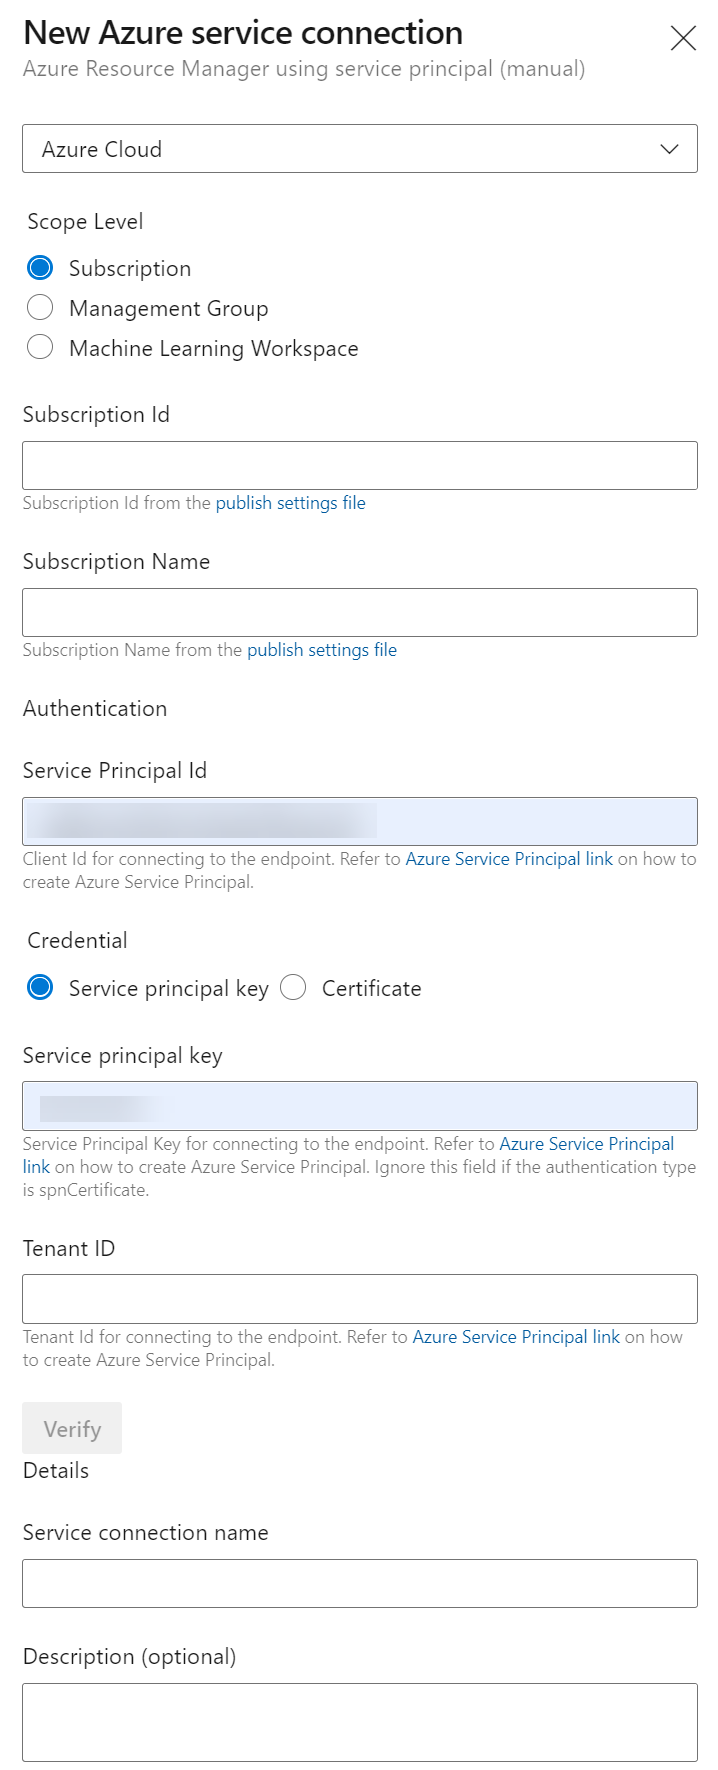
- Click on Verify and Save.
Task 2: Deploy resources to Azure by YAML pipelines
- Navigate back to the Pipelines pane in of the Pipelines hub.
-
In the Create your first Pipeline window, click Create pipeline.
Note: We will use the wizard to create a new YAML Pipeline definition based on our project.
- On the Where is your code? pane, click Azure Repos Git (YAML) option.
- On the Select a repository pane, click eShopOnWeb.
- On the Configure your pipeline pane, scroll down and select Existing Azure Pipelines YAML File.
- In the Selecting an existing YAML File blade, specify the following parameters:
- Branch: main
- Path: .ado/eshoponweb-cd-windows-cm.yml
- Click Continue to save these settings.
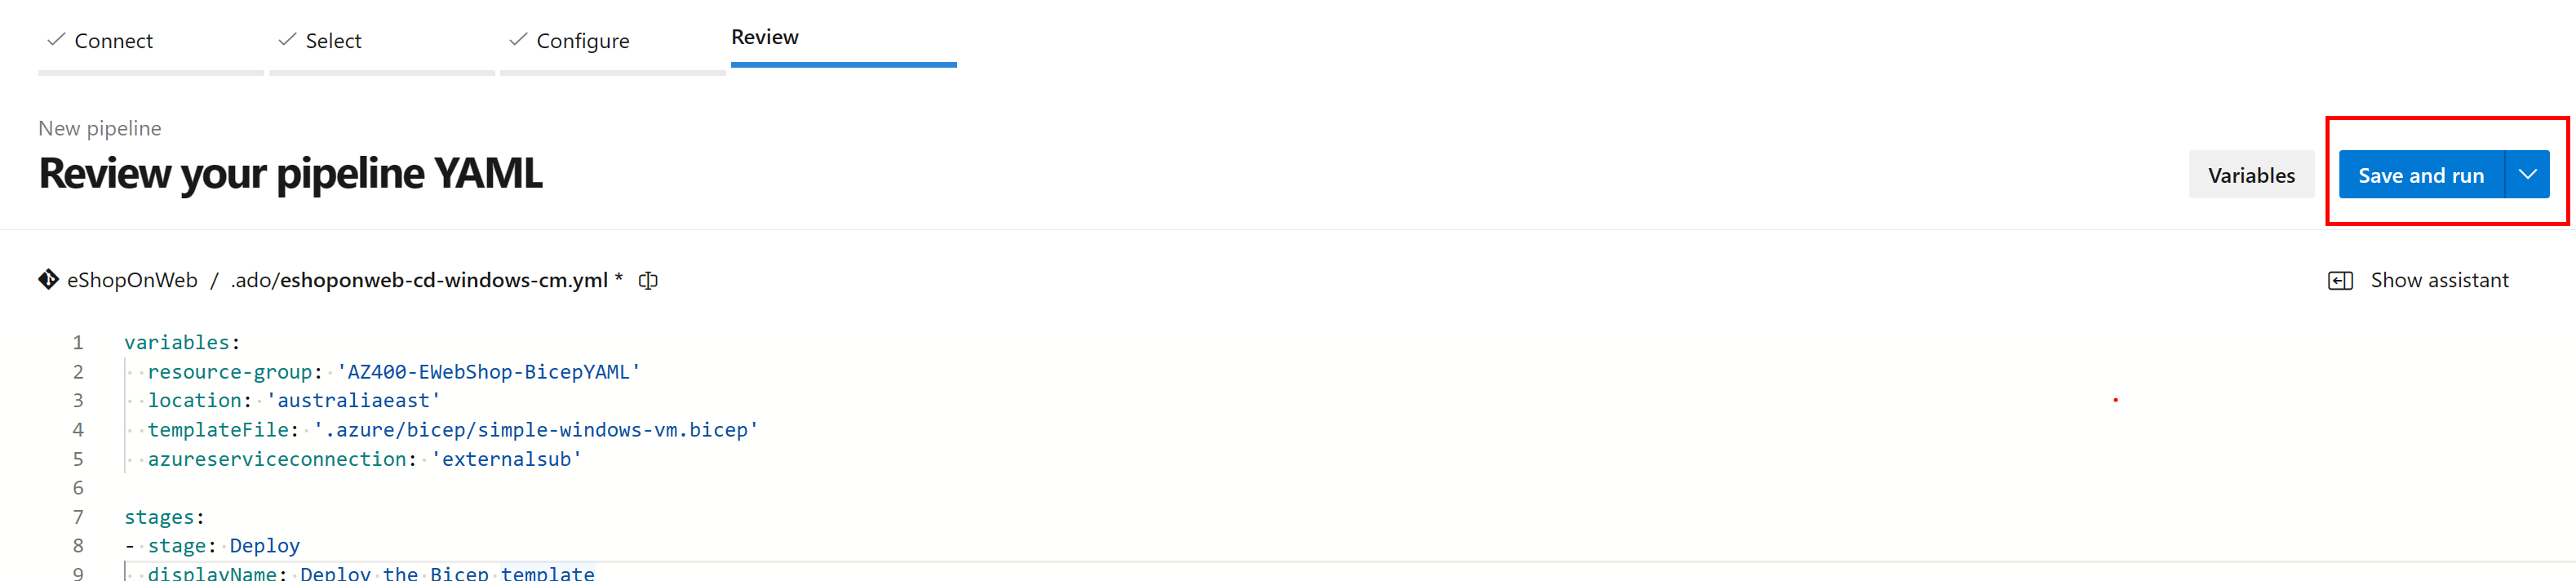
- In the variables section, choose a name for your resource group, set the desired location and replace the value of the service connection with one of your existing service connections you created earlier.
-
Click the Save and run button from the top right corder and when the commit dialog appeared, click Save and run again.
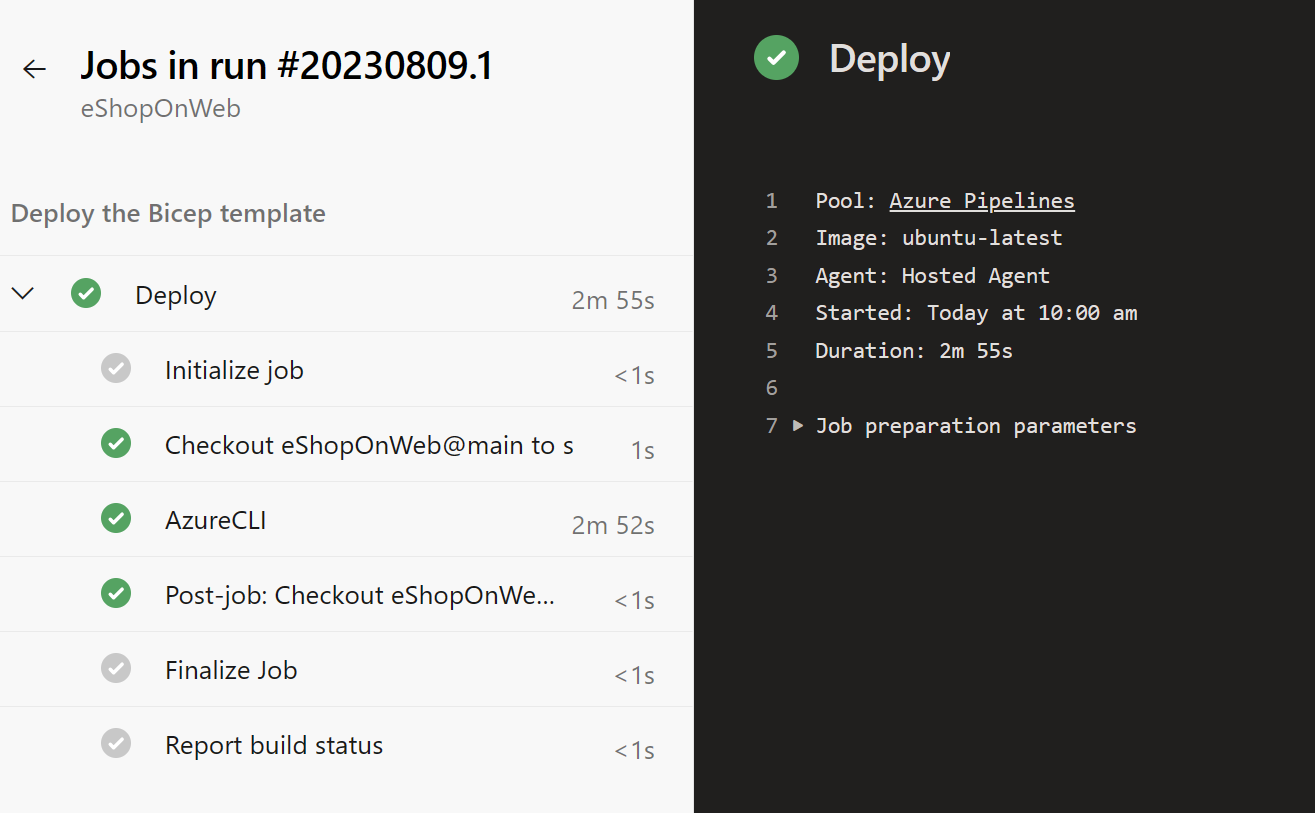
- Wait for the deployment to finish and review the results.
Task 3: Remove the Azure lab resources
In this task, you will use Azure Cloud Shell to remove the Azure resources provisioned in this lab to eliminate unnecessary charges.
- In the Azure portal, open the Bash shell session within the Cloud Shell pane.
-
Delete all resource groups you created throughout the labs of this module by running the following command (replace the resource group name with what you chose):
az group list --query "[?starts_with(name,'AZ400-EWebShop-NAME')].[name]" --output tsv | xargs -L1 bash -c 'az group delete --name $0 --no-wait --yes'Note: The command executes asynchronously (as determined by the –nowait parameter), so while you will be able to run another Azure CLI command immediately afterwards within the same Bash session, it will take a few minutes before the resource groups are actually removed.
Review
In this lab, you learned how to create an Azure Bicep template, modularize it by using a template module, modify the main deployment template to use the module and updated dependencies, and finally deploy the templates to Azure using YAML pipelines.