Configuring Pipelines as Code with YAML
Student lab manual
Lab requirements
-
This lab requires Microsoft Edge or an Azure DevOps supported browser.
-
Set up an Azure DevOps organization: If you don’t already have an Azure DevOps organization that you can use for this lab, create one by following the instructions available at Create an organization or project collection.
-
Identify an existing Azure subscription or create a new one.
-
Verify that you have a Microsoft account or a Microsoft Entra account with the Owner role in the Azure subscription and the Global Administrator role in the Microsoft Entra tenant associated with the Azure subscription. For details, refer to List Azure role assignments using the Azure portal and View and assign administrator roles in Azure Active Directory.
Lab overview
Many teams prefer to define their build and release pipelines using YAML. This allows them to access the same pipeline features as those using the visual designer but with a markup file that can be managed like any other source file. YAML build definitions can be added to a project by simply adding the corresponding files to the repository’s root. Azure DevOps also provides default templates for popular project types and a YAML designer to simplify the process of defining build and release tasks.
Objectives
After you complete this lab, you will be able to:
- Configure CI/CD pipelines as code with YAML in Azure DevOps.
Estimated timing: 60 minutes
Instructions
Exercise 0: Configure the lab prerequisites
In this exercise, you will set up the prerequisites for the lab, which consist of a new Azure DevOps project with a repository based on the eShopOnWeb.
Task 1: (skip if done) Create and configure the team project
In this task, you will create an eShopOnWeb_MultiStageYAML Azure DevOps project to be used by several labs.
-
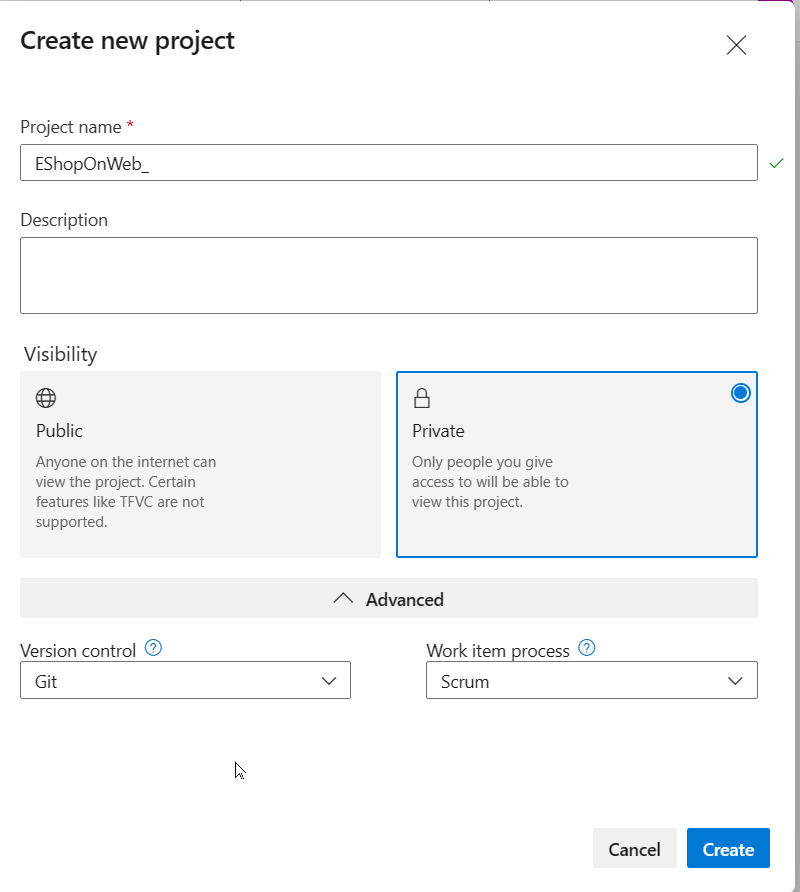
On your lab computer, in a browser window open your Azure DevOps organization. Click on New Project. Give your project the name eShopOnWeb_MultiStageYAML and leave the other fields with defaults. Click on Create.
Task 2: (skip if done) Import eShopOnWeb Git Repository
In this task you will import the eShopOnWeb Git repository that will be used by several labs.
-
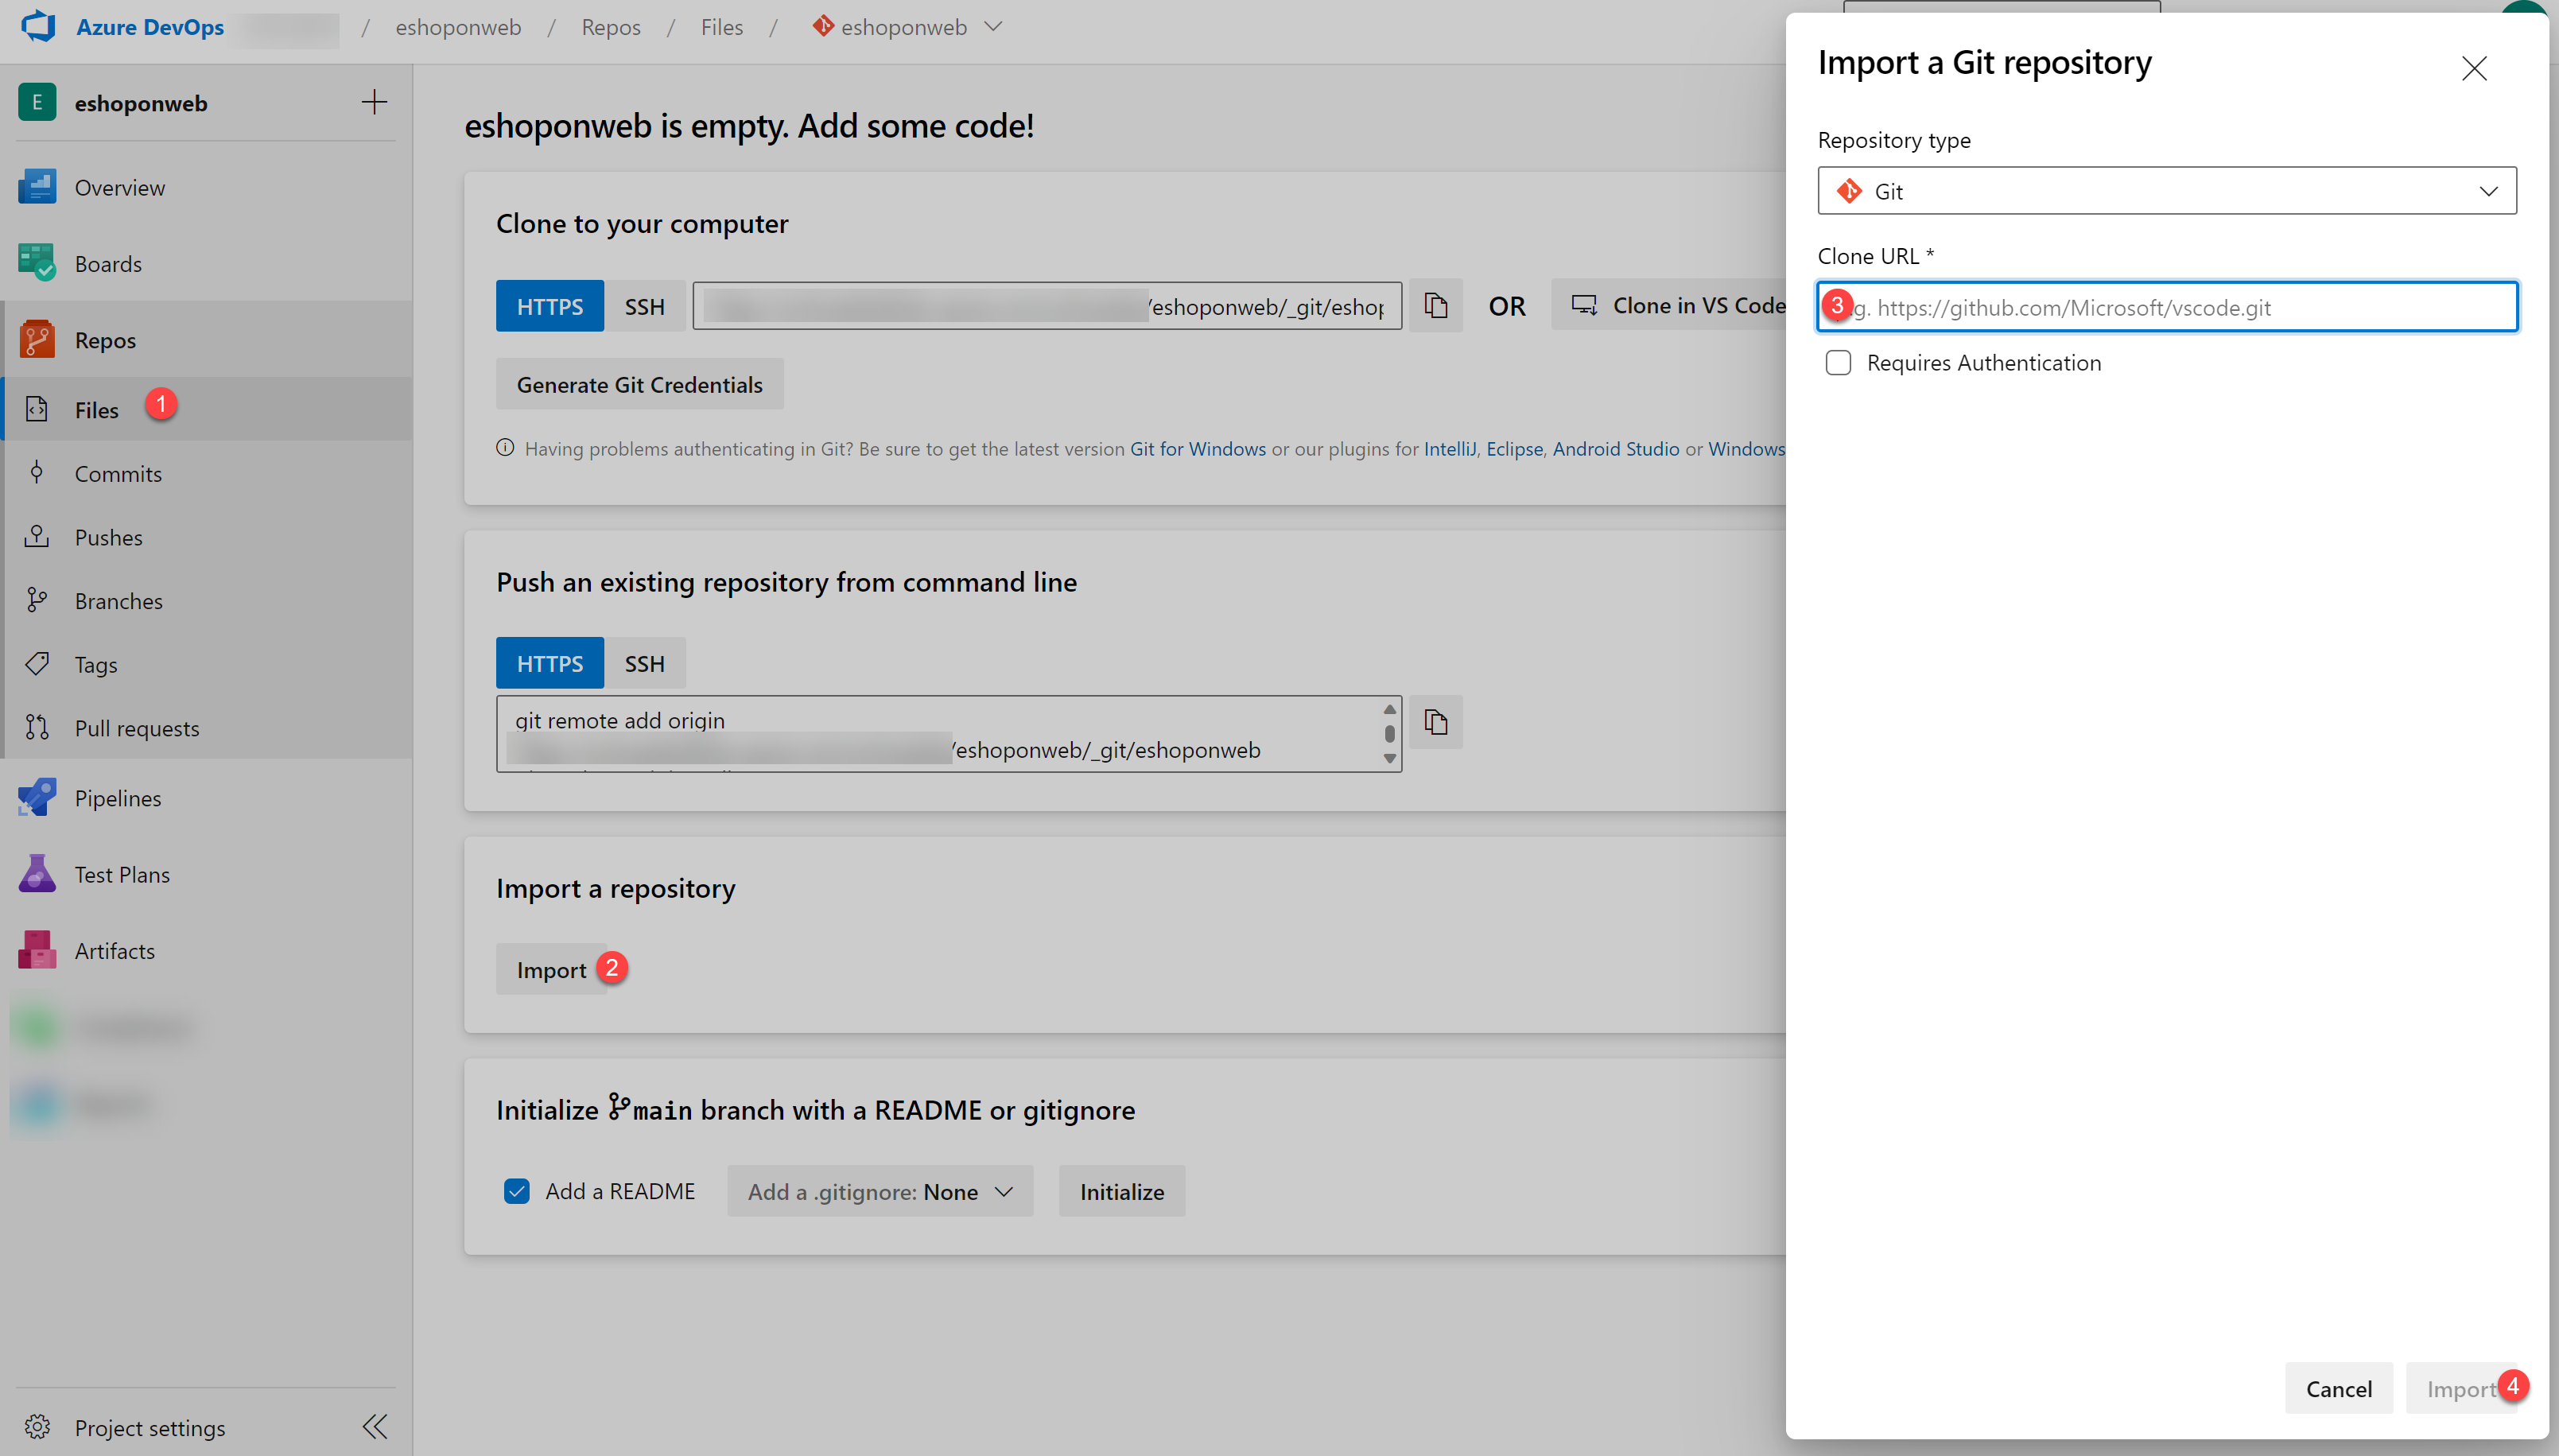
On your lab computer, in a browser window open your Azure DevOps organization and the previously created eShopOnWeb_MultiStageYAML project. Click on Repos>Files , Import a Repository. Select Import. On the Import a Git Repository window, paste the following URL https://github.com/MicrosoftLearning/eShopOnWeb.git and click Import:
-
The repository is organized the following way:
- .ado folder contains Azure DevOps YAML pipelines.
- .devcontainer folder container setup to develop using containers (either locally in VS Code or GitHub Codespaces).
- infra folder contains Bicep&ARM infrastructure as code templates used in some lab scenarios.
- .github folder container YAML GitHub workflow definitions.
- src folder contains the .NET 8 website used on the lab scenarios.
Task 2: Create Azure resources
In this task, you will create an Azure web app by using the Azure portal.
- From the lab computer, start a web browser, navigate to the Azure Portal, and sign in with the user account that has the Owner role in the Azure subscription you will be using in this lab and has the role of the Global Administrator in the Microsoft Entra tenant associated with this subscription.
- In the Azure portal, in the toolbar, click the Cloud Shell icon located directly to the right of the search text box.
-
If prompted to select either Bash or PowerShell, select Bash.
Note: If this is the first time you are starting Cloud Shell and you are presented with the You have no storage mounted message, select the subscription you are using in this lab, and select Create storage.
Note: for a list of regions and their alias, run the following command from the Azure Cloud Shell - Bash:
az account list-locations -o table -
From the Bash prompt, in the Cloud Shell pane, run the following command to create a resource group (replace the
<region>placeholder with the name of the Azure region closest to you such as ‘centralus’, ‘westeurope’ or other region of choice).LOCATION='<region>'RESOURCEGROUPNAME='az400m05l11-RG' az group create --name $RESOURCEGROUPNAME --location $LOCATION -
To create a Windows App service plan by running the following command:
SERVICEPLANNAME='az400m05l11-sp1' az appservice plan create --resource-group $RESOURCEGROUPNAME --name $SERVICEPLANNAME --sku B3 -
Create a web app with a unique name.
WEBAPPNAME=eshoponWebYAML$RANDOM$RANDOM az webapp create --resource-group $RESOURCEGROUPNAME --plan $SERVICEPLANNAME --name $WEBAPPNAMENote: Record the name of the web app. You will need it later in this lab.
- Close the Azure Cloud Shell, but leave the Azure Portal open in the browser.
Exercise 1: Configure CI/CD Pipelines as Code with YAML in Azure DevOps
In this exercise, you will configure CI/CD Pipelines as code with YAML in Azure DevOps.
Task 1: Add a YAML build definition
In this task, you will add a YAML build definition to the existing project.
- Navigate back to the Pipelines pane in of the Pipelines hub.
-
In the Create your first Pipeline window, click Create pipeline.
Note: We will use the wizard to create a new YAML Pipeline definition based on our project.
- On the Where is your code? pane, click Azure Repos Git (YAML) option.
- On the Select a repository pane, click eShopOnWeb_MultiStageYAML.
- On the Configure your pipeline pane, scroll down and select Existing Azure Pipelines YAML File.
- In the Selecting an existing YAML File blade, specify the following parameters:
- Branch: main
- Path: .ado/eshoponweb-ci.yml
- Click Continue to save these settings.
- From the Review your Pipeline YAML screen, click Run to start the Build Pipeline process.
-
Wait for the Build Pipeline to complete successfully. Ignore any warnings regarding the source code itself, as they are not relevant for this lab exercise.
Note: Each task from the YAML file is available for review, including any warnings and errors.
Task 2: Add continuous delivery to the YAML definition
In this task, you will add continuous delivery to the YAML-based definition of the pipeline you created in the previous task.
Note: Now that the build and test processes are successful, we can now add delivery to the YAML definition.
- On the pipeline run pane, click the ellipsis symbol in the upper right corner and, in the dropdown menu, click Edit pipeline.
- On the pane displaying the content of the eShopOnWeb_MultiStageYAML/.ado/eshoponweb-ci.yml file, navigate to the end of the file (line 56), and hit Enter/Return to add a new empty line.
-
Being on line 57, add the following content to define the Release stage in the YAML pipeline.
Note: You can define whatever stages you need to better organize and track pipeline progress.
- stage: Deploy displayName: Deploy to an Azure Web App jobs: - job: Deploy pool: vmImage: "windows-2019" steps: -
Set the cursor on a new line at the end of the YAML definition.
Note: This will be the location where new tasks are added.
- In the list of tasks on the right side of the code pane, search for and select the Azure App Service Deploy task.
-
In the Azure App Service deploy pane, specify the following settings and click Add:
- in the Azure subscription drop-down list, select the Azure subscription into which you deployed the Azure resources earlier in the lab, click Authorize, and, when prompted, authenticate by using the same user account you used during the Azure resource deployment.
- in the App Service name dropdown list, select the name of the web app you deployed earlier in the lab.
- in the Package or folder text box, update the Default Value to
$(Build.ArtifactStagingDirectory)/**/Web.zip. - In the Application and Configuration Settings add
-UseOnlyInMemoryDatabase true -ASPNETCORE_ENVIRONMENT Development
-
Confirm the settings from the Assistant pane by clicking the Add button.
Note: This will automatically add the deployment task to the YAML pipeline definition.
-
The snippet of code added to the editor should look similar to below, reflecting your name for the azureSubscription and WebappName parameters:
- task: AzureRmWebAppDeployment@4 inputs: ConnectionType: "AzureRM" azureSubscription: "AZURE SUBSCRIPTION HERE (b999999abc-1234-987a-a1e0-27fb2ea7f9f4)" appType: "webApp" WebAppName: "eshoponWebYAML369825031" packageForLinux: "$(Build.ArtifactStagingDirectory)/**/Web.zip" AppSettings: "-UseOnlyInMemoryDatabase true -ASPNETCORE_ENVIRONMENT Development" -
Validate the task is listed as a child of the steps task. If not, select all lines from the added task, press the Tab key twice to indent it four spaces, so that it listed as a child of the steps task.
Note: The packageForLinux parameter is misleading in the context of this lab, but it is valid for Windows or Linux.
Note: By default, these two stages run independently. As a result, the build output from the first stage might not be available to the second stage without additional changes. To implement these changes, we will add a new task to download the deployment artifact in the beginning of the deploy stage.
- Place the cursor on the first line under the steps node of the deploy stage, and hit Enter/Return to add a new empty line (Line 64).
- On the Tasks pane, search for and select the Download build artifacts task.
- Specify the following parameters for this task:
- Download Artifacts produced by: Current Build
- Download Type: Specific Artifact
- Artifact Name: select “Website” from the list (or type “Website” directly if it doesn’t appear automatically in the list)
- Destination Directory: $(Build.ArtifactStagingDirectory)
- Click Add.
-
The snippet of added code should look similar to below:
- task: DownloadBuildArtifacts@0 inputs: buildType: "current" downloadType: "single" artifactName: "Website" downloadPath: "$(Build.ArtifactStagingDirectory)" -
If the YAML indentation is off, With the added task still selected in the editor, press the Tab key twice to indent it four spaces.
Note: Here as well you may also want to add an empty line before and after to make it easier to read.
-
Click Save, on the Save pane, click Save again to commit the change directly into the main branch.
Note: Since our original CI-YAML was not configured to automatically trigger a new build, we have to initiate this one manually.
- From the Azure DevOps left menu, navigate to Pipelines and select Pipelines again.
- Open the eShopOnWeb_MultiStageYAML Pipeline and click Run Pipeline.
- Confirm the Run from the appearing pane.
- Notice the 2 different Stages, Build .Net Core Solution and Deploy to Azure Web App appearing.
- Wait for the pipeline to kick off and wait until it completes the Build Stage successfully.
-
Once the Deploy Stage wants to start, you are prompted with Permissions Needed, as well as an orange bar saying:
This pipeline needs permission to access a resource before this run can continue to Deploy to an Azure Web App - Click on View
- From the Waiting for Review pane, click Permit.
- Validate the message in the Permit popup window, and confirm by clicking Permit.
-
This sets off the Deploy Stage. Wait for this to complete successfully.
Note: If the deployment should fail, because of an issue with the YAML Pipeline syntax, use this as a reference:
#NAME THE PIPELINE SAME AS FILE (WITHOUT ".yml")
# trigger:
# - main

resources:
 repositories:
   - repository: self
     trigger: none

stages:
- stage: Build
 displayName: Build .Net Core Solution
 jobs:
 - job: Build
   pool:
     vmImage: ubuntu-latest
   steps:
   - task: DotNetCoreCLI@2
     displayName: Restore
     inputs:
       command: 'restore'
       projects: '**/*.sln'
       feedsToUse: 'select'

   - task: DotNetCoreCLI@2
     displayName: Build
     inputs:
       command: 'build'
       projects: '**/*.sln'

   - task: DotNetCoreCLI@2
     displayName: Test
     inputs:
       command: 'test'
       projects: 'tests/UnitTests/*.csproj'

   - task: DotNetCoreCLI@2
     displayName: Publish
     inputs:
       command: 'publish'
       publishWebProjects: true
       arguments: '-o $(Build.ArtifactStagingDirectory)'

   - task: PublishBuildArtifacts@1
     displayName: Publish Artifacts ADO - Website
     inputs:
       pathToPublish: '$(Build.ArtifactStagingDirectory)'
       artifactName: Website

   - task: PublishBuildArtifacts@1
     displayName: Publish Artifacts ADO - Bicep
     inputs:
       PathtoPublish: '$(Build.SourcesDirectory)/infra/webapp.bicep'
       ArtifactName: 'Bicep'
       publishLocation: 'Container'

- stage: Deploy
 displayName: Deploy to an Azure Web App
 jobs:
 - job: Deploy
   pool:
     vmImage: 'windows-2019'
   steps:
   - task: DownloadBuildArtifacts@0
     inputs:
       buildType: 'current'
       downloadType: 'single'
       artifactName: 'Website'
       downloadPath: '$(Build.ArtifactStagingDirectory)'
   - task: AzureRmWebAppDeployment@4
     inputs:
       ConnectionType: 'AzureRM'
       azureSubscription: 'AZURE SUBSCRIPTION HERE (b999999abc-1234-987a-a1e0-27fb2ea7f9f4)'
       appType: 'webApp'
       WebAppName: 'eshoponWebYAML369825031'
       packageForLinux: '$(Build.ArtifactStagingDirectory)/**/Web.zip'
       AppSettings: '-UseOnlyInMemoryDatabase true -ASPNETCORE_ENVIRONMENT Development'
Task 4: Review the deployed site
- Switch back to web browser window displaying the Azure portal and navigate to the blade displaying the properties of the Azure web app.
- On the Azure web app blade, click Overview and, on the overview blade, click Browse to open your site in a new web browser tab.
- Verify that the deployed site loads as expected in the new browser tab, showing the eShopOnWeb E-commerce website.
Exercise 2: Configure Environment settings for CI/CD Pipelines as Code with YAML in Azure DevOps
In this exercise, you will add approvals to a YAML-based Pipeline in Azure DevOps.
Task 1: Set up Pipeline Environments
YAML Pipelines as Code don’t have Release/Quality Gates as we have with Azure DevOps Classic Release Pipelines. However, some similarities can be configured for YAML Pipelines-as-Code using Environments. In this task, you will use this mechanism to configure approvals for the Build Stage.
- From the Azure DevOps Project eShopOnWeb_MultiStageYAML, navigate to Pipelines.
- Under the Pipelines Menu to the left, select Environments.
- Click Create Environment.
- In the New Environment pane, add a Name for the Environment, called approvals.
- Under Resources, select None.
- Confirm the settings by pressing the Create button.
- Once the environment got created, click on the “ellipsis” (…) next to the button “Add Resource”.
- Select Approvals and Checks.
- From the Add your first check, select Approvals.
-
Add your Azure DevOps User Account Name to the approvers field.
Note: In a real-life scenario, this would reflect the name of your DevOps team working on this project.
- Confirm the approval settings defined, by pressing the Create button.
- Last, we need to add the necessary “environment: approvals” settings to the YAML pipeline code for the Deploy Stage. To do this, navigate to Repos, browse to the .ado folder, and select the eshoponweb-ci.yml Pipeline-as-Code file.
- From the Contents view, click the Edit button to switch to Editing mode.
- Navigate to the start of the Deploy job (-job: Deploy on Line 60)
-
Add a new empty line right below, and add the following snippet:
environment: approvalsThe resulting snippet of code should look like this:
jobs: - job: Deploy environment: approvals pool: vmImage: "windows-2019" - As the environment is a specific setting of a deployment stage, it cannot be used by “jobs”. Therefore, we have to make some additional changes to the current job definition.
- On Line 60, rename “- job: Deploy” to - deployment: Deploy
- Next, under Line 63 (vmImage: Windows-2019), add a new empty line.
-
Paste in the following Yaml Snippet:
strategy: runOnce: deploy: -
Select the remaining snippet (Line 67 all the way to the end), and use the Tab key to fix the YAML indentation.
The resulting YAML snippet should look like this now, reflecting the Deploy Stage:
- stage: Deploy displayName: Deploy to an Azure Web App jobs: - deployment: Deploy environment: approvals pool: vmImage: "windows-2019" strategy: runOnce: deploy: steps: - task: DownloadBuildArtifacts@0 inputs: buildType: "current" downloadType: "single" artifactName: "Website" downloadPath: "$(Build.ArtifactStagingDirectory)" - task: AzureRmWebAppDeployment@4 inputs: ConnectionType: "AzureRM" azureSubscription: "AZURE SUBSCRIPTION HERE (b999999abc-1234-987a-a1e0-27fb2ea7f9f4)" appType: "webApp" WebAppName: "eshoponWebYAML369825031" packageForLinux: "$(Build.ArtifactStagingDirectory)/**/Web.zip" AppSettings: "-UseOnlyInMemoryDatabase true -ASPNETCORE_ENVIRONMENT Development" - Confirm the changes to the code YAML file by clicking Commit and clicking Commit again in the appearing Commit pane.
- Navigate to the Azure DevOps Project menu to the left, select Pipelines, select Pipelines and notice the EshopOnWeb_MultiStageYAML Pipeline used earlier.
- Open the Pipeline.
- Click Run Pipeline to trigger a new Pipeline run; confirm by clicking Run.
- Just like before, the Build Stage kicks off as expected. Wait for it to complete successfully.
- Next, since we have the environment:approvals configured for the Deploy Stage, it will ask for an approval confirmation before it kicks off.
- This is visible from the Pipeline view, where it says Waiting (0/1 checks passed). A notification message is also displayed saying approval needs review before this run can continue to Deploy to an Azure Web App.
- Click the View button next to this message.
- From the appearing pane Checks and manual validations for Deploy to Azure Web App, click the Approval Waiting message.
- Click Approve.
-
This allows the Deploy Stage to kick off and successfully deploying the Azure Web App source code.
Note: While this example only used the approvals, know the other checks such as Azure Monitor, REST API, etc… can be used in a similar way
Exercise 3: Remove the Azure lab resources
In this exercise, you will remove the Azure resources provisioned in this lab to eliminate unexpected charges.
Note: Remember to remove any newly created Azure resources that you no longer use. Removing unused resources ensures you will not see unexpected charges.
Task 1: Remove the Azure lab resources
In this task, you will use Azure Cloud Shell to remove the Azure resources provisioned in this lab to eliminate unnecessary charges.
- In the Azure portal, open the Bash shell session within the Cloud Shell pane.
-
List all resource groups created throughout the labs of this module by running the following command:
az group list --query "[?starts_with(name,'az400m05l11-RG')].name" --output tsv -
Delete all resource groups you created throughout the labs of this module by running the following command:
az group list --query "[?starts_with(name,'az400m05l11-RG')].[name]" --output tsv | xargs -L1 bash -c 'az group delete --name $0 --no-wait --yes'Note: The command executes asynchronously (as determined by the –nowait parameter), so while you will be able to run another Azure CLI command immediately afterwards within the same Bash session, it will take a few minutes before the resource groups are actually removed.
Review
In this lab, you configured CI/CD pipelines as code with YAML in Azure DevOps.