Implementing GitHub Actions for CI/CD
Student lab manual
Lab requirements
-
This lab requires Microsoft Edge or an Azure DevOps supported browser.
-
Identify an existing Azure subscription or create a new one.
-
Verify that you have a Microsoft account or a Microsoft Entra account with the Contributor or the Owner role in the Azure subscription. For details, refer to List Azure role assignments using the Azure portal and View and assign administrator roles in Azure Active Directory.
-
If you don’t already have a GitHub account that you can use for this lab, follow instructions available at Signing up for a new GitHub account to create one.
Lab overview
In this lab, you’ll learn how to implement a GitHub Action workflow that deploys an Azure web app.
Objectives
After you complete this lab, you will be able to:
- Implement a GitHub Action workflow for CI/CD.
- Explain the basic characteristics of GitHub Action workflows.
Estimated timing: 40 minutes
Instructions
Exercise 0: Import eShopOnWeb to your GitHub Repository
In this exercise, you will import the existing eShopOnWeb repository code to your own GitHub private repo.
The repository is organized the following way: - .ado folder contains Azure DevOps YAML pipelines. - .devcontainer folder container setup to develop using containers (either locally in VS Code or GitHub Codespaces). - infra folder contains Bicep&ARM infrastructure as code templates used in some lab scenarios. - .github folder container YAML GitHub workflow definitions. - src folder contains the .NET 8 website used on the lab scenarios.
Task 1: Create a public repository in GitHub and import eShopOnWeb
In this task, you will create an empty public GitHub repository and import the existing eShopOnWeb repository.
-
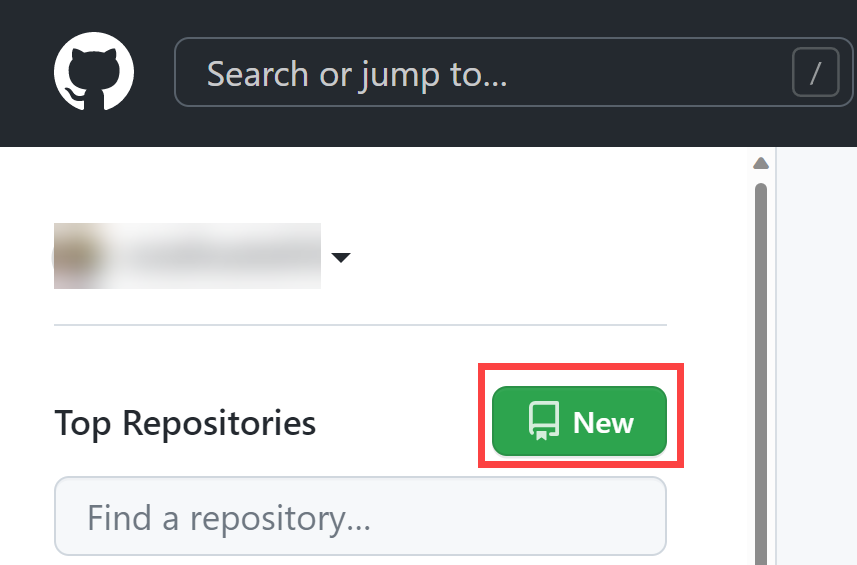
From the lab computer, start a web browser, navigate to the GitHub website, sign in using your account and click on New to create new repository.
-
On the Create a new repository page, click on Import a repository link (below the page title).
NOTE: you can also open the import website directly at https://github.com/new/import
-
On the Import your project to GitHub page:
Field Value Your old repository’s clone URL https://github.com/MicrosoftLearning/eShopOnWeb Owner Your account alias Repository Name eShopOnWeb Privacy Public -
Click on Begin Import and wait for your repository to be ready.
-
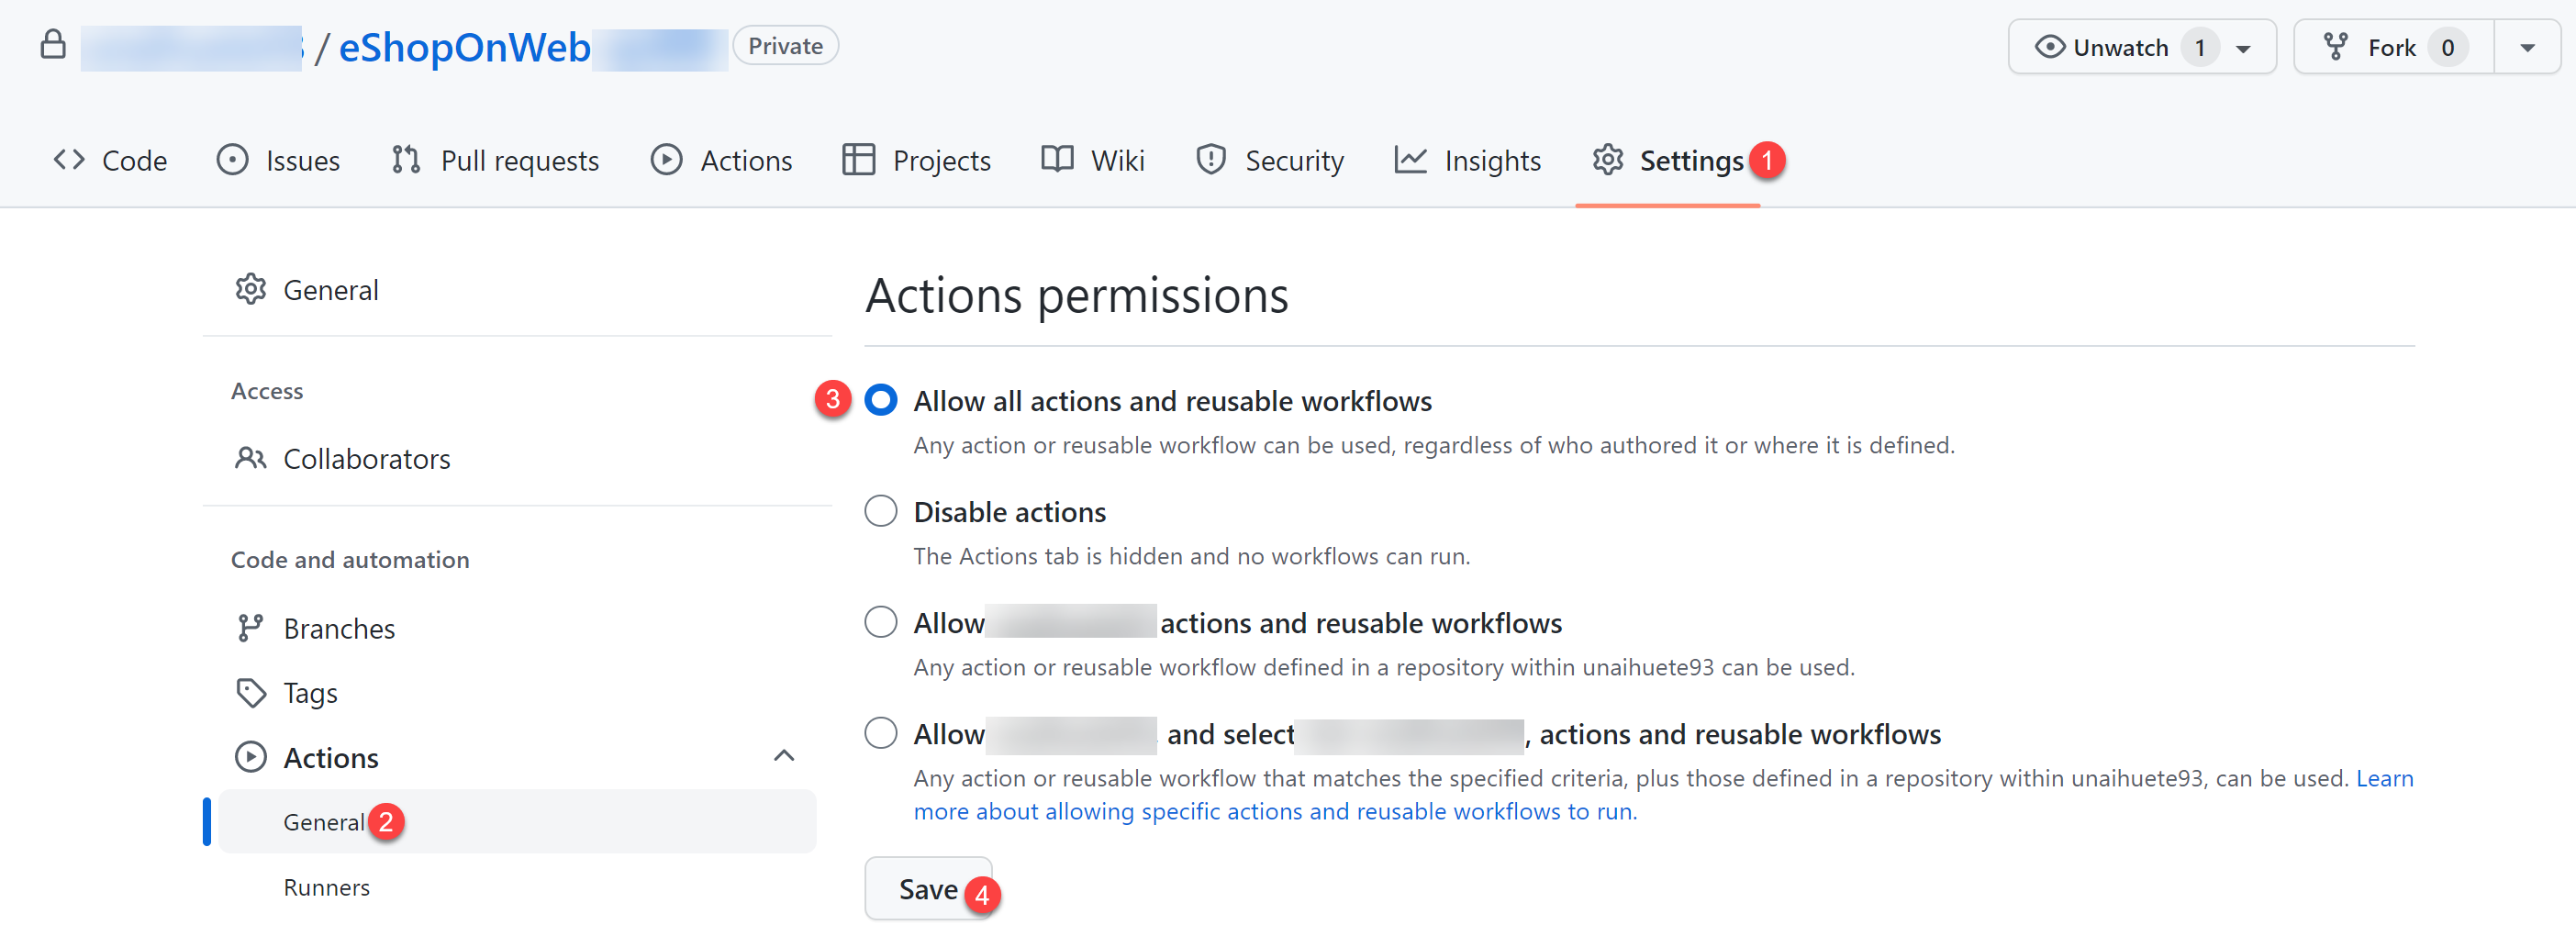
On the repository page, go to Settings, click on Actions > General and choose the option Allow all actions and reusable workflows. Click on Save.
Exercise 1: Setup your GitHub Repository and Azure access
In this exercise, you will create an Azure Service Principal to authorize GitHub accessing your Azure subscription from GitHub Actions. You will also setup the GitHub workflow that will build, test and deploy your website to Azure.
Task 1: Create an Azure Service Principal and save it as GitHub secret
In this task, you will create the Azure Service Principal used by GitHub to deploy the desired resources. As an alternative, you could also use OpenID connect in Azure, as a secretless authentication mechanism.
- On your lab computer, in a browser window, open the Azure Portal (https://portal.azure.com/).
- In the portal, look for Resource Groups and click on it.
- Click on + Create to create a new Resource Group for the exercise.
- On the Create a resource group tab, give the following name to your Resource Group: rg-eshoponweb-NAME (replace NAME for some unique alias). Click on Review+Create > Create.
-
In the Azure Portal, open the Cloud Shell (next to the search bar).
NOTE: if this is the first time you open the Cloud Shell, you need to configure the persistent storage
-
Make sure the terminal is running in Bash mode and execute the following command, replacing SUBSCRIPTION-ID and RESOURCE-GROUP with your own identifiers (both can be found on the Overview page of the Resource Group):
az ad sp create-for-rbac --name GH-Action-eshoponweb --role contributor --scopes /subscriptions/SUBSCRIPTION-ID/resourceGroups/RESOURCE-GROUP --sdk-authNOTE: Make sure this is typed or pasted as a single line! NOTE: this command will create a Service Principal with Contributor access to the Resource Group created before. This way we make sure GitHub Actions will only have the permissions needed to interact only with this Resource Group (not the rest of the subscription)
-
The command will output a JSON object, you will later use it as a GitHub secret for the workflow. Copy the JSON. The JSON contains the identifiers used to authenticate against Azure in the name of a Microsoft Entra identity (service principal).
{ "clientId": "<GUID>", "clientSecret": "<GUID>", "subscriptionId": "<GUID>", "tenantId": "<GUID>", (...) } -
You also need to run the following command to register the resource provider for the Azure App Service you will deploy later:
az provider register --namespace Microsoft.Web - In a browser window, go back to your eShopOnWeb GitHub repository.
- On the repository page, go to Settings, click on Secrets and variables > Actions. Click on New repository secret
- Name : AZURE_CREDENTIALS
- Secret: paste the previously copied JSON object (GitHub is able to keep multiple secrets under same name, used by azure/login action )
- Click on Add secret. Now GitHub Actions will be able to reference the service principal, using the repository secret.
Task 2: Modify and execute the GitHub workflow
In this task, you will modify the given GitHub workflow and execute it to deploy the solution in your own subscription.
- In a browser window, go back to your eShopOnWeb GitHub repository.
- On the repository page, go to Code and open the following file: eShopOnWeb/.github/workflows/eshoponweb-cicd.yml. This workflow defines the CI/CD process for the given .NET 8 website code.
- Uncomment the on section (delete “#”). The workflow triggers with every push to the main branch and also offers manual triggering (“workflow_dispatch”).
- In the env section, make the following changes:
- Replace NAME in RESOURCE-GROUP variable. It should be the same resource group created in previous steps.
- (Optional) You can choose your closest azure region for LOCATION. For example, “eastus”, “eastasia”, “westus”, etc.
- Replace YOUR-SUBS-ID in SUBSCRIPTION-ID.
- Replace NAME in WEBAPP-NAME with some unique alias. It will be used to create a globally unique website using Azure App Service.
-
Read the workflow carefully, comments are provided to help understand.
- Click on Start Commit and Commit Changes leaving defaults (changing the main branch). The workflow will get automatically executed.
Task 3: Review GitHub Workflow execution
In this task, you will review the GitHub workflow execution:
- In a browser window, go back to your eShopOnWeb GitHub repository.
-
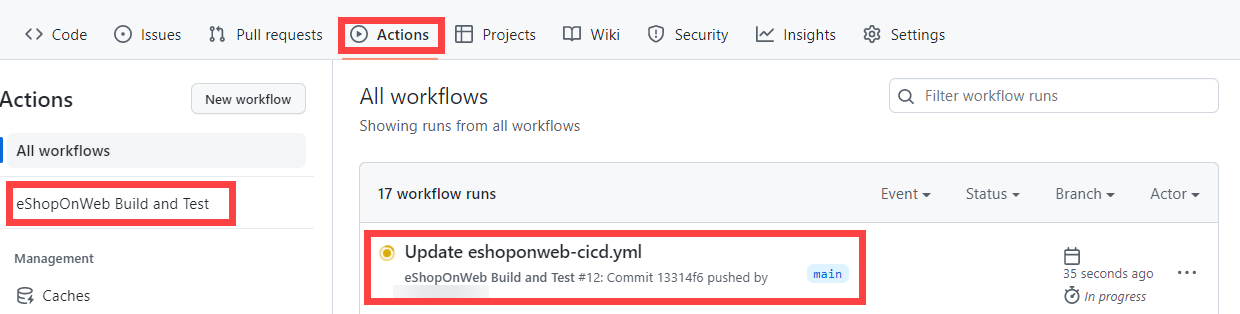
On the repository page, go to Actions, you will see the workflow setup before executing. Click on it.
-
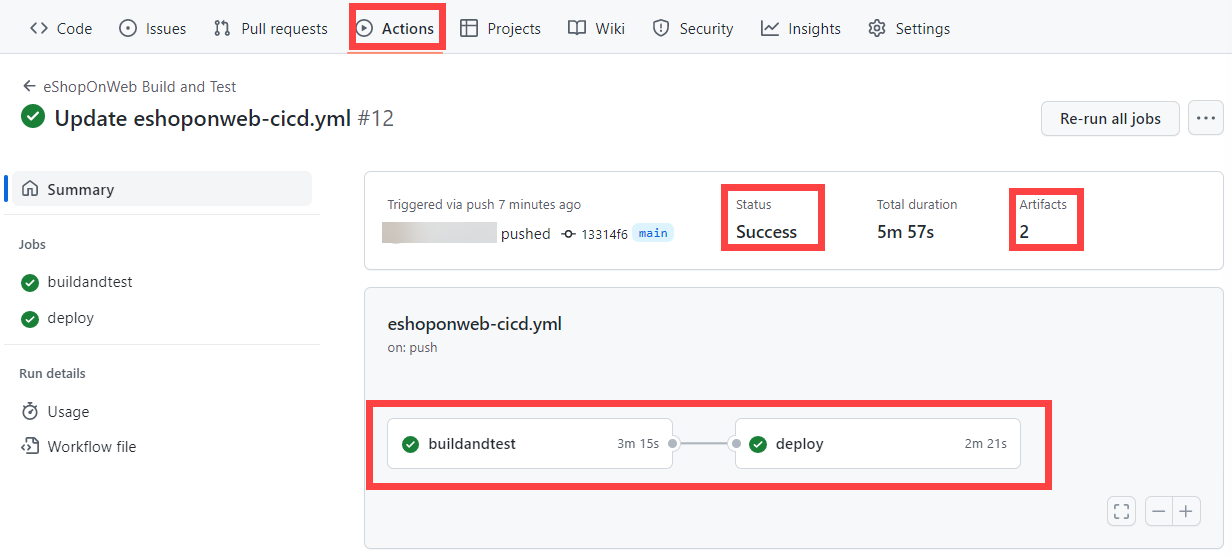
Wait for the workflow to finish. From the Summary you can see the two workflow jobs, the status and Artifacts retained from the execution. You can click in each job to review logs.
-
In a browser window, go back to the Azure Portal (https://portal.azure.com/). Open the resource group created before. You will see that the GitHub Action, using a bicep template, has created an Azure App Service Plan + App Service. You can see the published website opening the App Service and clicking Browse.

(OPTIONAL) Task 4: Add manual approval pre-deploy using GitHub Environments
In this task, you will use GitHub environments to ask for manual approval before executing the actions defined on the deploy job of your workflow.
- On the repository page, go to Code and open the following file: eShopOnWeb/.github/workflows/eshoponweb-cicd.yml.
-
In the deploy job section, you can find a reference to an environment called Development. GitHub used environments add protection rules (and secrets) for your targets.
- On the repository page, go to Settings, open Environments and click New environment.
-
Give it Development name and click on Configure Environment.
NOTE: If an environment called Development already exists in the Environments list, open its configuration by clicking on the environment name.
- In the Configure Development tab, check the option Required Reviewers and your GitHub account as a reviewer. Click on Save protection rules.
-
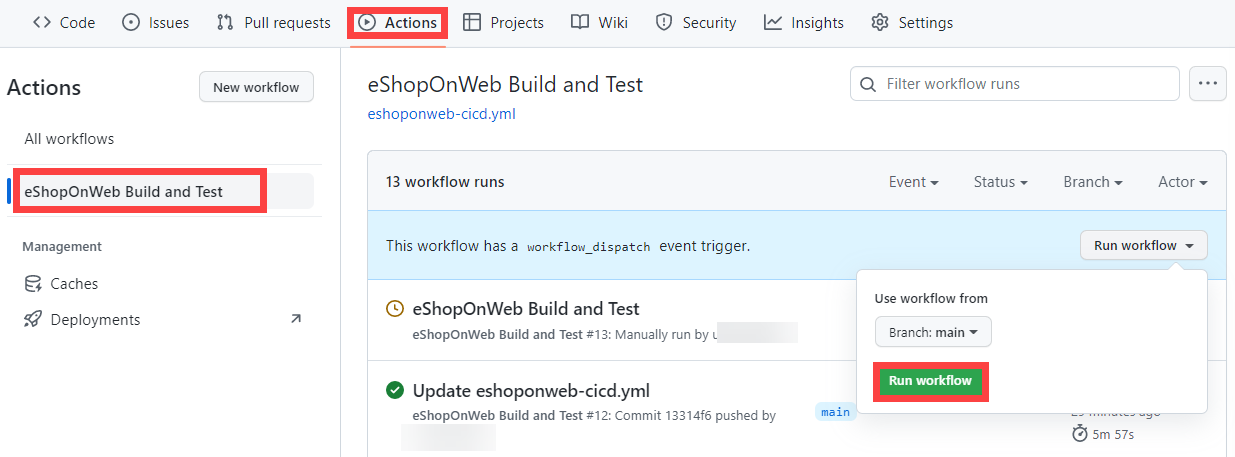
Now lets test the protection rule. On the repository page, go to Actions, click on eShopOnWeb Build and Test workflow and click on Run workflow>Run workflow to execute manually.
-
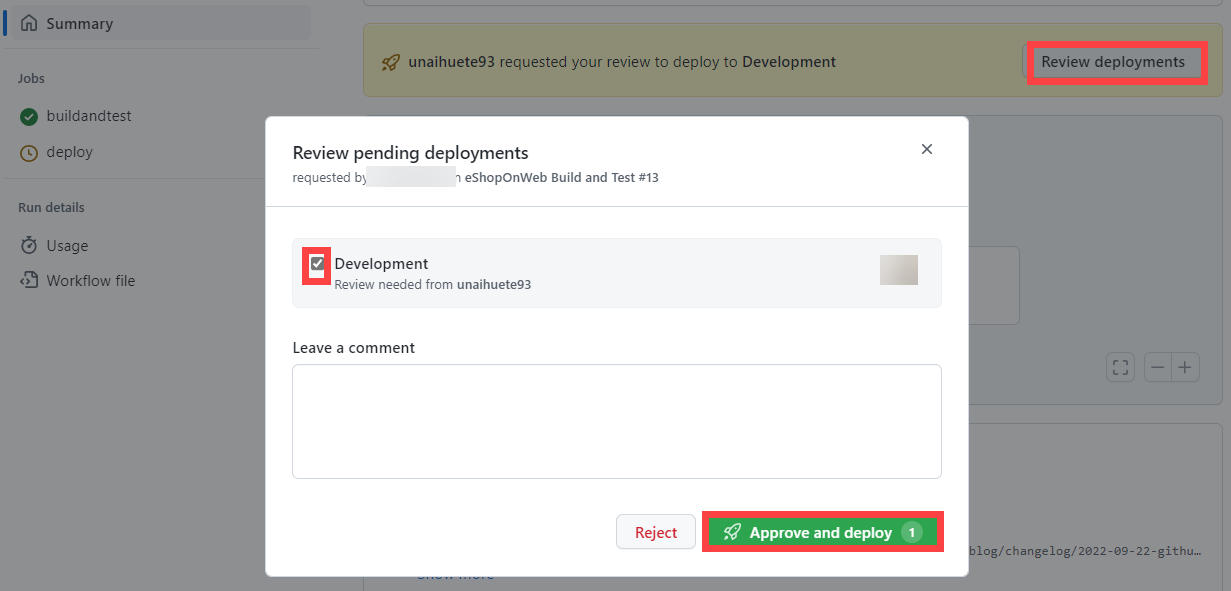
Click on the started execution of the workflow and wait for buildandtest job to finish. You will see a review request when deploy job is reached.
-
Click on Review deployments, check Development and click on Approve and deploy.
- Workflow will follow the deploy job execution and finish.
Exercise 2: Remove the Azure lab resources
In this exercise, you will use Azure Cloud Shell to remove the Azure resources provisioned in this lab to eliminate unnecessary charges.
- In the Azure portal, open the Bash shell session within the Cloud Shell pane.
-
List all resource groups created throughout the labs of this module by running the following command:
az group list --query "[?starts_with(name,'rg-eshoponweb')].name" --output tsv -
Delete all resource groups you created throughout the labs of this module by running the following command:
az group list --query "[?starts_with(name,'rg-eshoponweb')].[name]" --output tsv | xargs -L1 bash -c 'az group delete --name $0 --no-wait --yes'Note: The command executes asynchronously (as determined by the –nowait parameter), so while you will be able to run another Azure CLI command immediately afterwards within the same Bash session, it will take a few minutes before the resource groups are actually removed.
Review
In this lab, you implemented a GitHub Action workflow that deploys an Azure Web App.