Validate lab environment
In preparation for the labs, it is crucial to have your environment correctly set up. This page will guide you through the setup process, ensuring all prerequisites are met.
-
The labs require Microsoft Edge or an Azure DevOps-supported browser.
-
Set up an Azure Subscription: If you don’t already have an Azure subscription, create one by following the instructions on this page or visit https://azure.microsoft.com/free to sign up for a free.
- Set up an Azure DevOps organization: If you don’t already have an Azure DevOps organization that you can use for the labs, create one by following the instructions on this page, or at Create an organization or project collection.
-
Git for Windows download page. This will be installed as part of prerequisites for this lab.
-
Visual Studio Code. This will be installed as part of prerequisites for this lab.
-
Azure CLI. Install the Azure CLI on the self-hosted agent machines.
- .NET SDK - Latest version. Install the .NET SDK on the self-hosted agent machines.
Instructions to create an Azure DevOps Organization (you only have to do this once)
Note: Start at step 3, if you do already have a personal Microsoft Account setup and an active Azure Subscription linked to that account.
-
Use a private browser session to get a new personal Microsoft Account (MSA) at
https://account.microsoft.com. -
Using the same browser session, sign up for a free Azure subscription at
https://azure.microsoft.com/free. -
Open a browser and navigate to Azure portal at
https://portal.azure.com, then search at the top of the Azure portal screen for Azure DevOps. In the resulting page, click Azure DevOps organizations. -
Next, click on the link labelled My Azure DevOps Organizations or navigate directly to
https://aex.dev.azure.com. -
On the We need a few more details page, select Continue.
-
In the drop-down box on the left, choose Default Directory, instead of Microsoft Account.
-
If prompted (“We need a few more details”), provide your name, e-mail address, and location and click Continue.
-
Back at
https://aex.dev.azure.comwith Default Directory selected click the blue button Create new organization. -
Accept the Terms of Service by clicking Continue.
-
If prompted (“Almost done”), leave the name for the Azure DevOps organization at default (it needs to be a globally unique name) and pick a hosting location close to you from the list.
-
Once the newly created organization opens in Azure DevOps, select Organization settings in the bottom left corner.
-
At the Organization settings screen select Billing (opening this screen takes a few seconds).
-
Select Setup billing and on the right-hand side of the screen, select your Azure Subscription and then select Save to link the subscription with the organization.
-
Once the screen shows the linked Azure Subscription ID at the top, change the number of Paid parallel jobs for MS Hosted CI/CD from 0 to 1. Then select SAVE button at the bottom.
Note: You may wait a couple of minutes before using the CI/CD capabilities so that the new settings are reflected in the backend. Otherwise, you will still see the message “No hosted parallelism has been purchased or granted”.
-
In Organization Settings, go to section Pipelines and click Settings.
-
Toggle the switch to Off for Disable creation of classic build pipelines and Disable creation of classic release pipelines
Note: The Disable creation of classic release pipelines switch sets to On hides classic release pipeline creation options such as the Release menu in the Pipeline section of DevOps projects.
-
In Organization Settings, go to section Security and click Policies.
-
Toggle the switch to On for Allow public projects
Note: Extensions used in some labs might require a public project to allow using the free version.
Instructions to create and configure the Azure DevOps project (you only have to do this once)
Note: make sure you completed the steps to create your Azure DevOps Organization before continuing with these steps.
To follow all lab instructions, you’ll need set up a new Azure DevOps project, create a repository that’s based on the eShopOnWeb application, and create a service connection to your Azure subscription.
Create the team project
First, you’ll create an eShopOnWeb Azure DevOps project to be used by several labs.
-
Open your browser and navigate to your Azure DevOps organization.
-
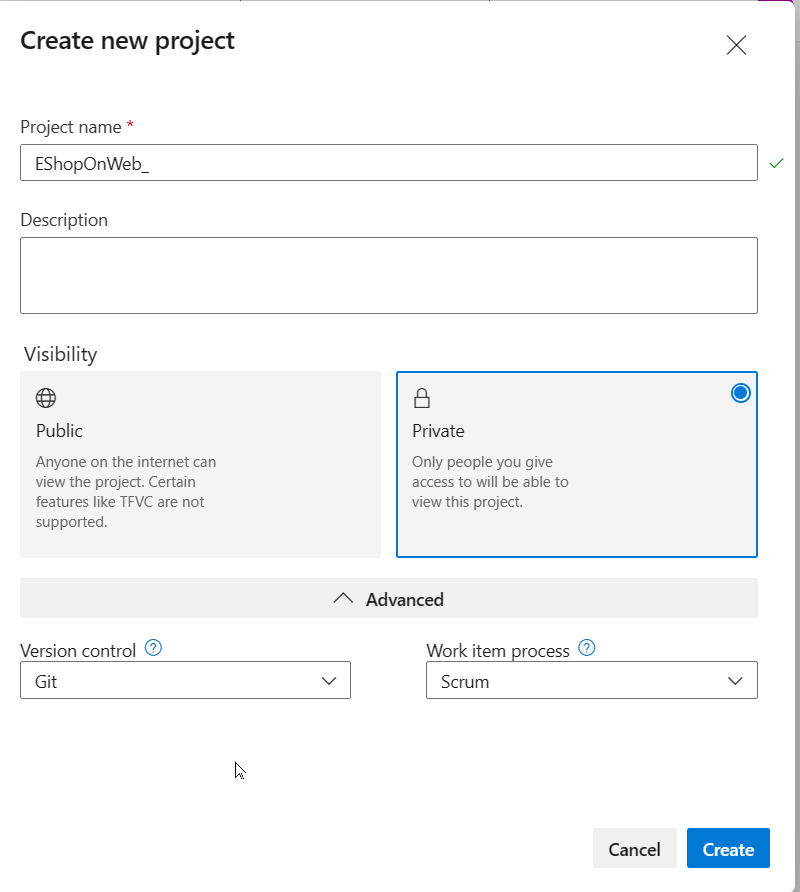
Select the New Project option and use the following settings:
- name: eShopOnWeb
- visibility: Private
- Advanced: Version Control: Git
- Advanced: Work Item Process: Scrum
-
Select Create.
Import eShopOnWeb git repository
Now, you’ll import the eShopOnWeb into your git repository.
-
Open your browser and navigate to your Azure DevOps organization.
-
Open the previously created eShopOnWeb project.
-
Select the Repos > Files, Import a Repository and then select Import.
-
On the Import a Git Repository window, paste the following URL
https://github.com/MicrosoftLearning/eShopOnWeband select Import: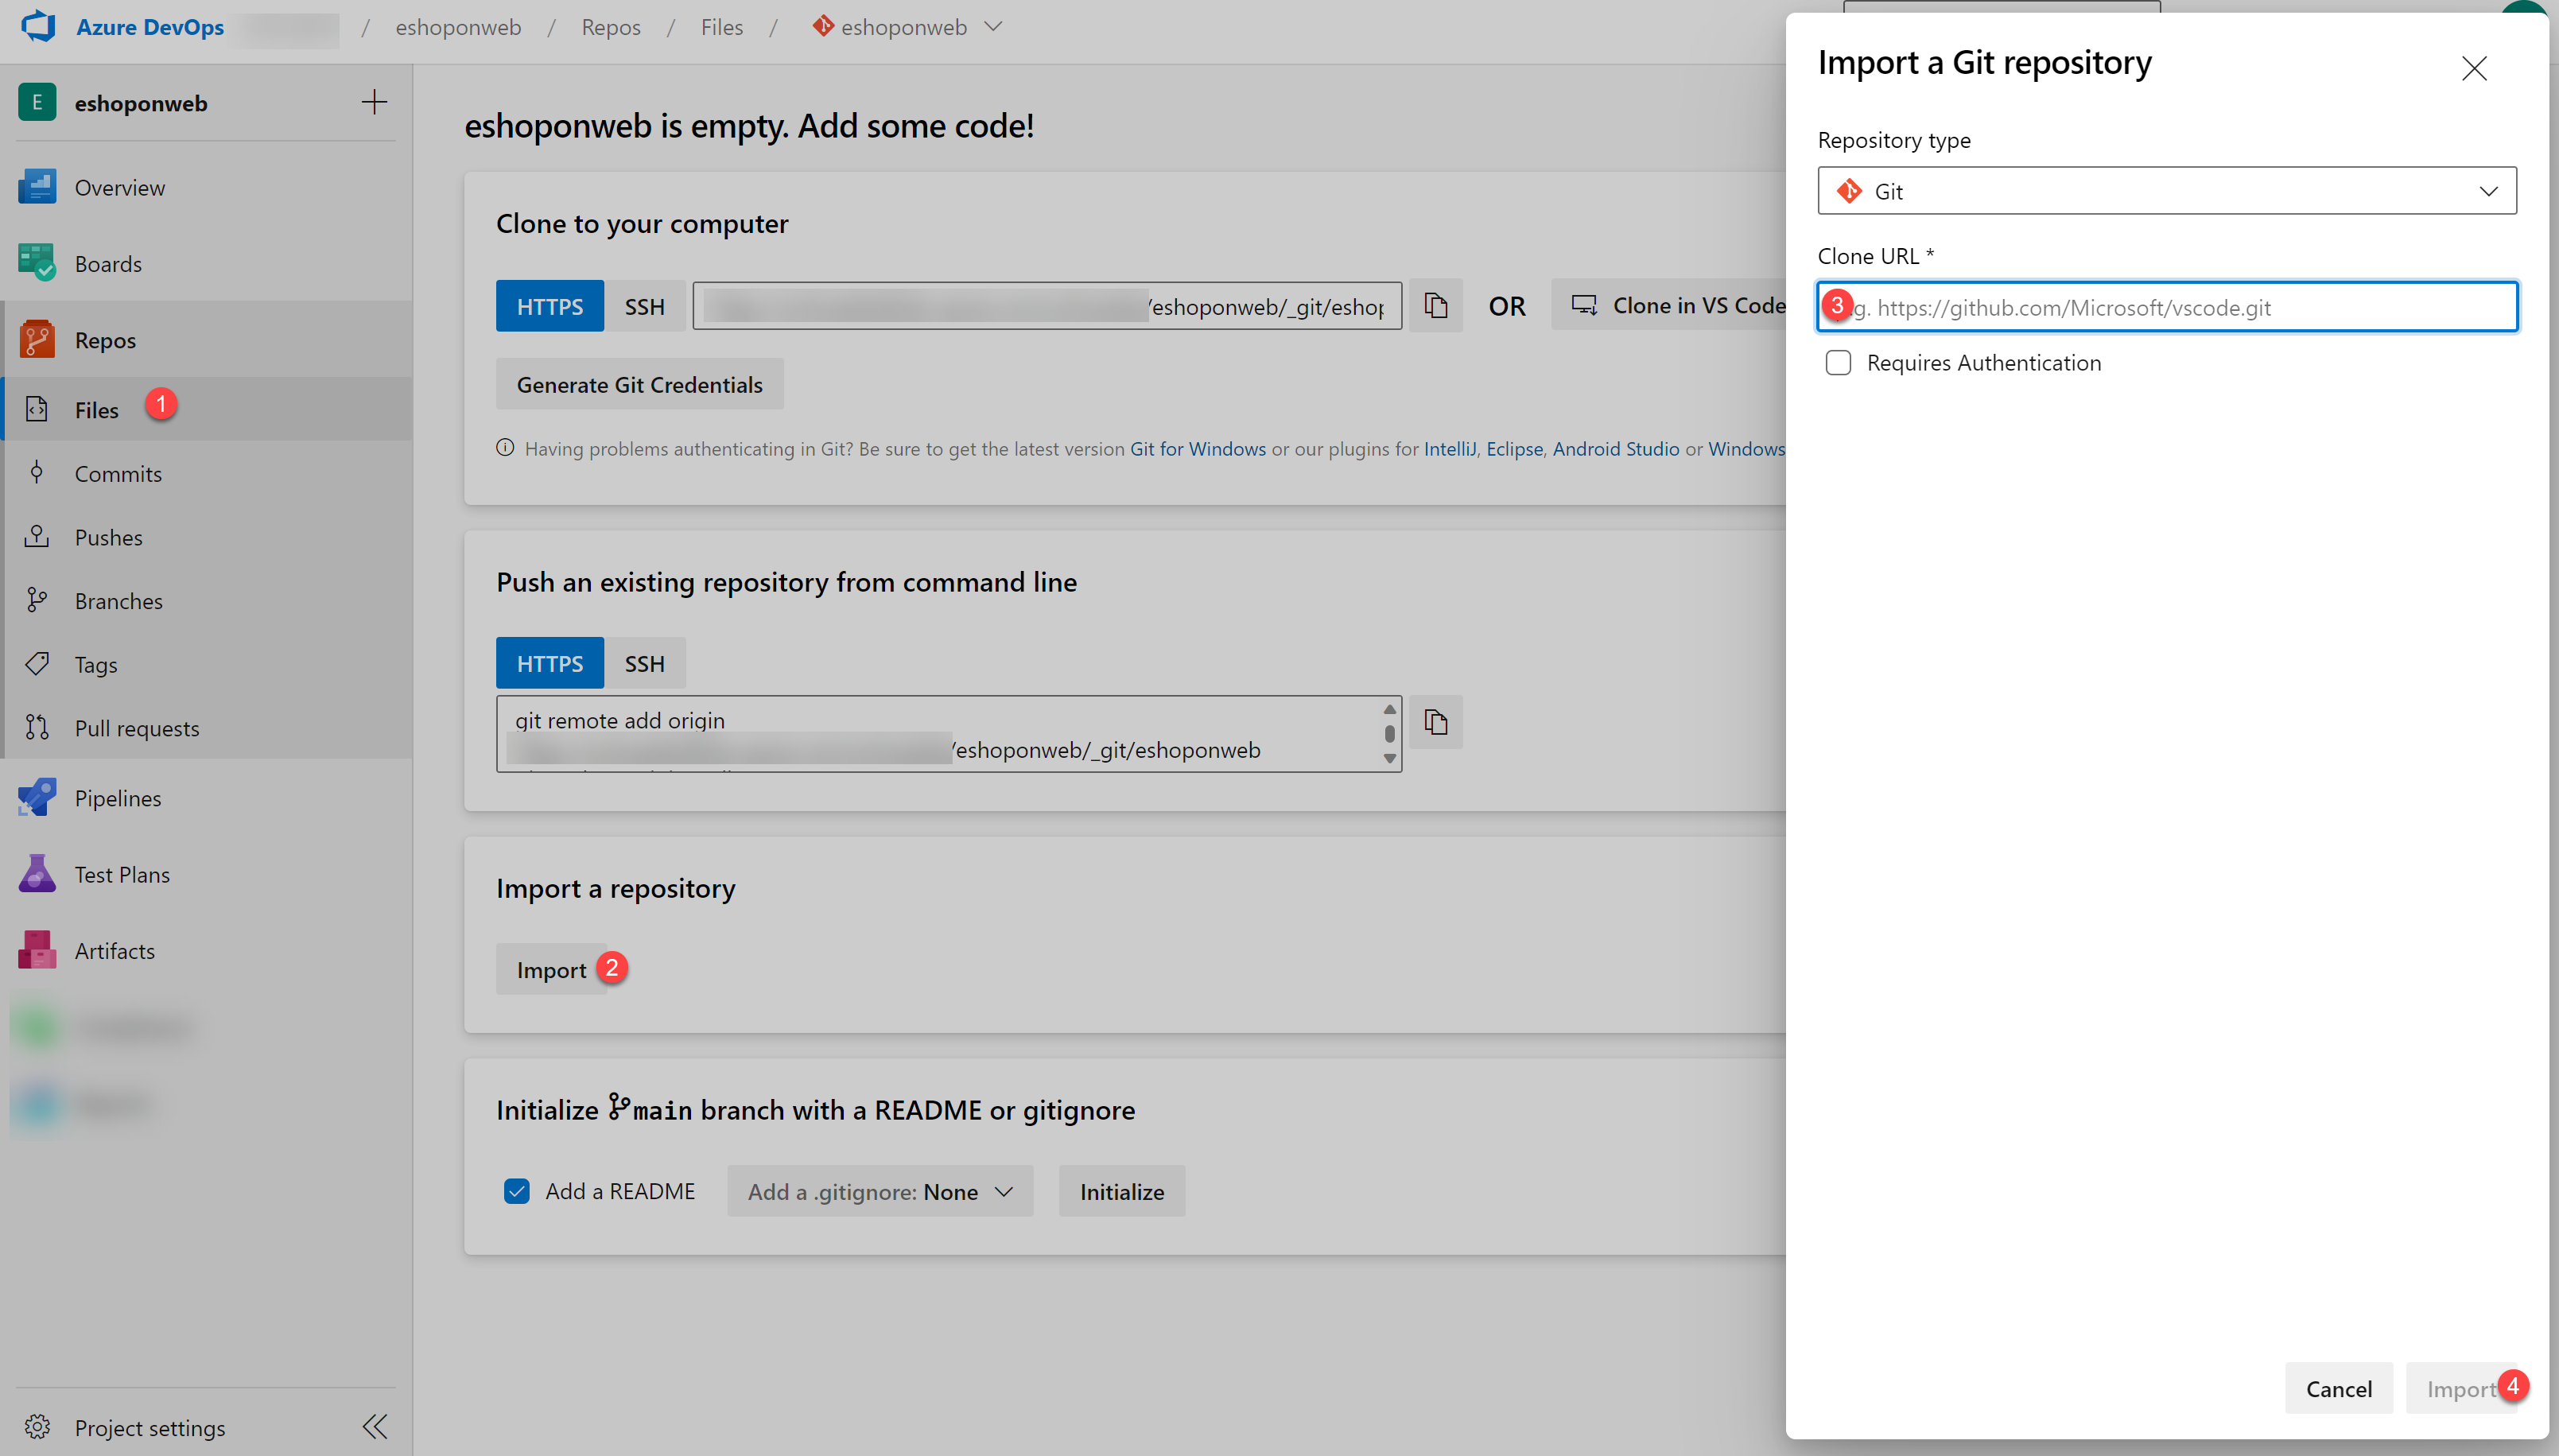
-
The repository is organized the following way:
- .ado folder contains Azure DevOps YAML pipelines.
- .devcontainer folder container setup to develop using containers (either locally in VS Code or GitHub Codespaces).
- .azure folder contains Bicep & ARM infrastructure as code templates.
- .github folder container YAML GitHub workflow definitions.
- src folder contains the .NET 8 website used on the lab scenarios.
-
Leave the web browser window open.
-
Go to Repos > Branches.
-
Hover on the main branch then click the ellipsis on the right of the column.
-
Click on Set as default branch.
Create a service connection to access Azure resources
You will need to create a service connection in Azure DevOps which will allow you to deploy and access resources in your Azure subscription.
-
Start a web browser, navigate to the Azure DevOps portal
https://aex.dev.azure.com. -
Sign in to the Azure DevOps organization.
Note: If this is the first time you are signing in to the Azure DevOps organization, you will be prompted create your profile and accept the terms of service, and then select Continue.
-
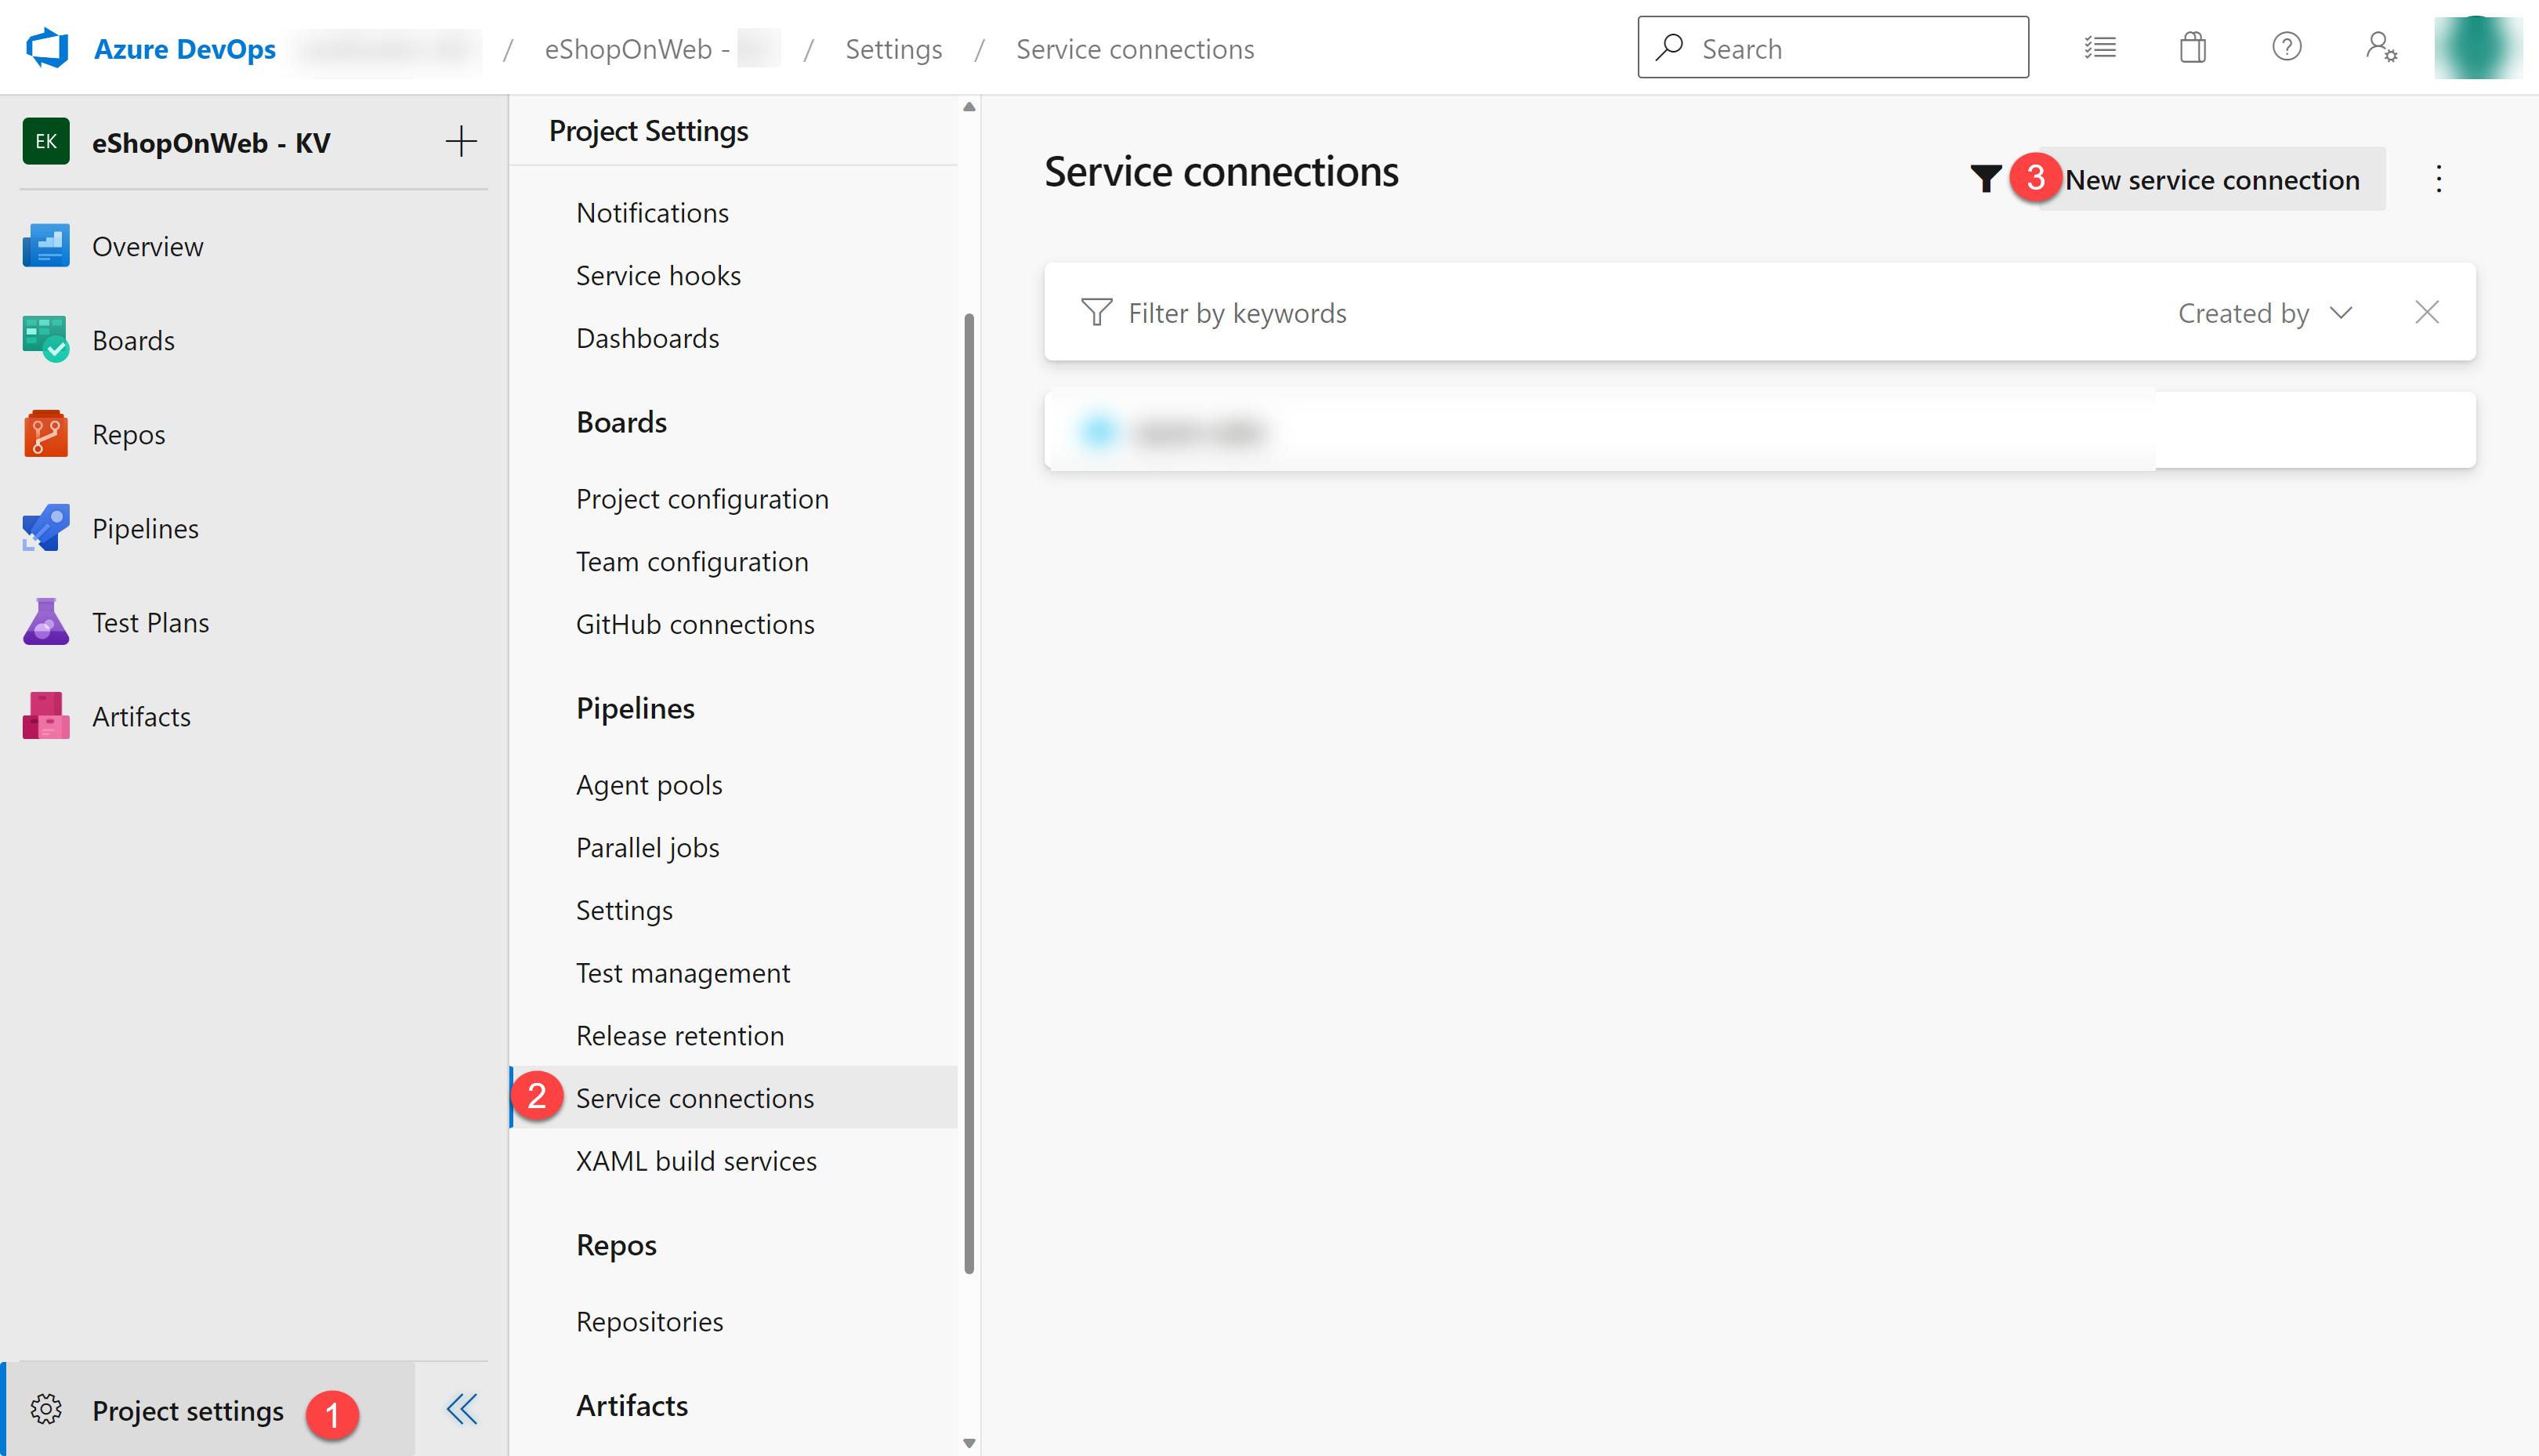
Open eShopOnWeb project, and select Project settings in the bottom left corner of the portal.
-
Select the Service connections under Pipelines, and then select Create service connection button.
-
On the New service connection blade, select Azure Resource Manager and Next (you may need to scroll down).
-
Select App registration (automatic) from the Identity type dropbox.
-
Select Workload Identity federation and Subscription under the Scope level.
Note: You can also use App registration or managed identity (manual) if you prefer to manually configure the service connection. Follow the steps in the Azure DevOps documentation to create the service connection manually.
-
Fill in the empty fields using the information:
- Subscription: Select your Azure subscription.
- Resource group: Select the resource group where you want to deploy resources. If you don’t have a resource group, you can create one in the Azure portal following the instructions in Manage Azure resource groups by using the Azure portal.
- Service connection name: Type
azure subs. This name will be referenced in YAML pipelines to access your Azure subscription.
-
Make sure the Grant access permission to all pipelines option is unchecked and select Save.
Important: The Grant access permission to all pipelines option is not recommended for production environments: selecting the option means granting access to the service connection to all pipelines in the project, not selecting the option allows you to approve the access to the service connection on the first run of each pipeline.
Note: If the Grant access permission to all pipelines option is disabled (it is in gray) and cannot be changed, continue with the lab.
Note: If you see an error message indicating you don’t have the necessary permissions to create a service connection, try again, or configure the service connection manually.
You have now completed the necessary prerequisite steps to continue with the labs.