M05-Unit 4 Deploy Azure Application Gateway
Exercise scenario
In this exercise, you use the Azure portal to create an application gateway. Then you test it to make sure it works correctly.
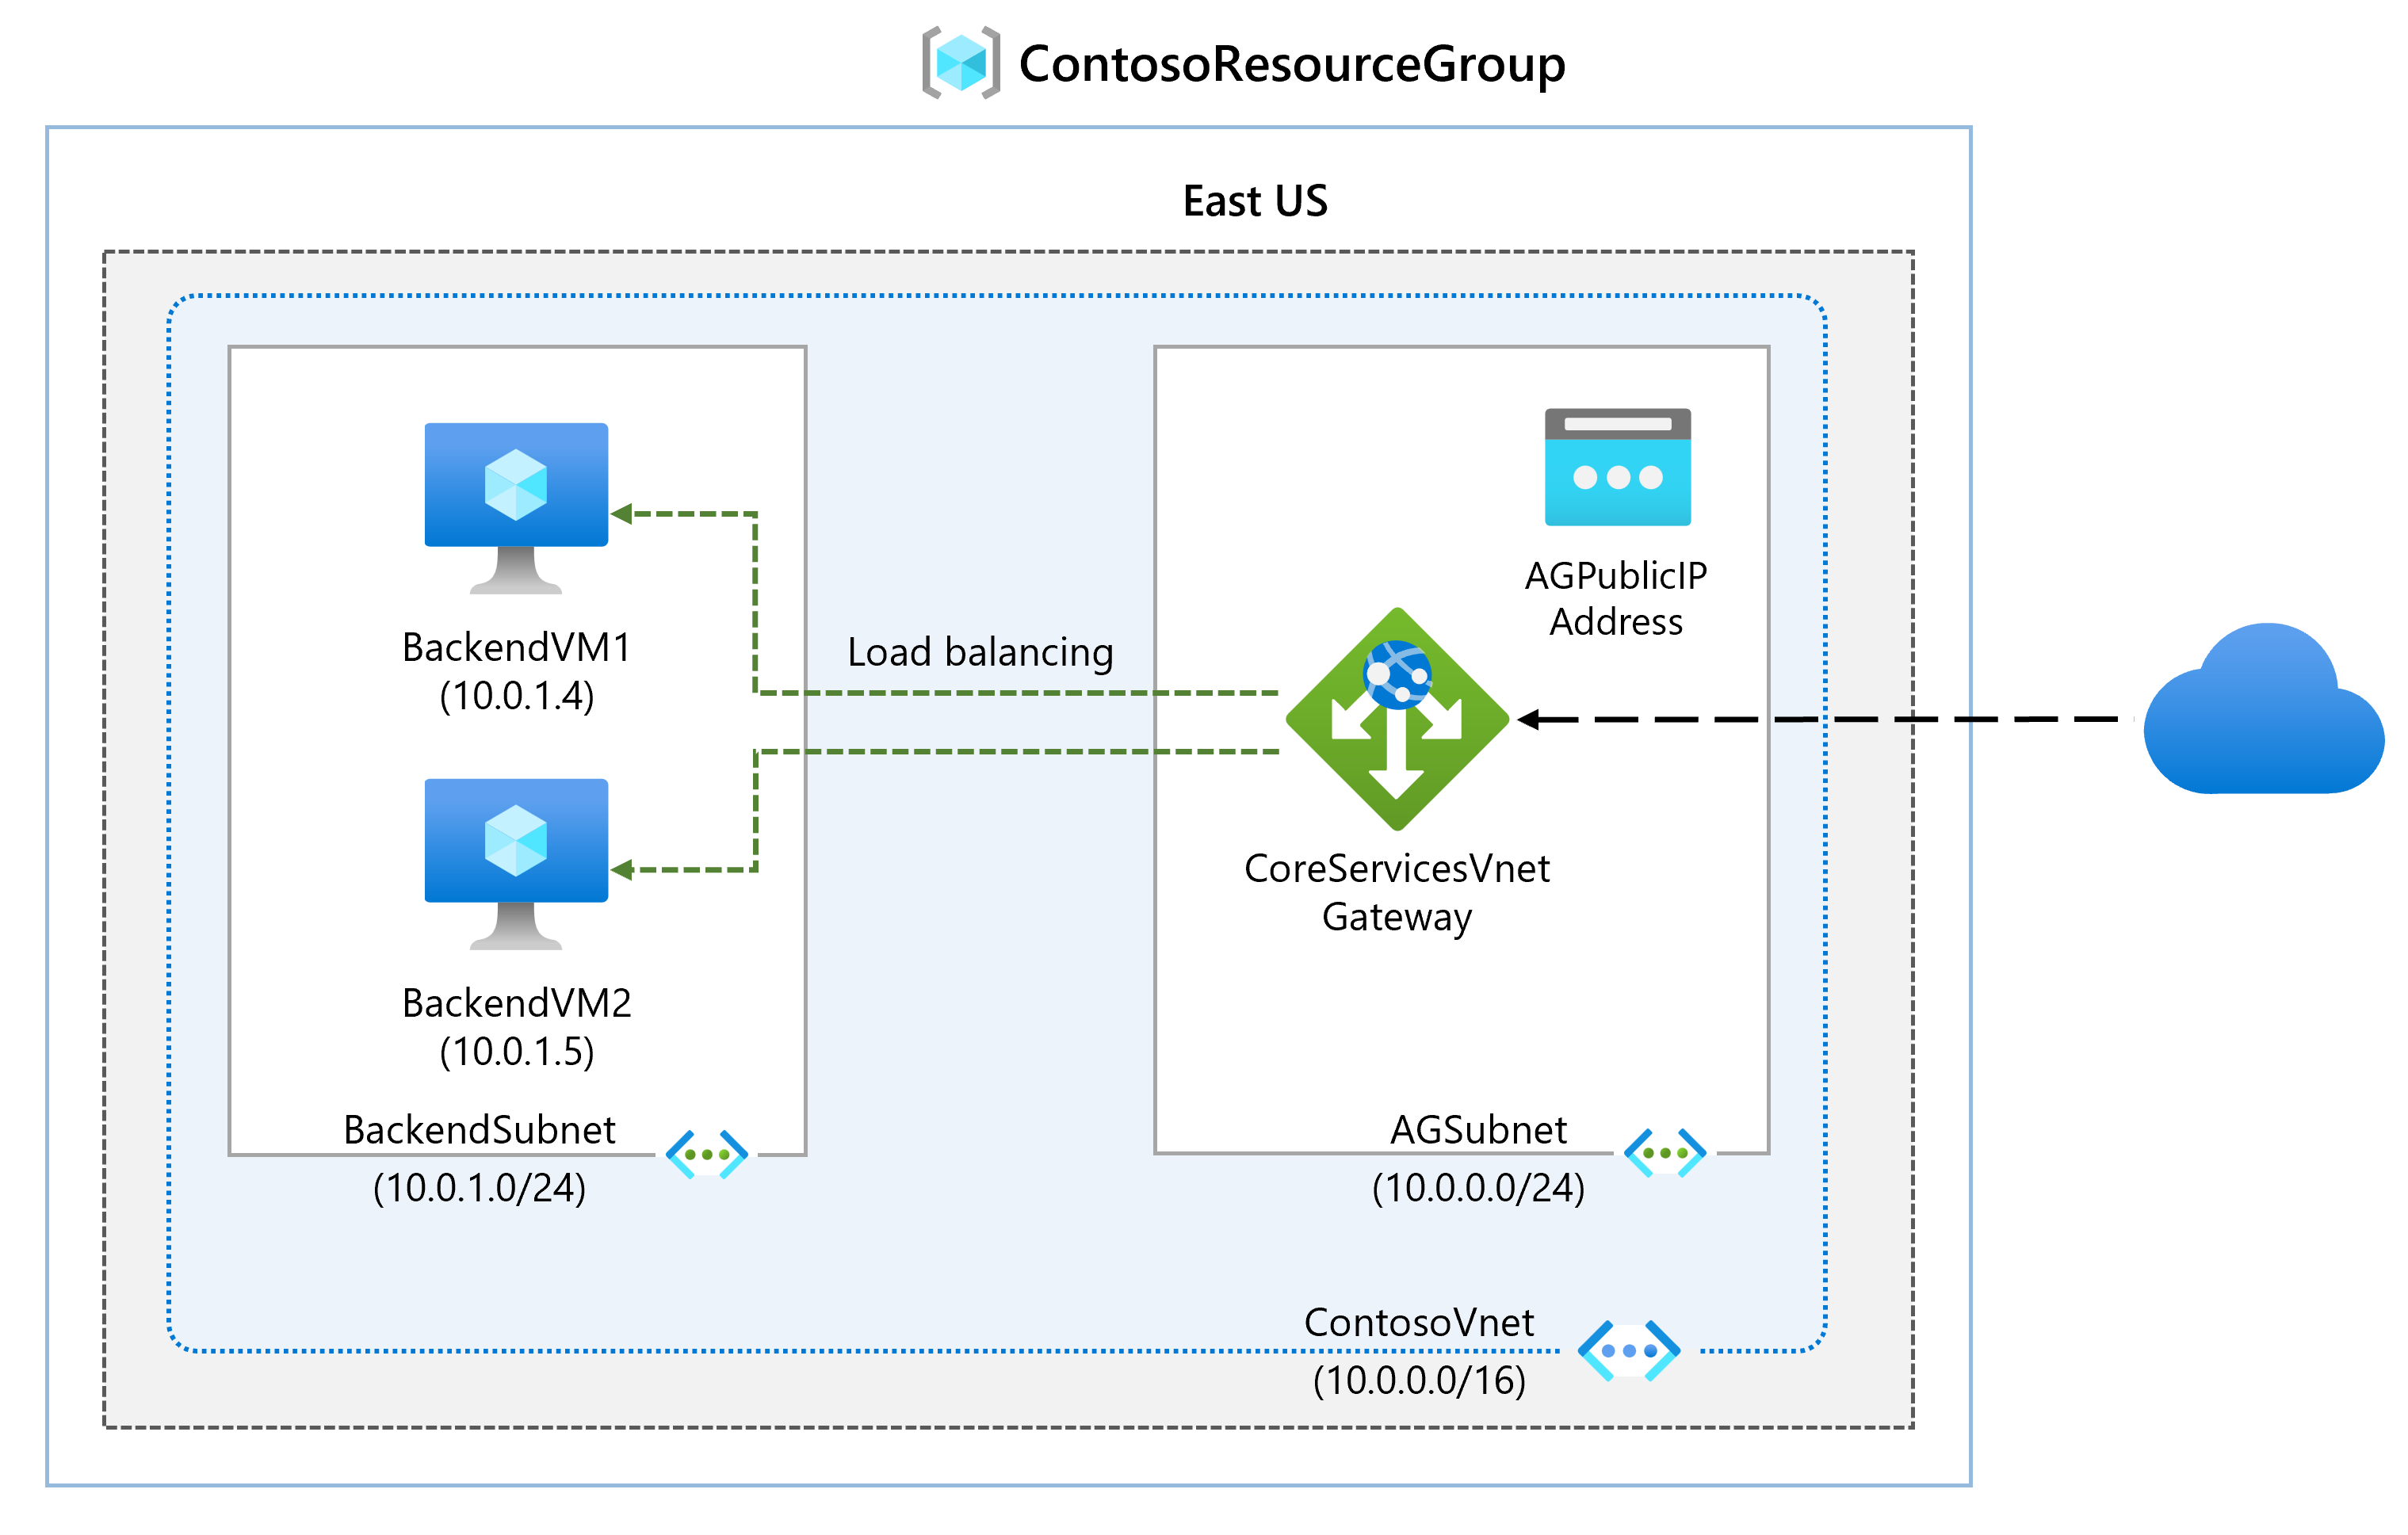
The application gateway directs application web traffic to specific resources in a backend pool. You assign listeners to ports, create rules, and add resources to a backend pool. For the sake of simplicity, this article uses a simple setup with a public front-end IP, a basic listener to host a single site on the application gateway, a basic request routing rule, and two virtual machines in the backend pool.
For Azure to communicate between the resources that you create, it needs a virtual network. You can either create a new virtual network or use an existing one. In this example, you’ll create a new virtual network while you create the application gateway. Application Gateway instances are created in separate subnets. You create two subnets in this example: one for the application gateway, and another for the backend servers.
Estimated time: 25 minutes
Job skills
In this exercise, you:
- Task 1: Create an application gateway
- Task 2: Create virtual machines
- Task 3: Add backend servers to backend pool
- Task 4: Test the application gateway
Task 1: Create an application gateway
-
Sign in to the Azure portal with your Azure account.
-
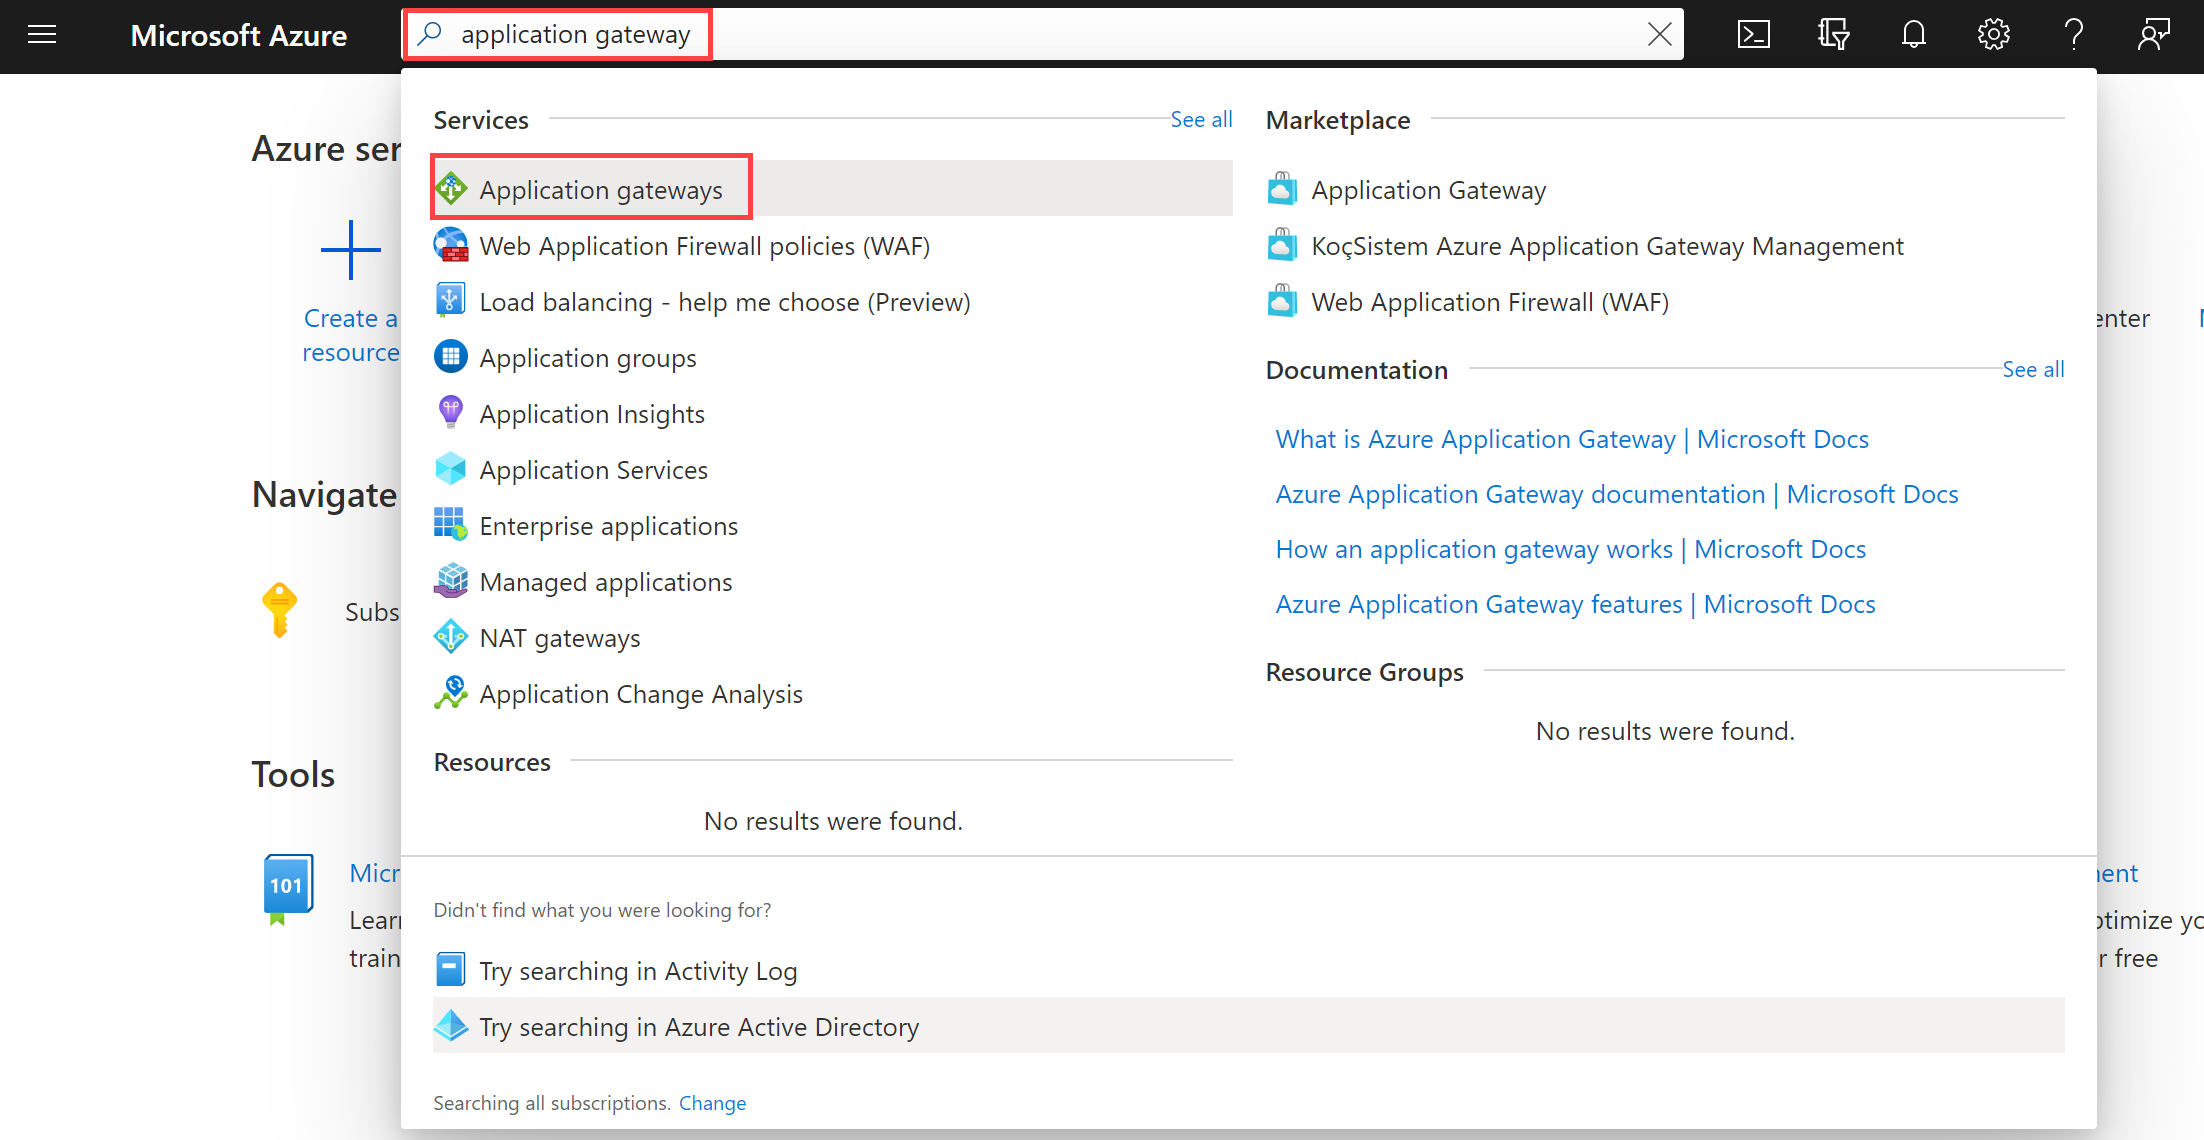
On any Azure Portal page, in Search resources, services and docs (G+/), enter application gateway, and then select Application gateways from the results.
-
On the Application gateways page, select + Create, and then select Application Gateway from the dropdown menu.
-
On the Create application gateway Basics tab, enter, or select the following information:
Setting Value Subscription Select your subscription. Resource group Select Create new ContosoResourceGroup Application Gateway ContosoAppGateway Region Select East US Virtual Network Select Create new -
In Create virtual network, enter, or select the following information:
Setting Value Name ContosoVNet ADDRESS SPACE Address range 10.0.0.0/16 SUBNETS Subnet name Change default to AGSubnet Address range 10.0.0.0/24 -
Select OK to return to the Create application gateway Basics tab.
-
Accept the default values for the other settings and then select Next: Frontends.
-
On the Frontends tab, verify Frontend IP address type is set to Public.
-
Select Add new for the Public IP address and enter AGPublicIPAddress for the public IP address name, and then select OK.
-
Select Next: Backends.
-
On the Backends tab, select Add a backend pool.
-
On the Add a backend pool window that opens, enter the following values to create an empty backend pool:
Setting Value Name BackendPool Add backend pool without targets Yes -
On the Add a backend pool window, select Add to save the backend pool configuration and return to the Backends tab.
-
On the Backends tab, select Next: Configuration.
-
On the Configuration tab, you’ll connect the frontend and backend pool you created using a routing rule.
-
On the Routing rules column, select Add a routing rule.
-
On the Rule name box, enter RoutingRule.
-
For Priority enter 100.
-
On the Listener tab, enter or select the following information:
Setting Value Listener name Listener Frontend IP Select Public IPv4 -
Accept the default values for the other settings on the Listener tab.
-
Select the Backend targets tab to configure the rest of the routing rule.
-
On the Backend targets tab, enter or select the following information:
Setting Value Target type Backend pool Backend Settings Add new -
In Add a Backend Setting, enter or select the following information:
Setting Value Backend setting name HTTPSetting Backend port 80 -
Accept the default values for the other settings in the Add a Backend Setting window, then select Add to return to Add a routing rule.
-
Select Add to save the routing rule and return to the Configuration tab.
-
Select Next: Tags and then Next: Review + create.
-
Review the settings on the Review + create tab
-
Select Create to create the virtual network, the public IP address, and the application gateway.
-
It may take several minutes for Azure to create the application gateway. Wait until the deployment finishes successfully.
Add a subnet for a backend servers
-
Search for and select the ContosoVNet. Verify the AGSubnet was created.
-
To create the BackendSubnet, select Settings and then Subnets. Select + Subnet, enter the settings below, and then select Add.
Setting Value Subnet name BackendSubnet Address range 10.0.1.0/24
Task 2: Create virtual machines
- In the Azure portal, select the Cloud Shell icon (top right). If necessary, configure the shell.
- Select PowerShell.
- Select No Storage Account required and your Subscription, then select Apply.
- Wait for the terminal to create and a prompt to be displayed.
-
On the toolbar of the Cloud Shell pane, select Manage files and then Upload. Upload the following files: backend.json, backend.parameters.json, and install-iis.ps1.
Note: If you are working in your own subscription the template files are available in the GitHub lab repository.
-
Deploy the following ARM templates to create the VMs needed for this exercise:
Note: You will be prompted to provide an Admin password.
Note: If deployment fails with NotAvailableForSubscription for the default VM size, open backend.parameters.json, update the vmSize value to a VM size that is available in your subscription and region, and rerun the deployment command.
$RGName = "ContosoResourceGroup" New-AzResourceGroupDeployment -ResourceGroupName $RGName -TemplateFile backend.json -TemplateParameterFile backend.parameters.jsonNote: Take time to review the backend.json file. There are two virtual machines being deployed. This will take a few minutes.
- The command should complete successfully and list BackendVM1 and BackendVM2.
Install IIS on each virtual machine
-
Each backend server needs IIS installed.
-
Continue at the PowerShell prompt and use the provided script to install IIS on BackendVM1.
Invoke-AzVMRunCommand -ResourceGroupName 'ContosoResourceGroup' -Name 'BackendVM1' -CommandId 'RunPowerShellScript' -ScriptPath 'install-iis.ps1'Note: While you wait review the PowerShell script. Notice that the IIS home page is being customized to provide the virtual machine name.
-
Run the command again, this time for BackendVM2.
Invoke-AzVMRunCommand -ResourceGroupName 'ContosoResourceGroup' -Name 'BackendVM2' -CommandId 'RunPowerShellScript' -ScriptPath 'install-iis.ps1'Note: Each command will take a couple of minutes to complete.
Task 3: Add backend servers to backend pool
-
On the Azure portal menu, select All resources or search for and select All resources. Then select ContosoAppGateway.
-
Under Settings, select Backend pools.
-
Select BackendPool.
-
On the Edit backend pool page, under Backend targets, in Target type, select Virtual machine.
-
Under Target, select BackendVM1-nic.
-
On Target type, select Virtual machine.
-
Under Target, select BackendVM2-nic.
-
Select Save and wait for the targets to be added.
-
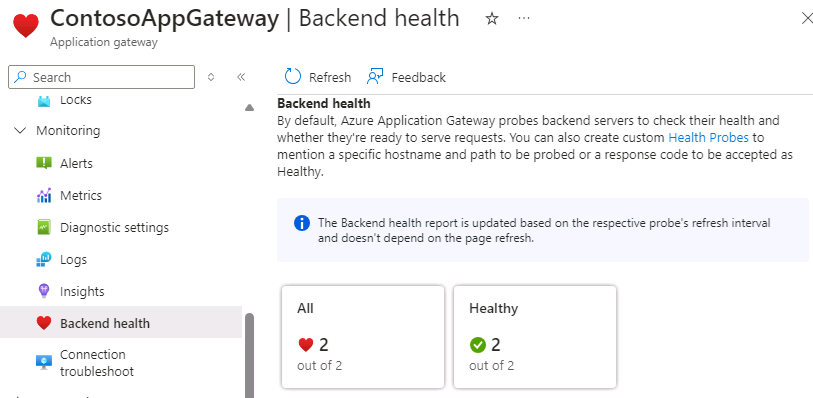
Check to ensure the backend servers are healthy. Select Monitoring and then Backend Health. Both targets should be healthy.
Task 4: Test the application gateway
Although IIS isn’t required to create the application gateway, you installed it in this exercise to verify if Azure successfully created the application gateway.
Use IIS to test the application gateway
-
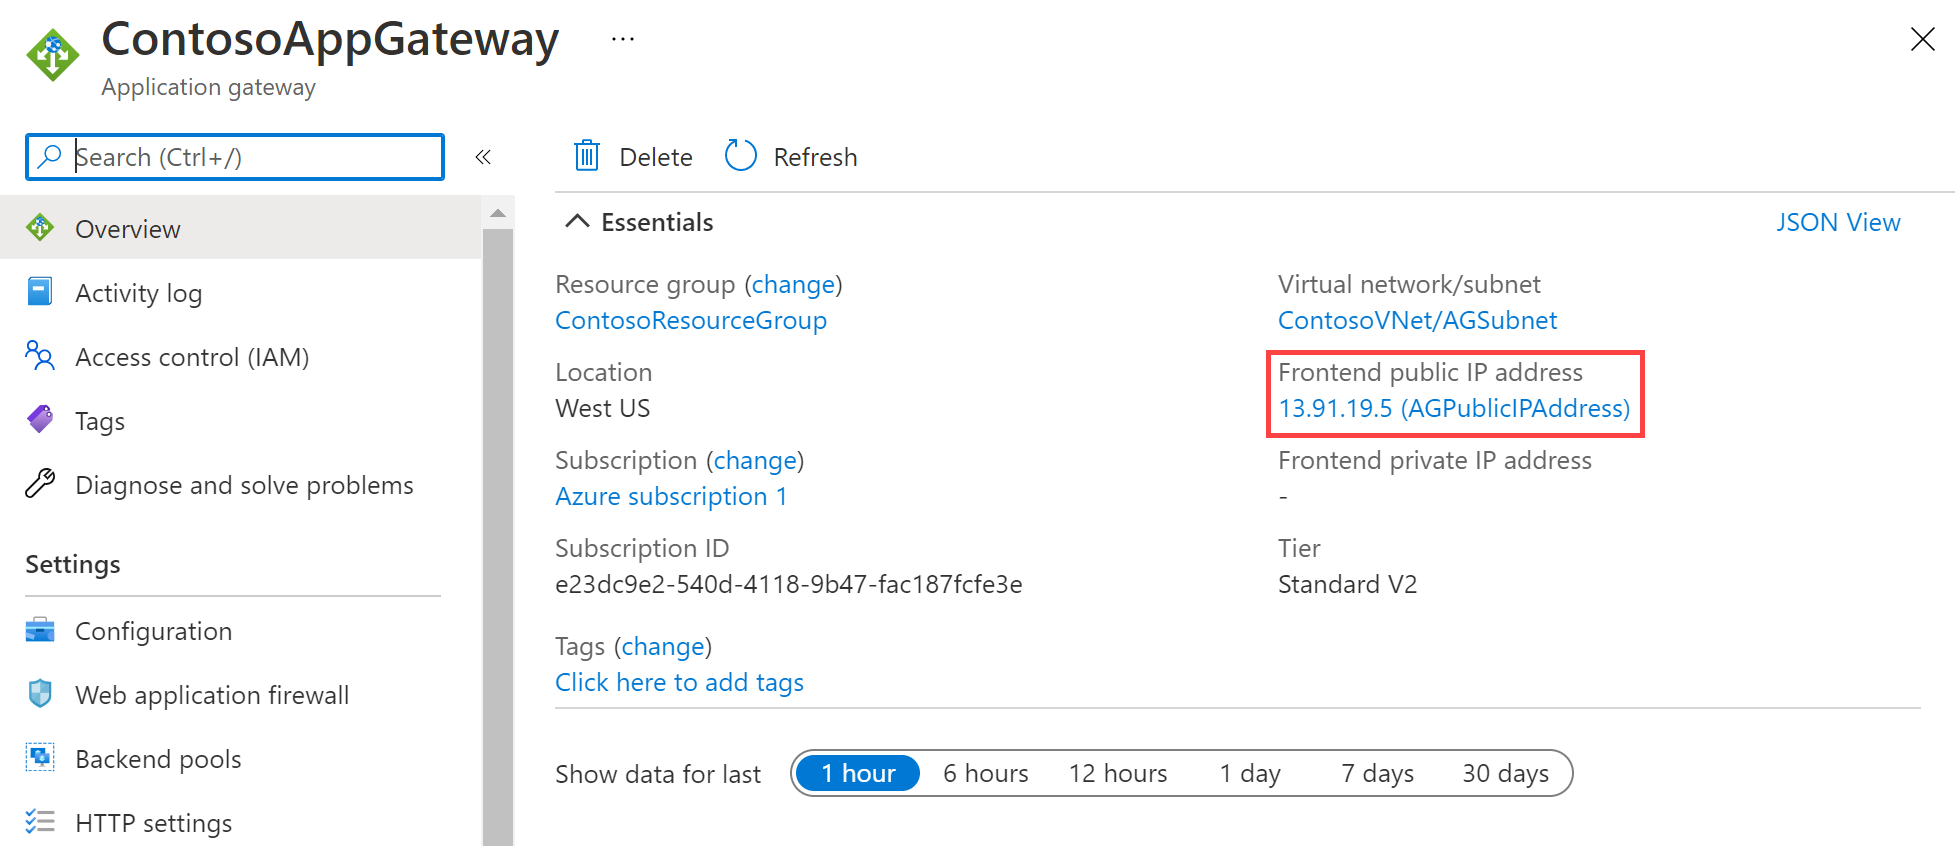
Find the public IP address for the application gateway on its Overview page.
-
Copy the public IP address, and then paste it into the address bar of your browser to browse that IP address.
-
Check the response. A valid response verifies that the application gateway was successfully created and can successfully connect with the backend.
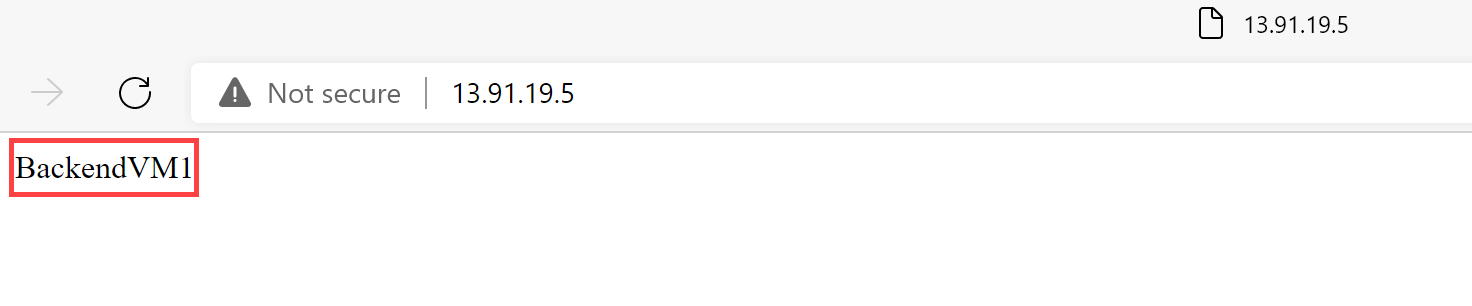
-
Refresh the browser multiple times and you should see connections to both BackendVM1 and BackendVM2.
Clean up resources
Note: Remember to remove any newly created Azure resources that you no longer use. Removing unused resources ensures you will not see unexpected charges.
-
On the Azure portal, open the PowerShell session within the Cloud Shell pane.
-
Delete all resource groups you created throughout the labs of this module by running the following command:
Remove-AzResourceGroup -Name 'IntLB-RG' -Force -AsJob
Note: The command executes asynchronously (as determined by the -AsJob parameter), so while you will be able to run another PowerShell command immediately afterwards within the same PowerShell session, it will take a few minutes before the resource groups are actually removed.
Extend your learning with Copilot
Copilot can assist you in learning how to use the Azure scripting tools. Copilot can also assist in areas not covered in the lab or where you need more information. Open an Edge browser and choose Copilot (top right) or navigate to copilot.microsoft.com. Take a few minutes to try these prompts.
- How does the Azure Application Gateway route requests?
- What security features does Azure Application Gateway include?
- Compare the Azure Application Gateway with the Azure Load Balancer. Give examples of when to use each product.
Learn more with self-paced training
- Introduction to Azure Application Gateway. This module explains what Azure Application Gateway does, how it works, and when you should choose to use Application Gateway as a solution to meet your organization’s needs.
- Load balance HTTP(S) traffic in Azure. In this module, you learn how to design and implement Azure Application Gateway.
Key takeaways
Congratulations on completing the lab. Here are the main takeaways for this lab.
- Azure Application Gateway is a web traffic (OSI layer 7) load balancer that enables you to manage traffic to your web applications.
- Application Gateway can make routing decisions based on additional attributes of an HTTP request, for example URI path or host headers.
- Use Application Gateway for application hosted in a single region and when you need URL based routing.