M04-Unit 6 Create a Traffic Manager profile using the Azure portal
Exercise scenario
In this exercise, you will create a Traffic Manager profile to deliver high availability for the fictional Contoso Ltd organization’s web application.
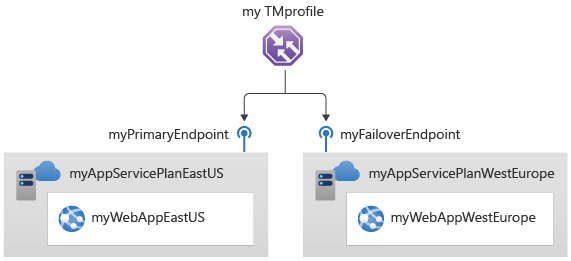
You create two instances of a web application deployed in two different regions (East US and West Europe). The East US region will act as a primary endpoint for Traffic Manager, and the West Europe region will act as a failover endpoint.
You then create a Traffic Manager profile based on endpoint priority. This profile will direct user traffic to the primary site running the web application. Traffic Manager will continuously monitor the web application, and if the primary site in East US is unavailable, it will provide automatic failover to the backup site in West Europe.
The diagram below approximately illustrates the environment you will be deploying in this exercise.
Estimated time: 35 minutes
Job skills
In this exercise, you will:
- Task 1: Create the web apps
- Task 2: Create a Traffic Manager profile
- Task 3: Add Traffic Manager endpoints
- Task 4: Test the Traffic Manager profile
Task 1: Create the web apps
In this section, you will create two instances of a web application deployed in the two different Azure regions.
-
On the Azure portal home page, search for and select App Services. Select Create and then Web App.
-
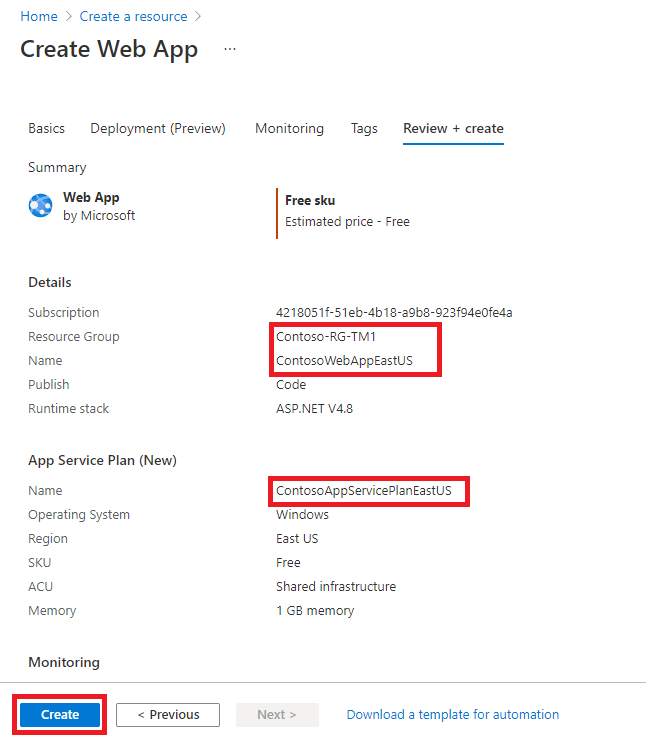
On the Create Web App page, on the Basics tab, use the information in the table below to create the first web application.
Setting Value Subscription Select your subscription Resource group Select Create new Name: Contoso-RG-TM1 Name ContosoWebAppEastUSxx (where xx are your initials to make the name unique) Publish Code Runtime stack ASP.NET V4.8 Operating system Windows Region East US Windows Plan Select Create new Name: ContosoAppServicePlanEastUS Pricing Plan Premium V3 P1V3 (Select another plan if this is unavailable) Note: If East US is unavailable due to quota, capacity, or policy constraints, select another available region in your subscription.
-
Select Monitor + secure tab.
-
Select the No option for Enable Application Insights.
-
Select Review + create.
-
Select Create. When the Web App successfully deploys, it creates a default web site.
-
Repeat steps 1-6 above to create a second web app. Use the same settings as before except for the information in the table below.
Setting Value Resource group Select Create new Name: Contoso-RG-TM2 Name ContosoWebAppWestEuropexx (where xx are your initials to make the name unique) Region West Europe Windows Plan Select Create new Name: ContosoAppServicePlanWestEurope -
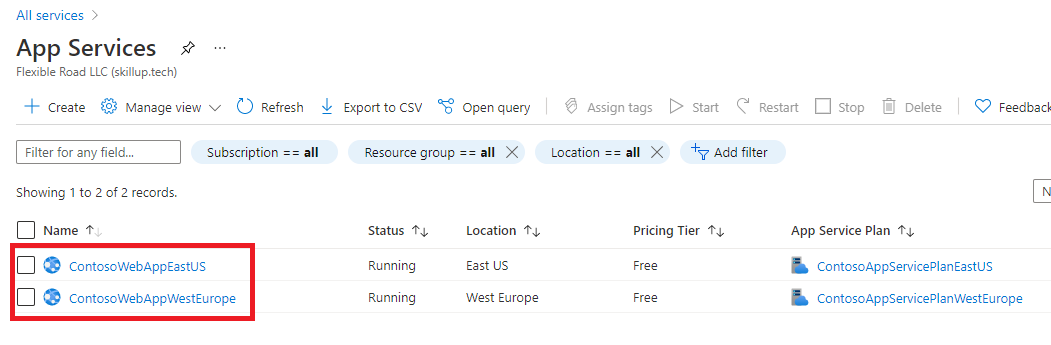
On the Azure home page, select All services, in the left navigation menu, select Web, and then select App Services.
-
You should see the two new web apps listed.
Task 2: Create a Traffic Manager profile
Now you will create a Traffic Manager profile that directs user traffic based on endpoint priority.
-
On the Azure portal home page, select Create a resource.
-
In the search box at the top of the page, enter Traffic Manager profile, and then select it from the pop-up list.
-
Select Create.
-
On the Create Traffic Manager profile page, use the information in the table below to create the Traffic Manager profile.
Setting Value Name Contoso-TMProfilexx (where xx are your initials to make the name unique) Routing method Priority Subscription Select your subscription Resource group Contoso-RG-TM1 Resource group location East US -
Select Review + create and then Create.
Task 3: Add Traffic Manager endpoints
In this section, you will add the website in the East US as the primary endpoint to route all the user traffic. You will then add the website in West Europe as a failover endpoint. If the primary endpoint becomes unavailable, then traffic will automatically be routed to the failover endpoint.
-
On the Azure portal home page, select All resources, then select on Contoso-TMProfile in the resources list.
-
Under Settings, select Endpoints, and then select Add.
-
On the Add endpoint page, enter the information from the table below.
Setting Value Type Azure endpoint Name myPrimaryEndpoint Target resource type App Service Target resource ContosoWebAppEastUS (East US) Priority 1 -
Select Add.
-
Repeat steps 2-4 above to create the failover endpoint. Use the same settings as before except for the information in the table below.
Setting Value Name myFailoverEndpoint Target resource ContosoWebAppWestEurope (West Europe) Priority 2 -
Setting a priority of 2 means that traffic will route to this failover endpoint if the configured primary endpoint becomes unhealthy.
-
Under Settings, select Configuration, and then update the Endpoint monitor settings Protocol to HTTPS and Port to 443 and select Save.
-
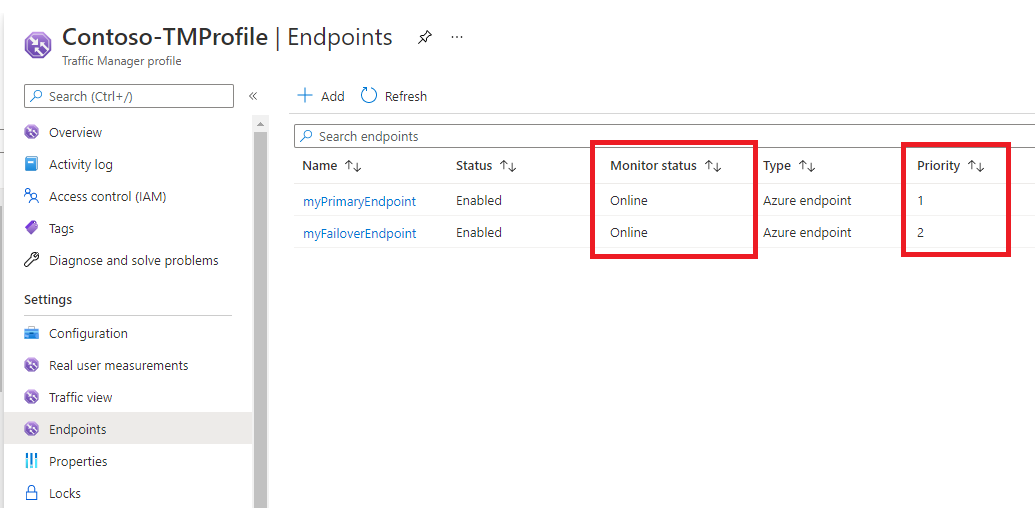
The two new endpoints are displayed in the Traffic Manager profile. Notice that after a few minutes the Monitoring status should change to Online.
Task 4: Test the Traffic Manager profile
In this section, you will check the DNS name of your Traffic Manager profile, and then you will configure the primary endpoint so that it is unavailable. You will then verify that the web app is still available, to test that the Traffic Manager profile is successfully sending traffic to the failover endpoint.
-
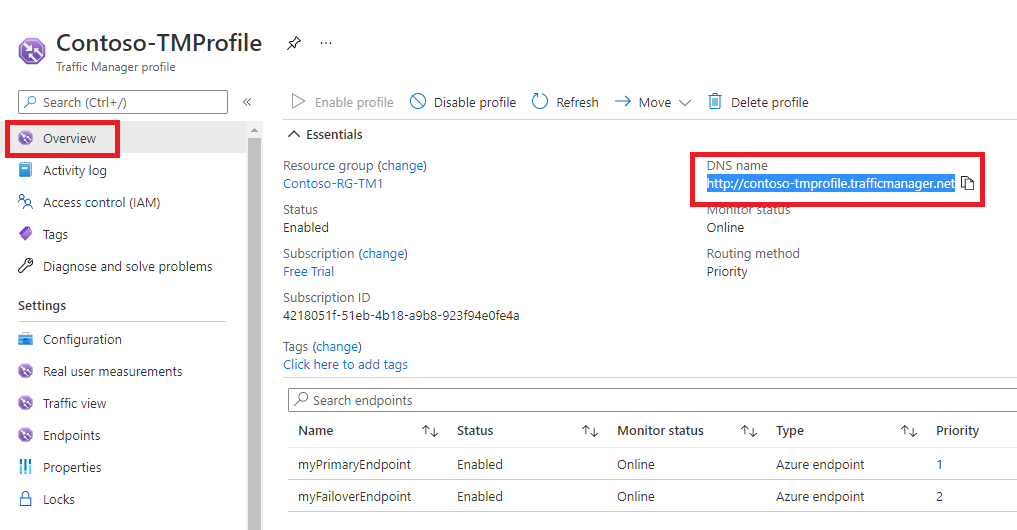
On the Contoso-TMProfile page, select Overview.
-
On the Overview screen, copy the DNS name entry to the clipboard (or take note of it somewhere).
-
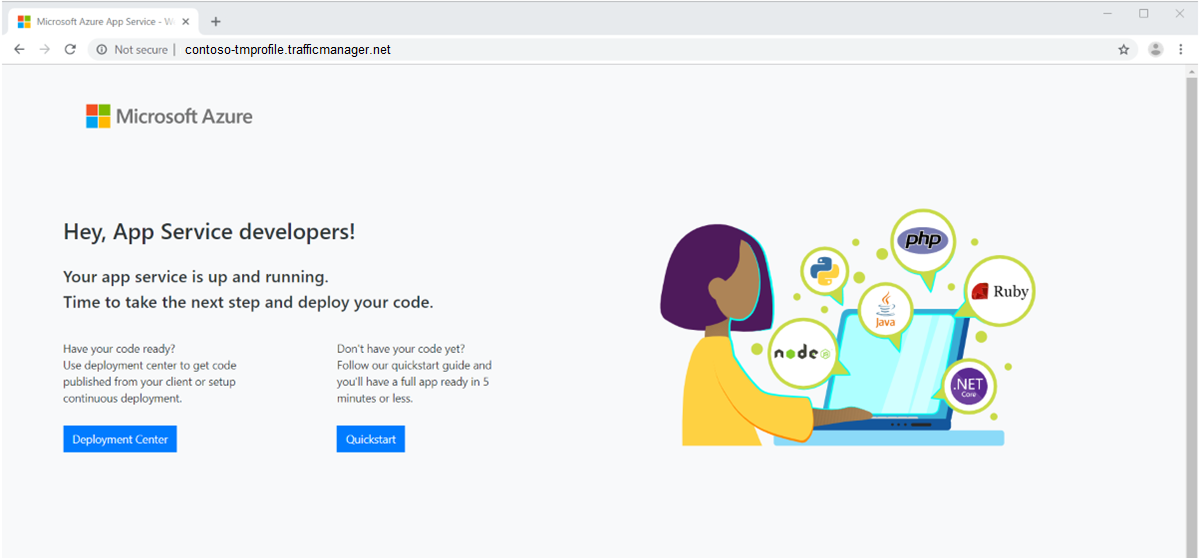
Open a web browser tab, and paste (or enter) the DNS name entry (contoso-tmprofile.trafficmanager.net) into the address bar, and press Enter.
Note: If you receive errors that the website is not secure, use an InPrivate browsing window.
-
The web app’s default web site should be displayed. If you get 404 Web Site not found message, Disable profile from Contoso-TMProfilexx Traffic Manager profile overview page and Enable profile. Then refresh the webpage.
-
Currently all traffic is being sent to the primary endpoint as you set its Priority to 1.
-
To test the failover endpoint is working properly, you need to disable the primary site.
-
On the Contoso-TMProfile page, on the overview screen, select the number 2 to the right of Endpoints:.
-
Select the Edit button (pencil icon) for myPrimaryEndpoint.
-
On the myPrimaryEndpoint blade, under Status, clear the checkbox for Enable Endpoint, and then select Save.
-
If needed, close the myPrimaryEndpoint blade (select the X in the top right corner of the page).
-
On the Contoso-TMProfile page, the Monitor status for myPrimaryEndpoint should now be Disabled.
-
Open a new web browser session, and paste (or enter) the DNS name entry (contoso-tmprofile.trafficmanager.net) into the address bar, and press Enter.
-
Verify that the web app is still responding. As the primary endpoint was not available, the traffic was instead routed to the failover endpoint to allow the web site to still function.
Clean up resources
Note: Remember to remove any newly created Azure resources that you no longer use. Removing unused resources ensures you will not see unexpected charges.
-
On the Azure portal, open the PowerShell session within the Cloud Shell pane.
-
Delete all resource groups you created throughout the labs of this module by running the following command:
Remove-AzResourceGroup -Name 'Contoso-RG-TM1' -Force -AsJob Remove-AzResourceGroup -Name 'Contoso-RG-TM2' -Force -AsJobNote: The command executes asynchronously (as determined by the -AsJob parameter), so while you will be able to run another PowerShell command immediately afterwards within the same PowerShell session, it will take a few minutes before the resource groups are actually removed.
Extend your learning with Copilot
Copilot can assist you in learning how to use the Azure scripting tools. Copilot can also assist in areas not covered in the lab or where you need more information. Open an Edge browser and choose Copilot (top right) or navigate to copilot.microsoft.com. Take a few minutes to try these prompts.
- What are the high level steps for configuring Azure Traffic Manager?
- Compare and contrast when to use Azure Load Balancer and Azure Traffic Manager.
- Explain the Traffic Manager routing profiles and when they should be used.
Learn more with self-paced training
- Load balance non-HTTP(S) traffic in Azure. In this module, you learn about Azure Traffic Manager and implementing routing methods.
Key takeaways
Congratulations on completing the lab. Here are the main takeaways for this lab.
- Azure Traffic Manager is a DNS-based traffic load balancer. This service allows you to distribute traffic to your public facing applications across the global Azure regions.
- Traffic Manager has six traffic-routing methods that allow you to control how Traffic Manager chooses which endpoint should receive traffic from each end user. How many can you name?
- You can nest Traffic Manager profiles to combine the benefits of more than one traffic-routing method. Nested profiles allow you to override the default Traffic Manager behavior to support larger and more complex application deployments.