M01 - Unit 6 Configure DNS settings in Azure
Exercise scenario
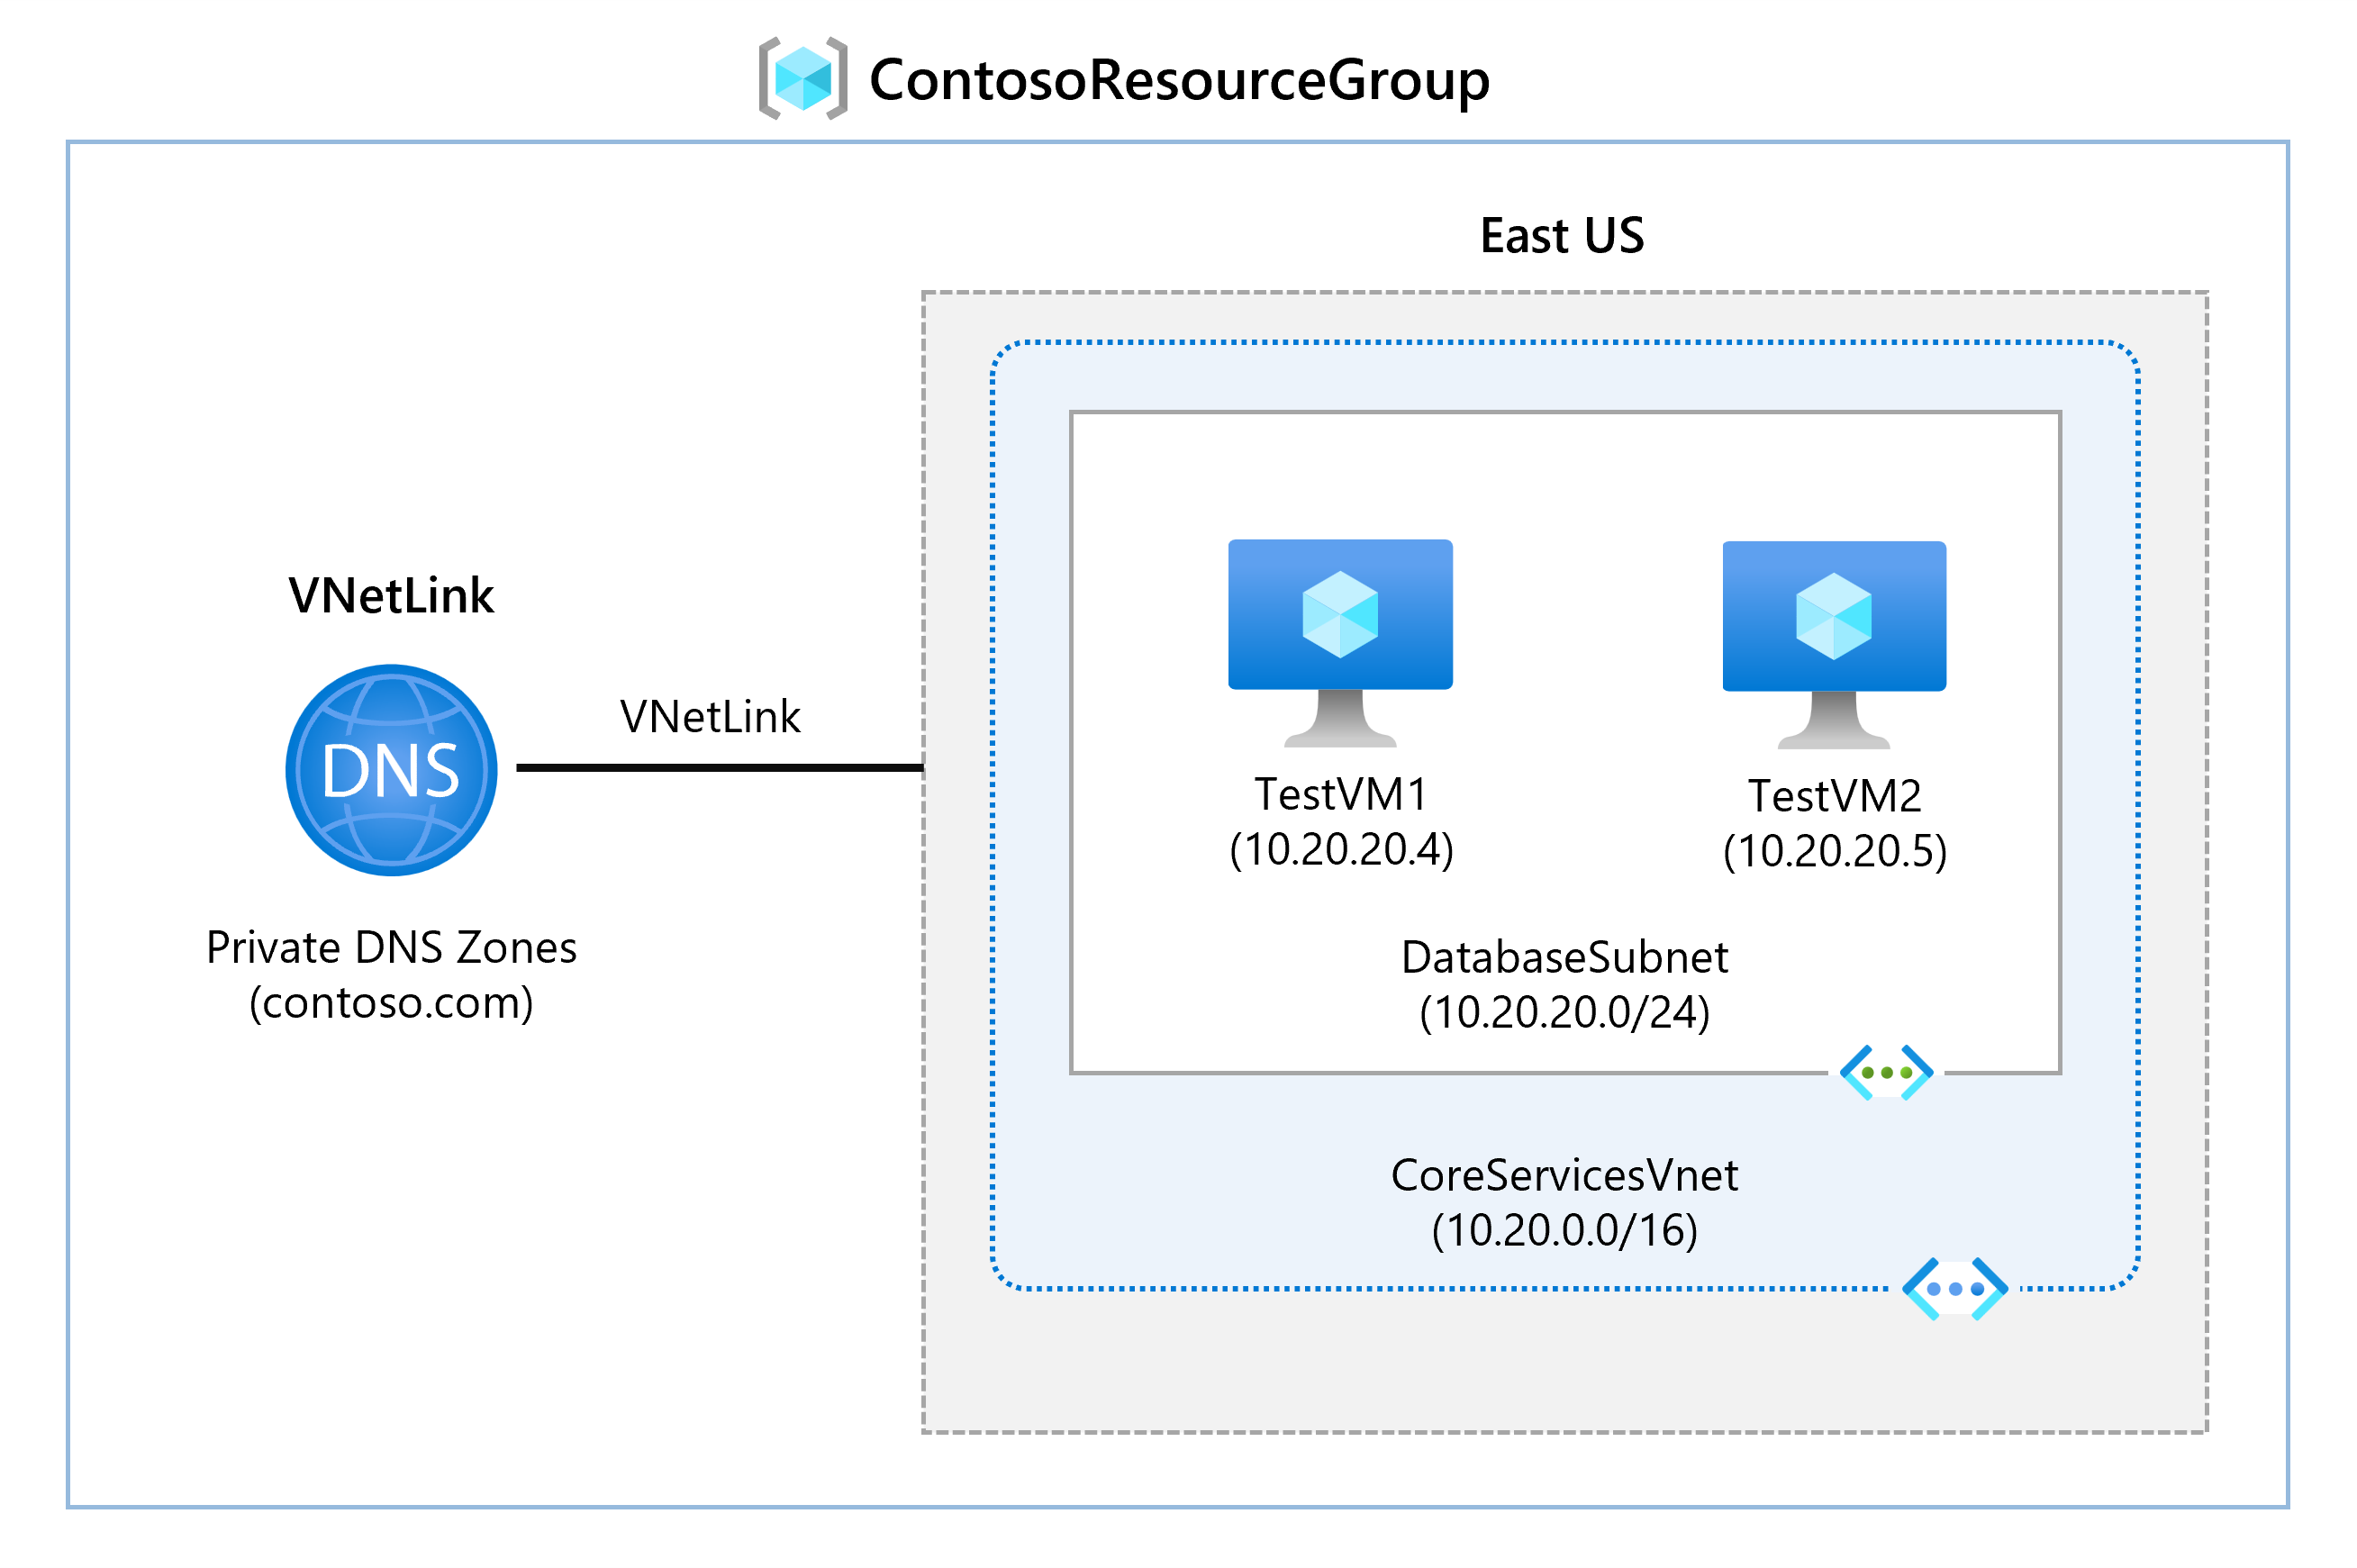
In this unit, you will configure DNS name resolution for Contoso Ltd. You will create a private DNS zone named contoso.com, link the VNets for registration and resolution, and then create two virtual machines and test the configuration.
Estimated time: 25 minutes
Job skills
In this exercise, you will:
- Task 1: Create a private DNS Zone
- Task 2: Link subnet for auto registration
- Task 3: Create Virtual Machines to test the configuration
- Task 4: Verify records are present in the DNS zone
Important: This exercise requires a virtual network from the previous lab. This can be installed using a template file. All of the virtual networks will be installed, but only the CoreServicesVNet is needed.
Task 1: Create a private DNS Zone
-
Go to Azure Portal.
-
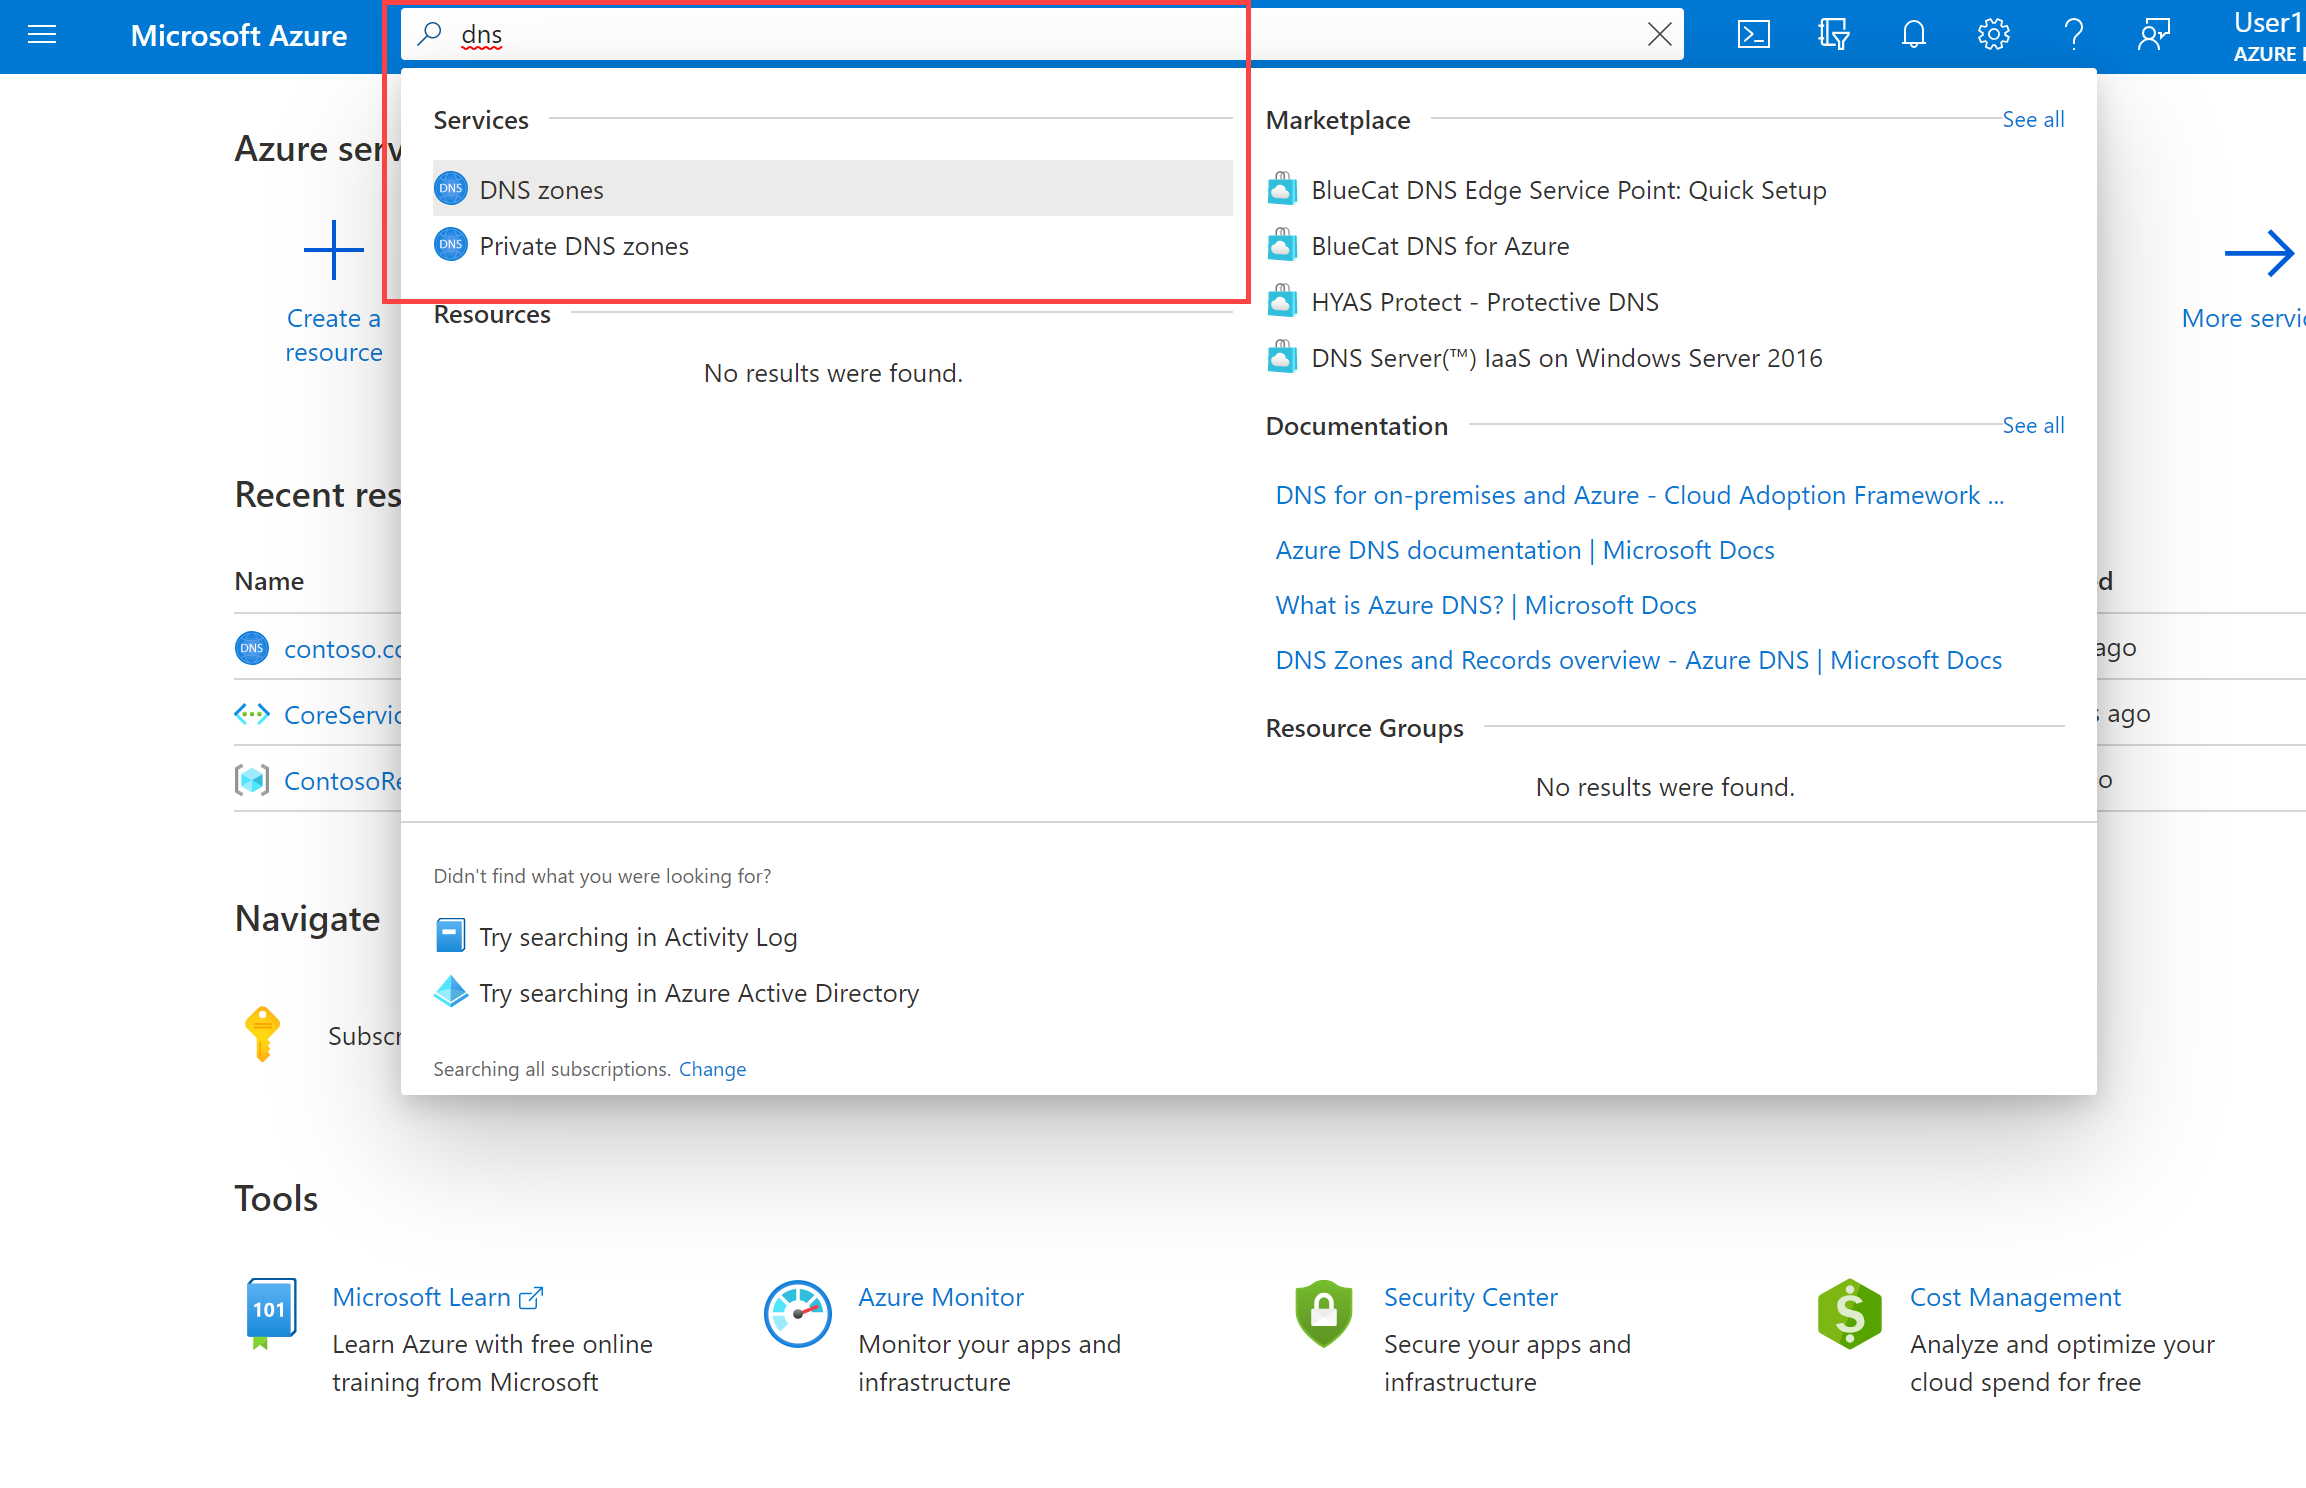
On the Azure home page, in the search bar, enter dns, and then select Private DNS zones.
-
In Private DNS zones, select + Create.
-
Use the information in the following table to create the private DNS zone.
Tab Option Value Basics Resource group (create new if needed) ContosoResourceGroupName Contoso.comReview + create Review your settings and select Create -
Wait until the deployment is complete, and then select Go to resource.
-
Verify that the zone has been created.
Task 2: Link subnet for auto registration
-
In Contoso.com, under DNS Management, select Virtual Network Links.
-
On Contoso.com | Virtual Network Links, select + Add.
-
Use the information in the following table to add the virtual network link.
Option Value Link name CoreServicesVnetLinkSubscription No changes required Virtual Network CoreServicesVnet (ContosoResourceGroup) Enable auto registration Selected Review your settings and select Create. -
Select Refresh.
-
Verify that the CoreServicesVnetLink has been created, and that auto-registration is enabled.
Task 3: Create Virtual Machines to test the configuration
In this section, you will create two test VMs to test the Private DNS zone configuration.
- In the Azure portal, select the Cloud Shell icon (top right). If necessary, configure the shell.
- Select PowerShell.
- Select No Storage Account required and your Subscription, then select Apply.
- Wait for the terminal to create and a prompt to be displayed.
-
On the toolbar of the Cloud Shell pane, select the Manage Files icon, in the drop-down menu, select Upload and upload the template files: azuredeploy.json and azuredeploy.parameters.json from the \Allfiles\Exercises\M01\ folder.
Note: If you are working in your own subscription the template files are available in the GitHub lab repository.
-
Deploy the following ARM templates to create the VMs needed for this exercise:
Note: You will be prompted to provide an Admin password. You will need this password in a later step.
$RGName = "ContosoResourceGroup" New-AzResourceGroupDeployment -ResourceGroupName $RGName -TemplateFile azuredeploy.json -TemplateParameterFile azuredeploy.parameters.json -
When the deployment is complete, go to the Azure portal home page, and then select Virtual Machines.
- Verify that both virtual machines have been created.
Task 4: Verify records are present in the DNS zone
-
On the Azure Portal home page, select Private DNS zones.
-
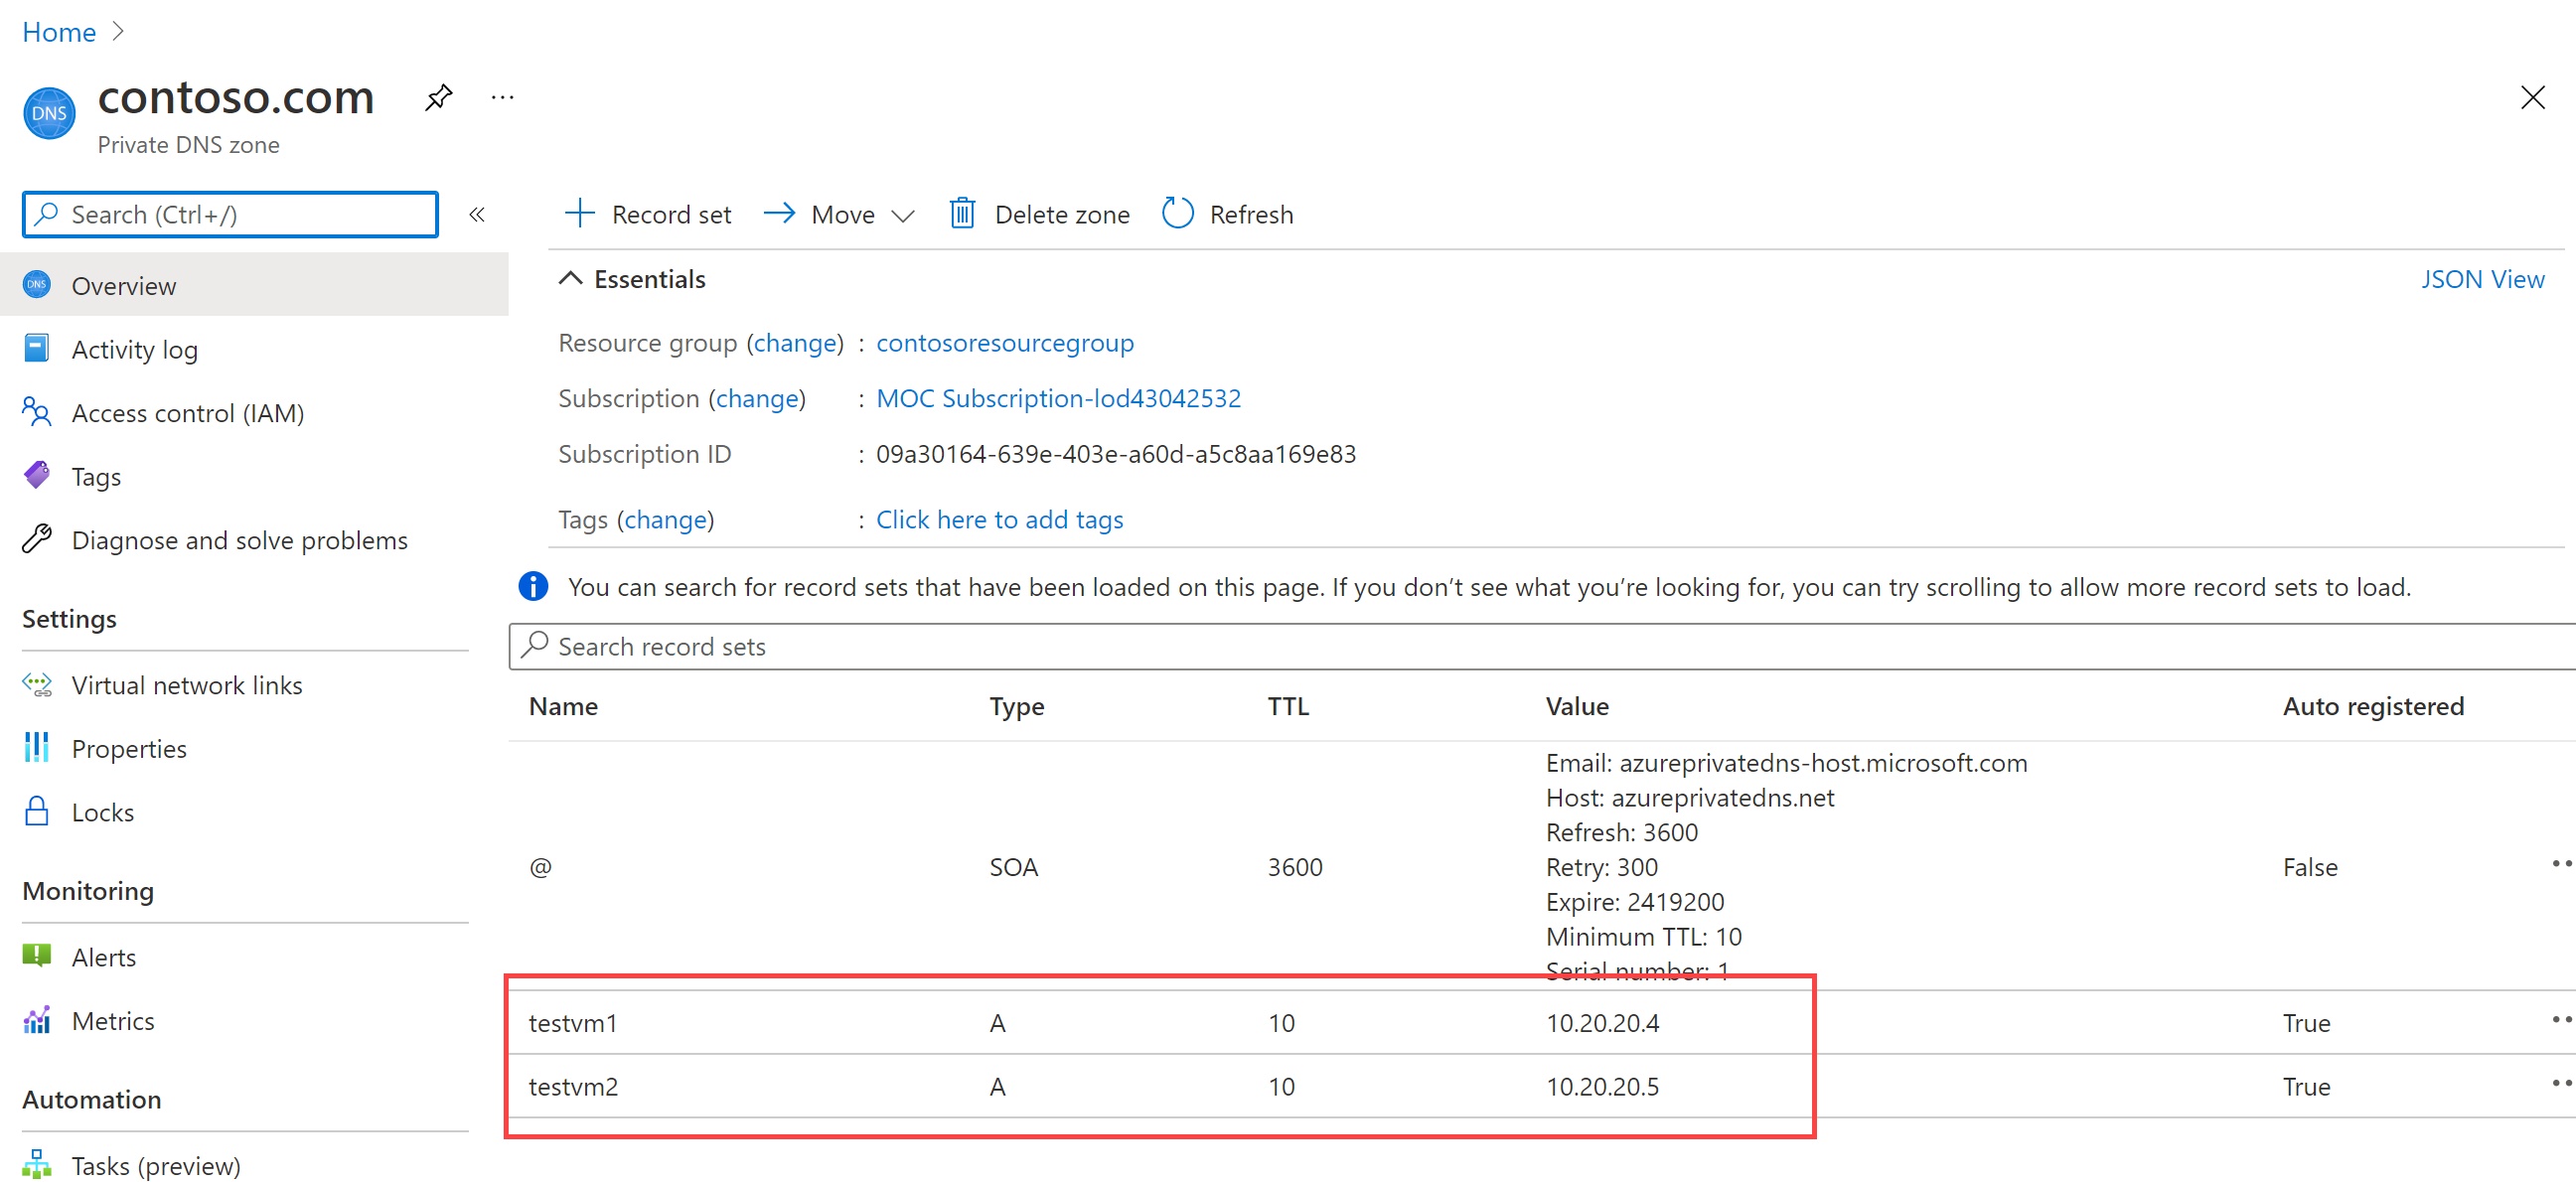
On Private DNS zones, select contoso.com.
-
Verify that host (A) records are listed for both VMs, as shown:
-
Make a note of the names and IP addresses of the VMs.
Connect to a VM to test the name resolution
-
On the Azure Portal home page, select Virtual Machines.
-
Select TestVM1.
-
On TestVM1, select Connect > Connect and download the RDP file. Ensure the file downloads successfully.
-
Locate the RDP file and double-click to execute the file.
-
Select Connect and provide the TestUser password you provided during the template deployment.
-
Select Okay and then Yes at the warning page.
-
On TestVM1, open a command prompt and enter the command
ipconfig /all. -
Notice the IP address is the same as the one in the DNS zone.
-
Enter the command
ping TestVM2.contoso.com.Note: This command will timeout because of the Windows Firewall that is enabled on the VMs.
-
Instead, use the
nslookup TestVM2.contoso.comcommand.Note: This command is successful, and demonstrates private zone name resolution.
Extend your learning with Copilot
Copilot can assist you in learning how to use the Azure scripting tools. Copilot can also assist in areas not covered in the lab or where you need more information. Open an Edge browser and choose Copilot (top right) or navigate to copilot.microsoft.com. Take a few minutes to try these prompts.
- What is the difference between Azure DNS and Azure Private DNS? Provide examples of when to use Azure private DNS.
- What is the purpose of auto registration when creating an Azure DNS zone?
Learn more with self-paced training
- Introduction to Azure DNS. This module explains what Azure DNS does, how it works, and when you should choose to use Azure DNS as a solution to meet your organization’s needs.
- Host your domain on Azure DNS. In this module, you create a DNS zone and DNS records to map the domain to an IP address. You also test to ensure the domain name resolves to your web server.
Key takeaways
Congratulations on completing the lab. Here are the main takeaways for this lab.
- Azure DNS is a cloud service that allows you to host and manage domain name system (DNS) domains, also known as DNS zones.
- Azure DNS public zones host domain name zone data for records that you intend to be resolved by any host on the internet.
- Azure Private DNS zones allow you to configure a private DNS zone namespace for private Azure resources.
- A DNS zone is a collection of DNS records. DNS records provide information about the domain.