Lab 07 - Manage Azure Storage
Lab introduction
In this lab you learn to create storage accounts for Azure blobs and Azure files. You learn to configure and secure blob containers. You also learn to use Storage Browser to configure and secure Azure file shares.
This lab requires an Azure subscription. Your subscription type may affect the availability of features in this lab. You may change the region, but the steps are written using East US.
Estimated timing: 50 minutes
Lab scenario
Your organization is currently storing data in on-premises data stores. Most of these files are not accessed frequently. You would like to minimize the cost of storage by placing infrequently accessed files in lower-priced storage tiers. You also plan to explore different protection mechanisms that Azure Storage offers, including network access, authentication, authorization, and replication. Finally, you want to determine to what extent Azure Files is suitable for hosting your on-premises file shares.
Architecture diagram
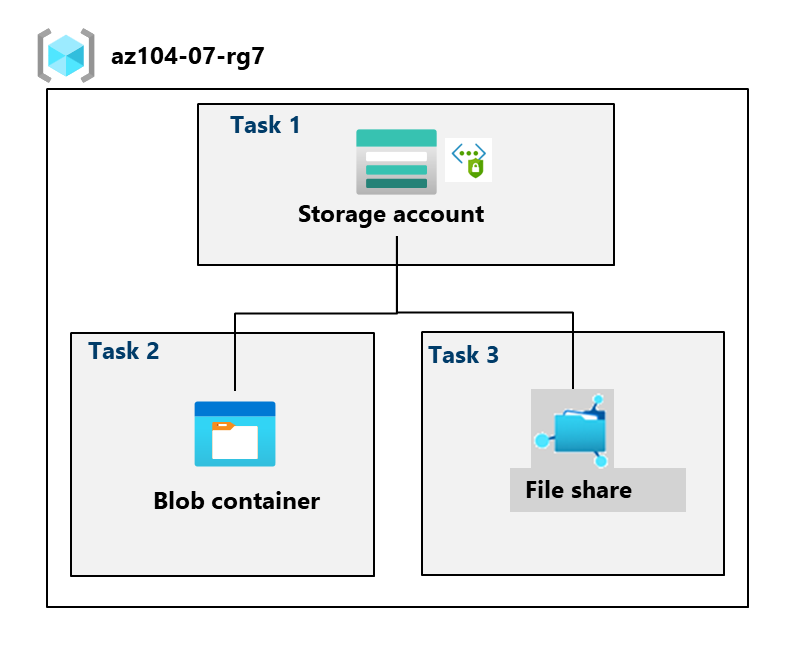
Job skills
- Task 1: Create and configure a storage account.
- Task 2: Create and configure secure blob storage.
- Task 3: Create and configure secure Azure file storage.
Task 1: Create and configure a storage account.
In this task, you will create and configure a storage account. The storage account will use geo-redundant storage and will not have public access.
-
Sign in to the Azure portal -
https://portal.azure.com. -
Search for and select
Storage accounts, select Storage accounts in the results, and then click + Create. -
On the Basics tab of the Create a storage account blade, specify the following settings (leave others with their default values):
Setting Value Subscription the name of your Azure subscription Resource group az104-rg7 (create new) Storage account name any globally unique name between 3 and 24 in length consisting of letters and digits Region (US) East US Performance Standard (notice the Premium option) Preferred storage type Azure Blob Storage or Azure Data Lake Storage Redundancy Geo-redundant storage (notice the other options) Make read access to data available in the event of regional unavailability. Check the box Did you know? You should use the Standard performance tier for most applications. Use the Premium performance tier for enterprise or high-performance applications.
-
On the Advanced and Security tabs, use the informational icons to learn more about the choices. Take the defaults.
-
On the Networking tab, in the Public network access section, select Disable. This will restrict inbound access while allowing outbound access.
-
Review the Data protection tab. Notice 7 days is the default soft delete retention policy. Note you can enable versioning for blobs. Accept the defaults.
-
Review the Encryption tab. Notice the additional security options. Accept the defaults.
-
Select Review + create, wait for the validation process to complete, and then click Create.
-
Once the storage account is deployed, select Go to resource.
-
Review the Overview blade and the additional configurations that can be changed. These are global settings for the storage account. Notice the storage account can be used for Blob containers, File shares, Queues, and Tables.
-
In the Security + networking blade, select Networking. Notice Public network access is disabled.
-
Under Public network access, click Manage to open the Public network access configuration blade.
-
Set Public network access to Enabled. Set Public network access scope to Enable from selected networks.
-
In the Resource settings: Virtual networks, IP Addresses and exceptions section, Add your client IPv4 address.
-
Save your changes. If an informational banner appears suggesting you associate a network security perimeter, you can disregard it and continue.
-
-
In the Data management blade, select Redundancy. Notice the information about your primary and secondary data center locations.
-
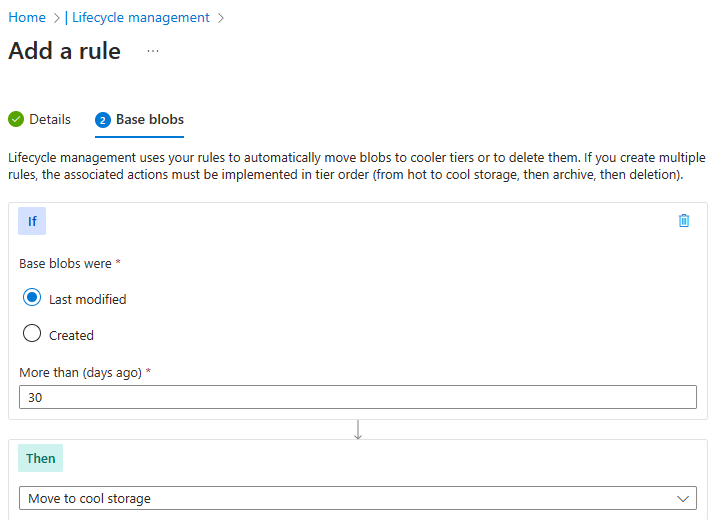
In the Data management blade, select Lifecycle management, and then select Add a rule.
-
Name the rule
Movetocool. Notice your options for limiting the scope of the rule. Click Next. -
On the Add rule page, if base blobs were last modified more than
30days ago then Move to cool storage. Notice your other choices. -
Notice you can configure other conditions. Select Add when you are done exploring.
-
Task 2: Create and configure secure blob storage
In this task, you will create a blob container and upload an image. Blob containers are directory-like structures that store unstructured data.
Create a blob container and a time-based retention policy
-
Continue in the Azure portal, working with your storage account.
-
In the Data storage blade, select Containers.
-
Click + Add container and Create a container with the following settings:
Setting Value Name dataPublic access level Notice the access level is set to private 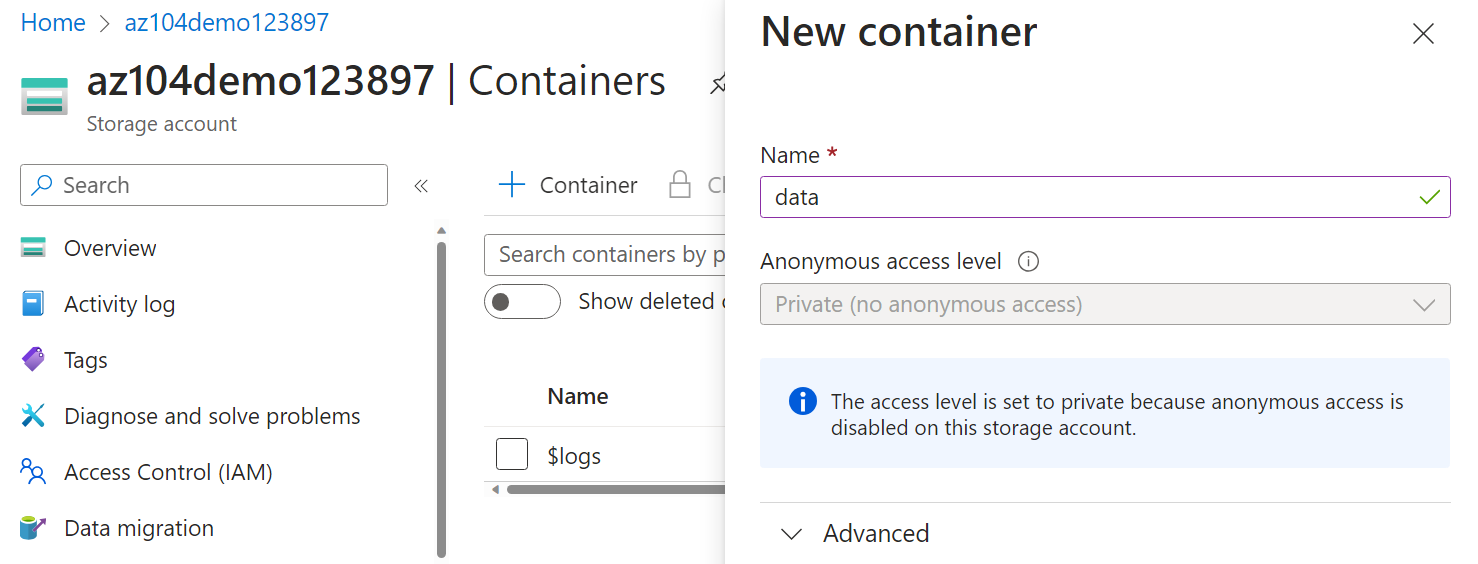
-
On your container, scroll to the ellipsis (…) on the far right, select Access policy.
-
If a warning appears stating that authorization with Shared Key is disabled for the account, you can disregard it and continue.
-
In the Immutable blob storage area, select Add policy, change the type from Legal hold to Time-based retention.
Setting Value Policy type Time-based retention Set retention period for 180days -
Select Save.
Manage blob uploads
-
In the storage account’s left menu, select Configuration and set Allow storage account key access to Enabled, then click Save.
-
Next, navigate to Access Control (IAM), click Add role assignment, select the Storage Blob Data Contributor role and Storage File Data Privileged Contributor role, assign it to your user account, and click Review + assign.
-
Once access is configured, select your data container and then click Upload.
-
On the Upload blob blade, expand the Advanced section.
Note: Locate a file to upload. This can be any type of file, but a small file is best. A sample file can be downloaded from the AllFiles directory.
Setting Value Browse for files add the file you have selected to upload Select Advanced Blob type Block blob Block size 4 MiB Access tier Hot (notice the other options) Upload to folder securitytestEncryption scope Use existing default container scope -
Click Upload.
-
Confirm you have a new folder, and your file was uploaded.
-
Select your upload file and review the ellipsis (…) options including Download, Delete, Change tier, and Acquire lease.
-
Select the uploaded file to open its Overview panel, then copy the URL using the Copy to clipboard button in the Properties table. Paste the URL into a new InPrivate browser window.
-
You should be presented with an XML-formatted message stating ResourceNotFound or PublicAccessNotPermitted.
Note: This is expected, since the container you created has the public access level set to Private (no anonymous access).
Configure limited access to the blob storage
-
Browse back to the file that you uploaded and select the ellipsis (…) to the far right, then select Generate SAS.
-
Note the warning banner stating that authorization with Shared Key is disabled for this account — this means the Account key signing option will be unavailable.
-
Specify the following settings (leave others with their default values):Browse back to the file that you uploaded and select the ellipsis (…) to the far right, then select Generate SAS and specify the following settings (leave others with their default values):
Setting Value Signing method User delegation key Permissions Read (notice your other choices) Start date yesterday’s date Start time current time Expiry date tomorrow’s date Expiry time current time Allowed IP addresses leave blank -
Click Generate SAS token and URL.
-
Copy the Blob SAS URL entry to the clipboard.
-
Open another InPrivate browser window and navigate to the Blob SAS URL you copied in the previous step.
Note: You should be able to view the content of the file.
Task 3: Create and configure an Azure File storage
In this task, you will create and configure Azure File shares. You will use Storage Browser to manage the file share.
Create the file share and upload a file
-
In the Azure portal, navigate back to your storage account, in the Data storage blade, click Classic file shares.
-
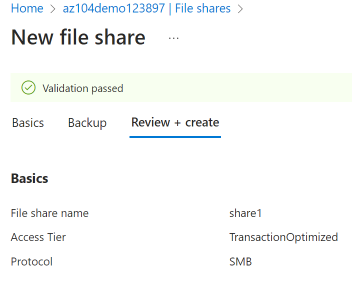
Click + Classic file share and on the Basics tab give the file share a name,
share1. -
Notice the Access tier options. Keep the default Transaction optimized.
-
Move to the Backup tab and ensure Enable backup is not checked. We are disabling backup to simplify the lab configuration.
-
Click Review + create, and then Create. Wait for the file share to deploy.
-
After the file share is created, an informational banner will appear prompting you to enable backup — you can disregard this message and continue.
Explore Storage Browser and upload a file
-
Return to your storage account and select Storage browser. The Azure Storage Browser is a portal tool that lets you quickly view all the storage services under your account.
-
Select Clasic file shares and verify your share1 directory is present.
-
Select your share1 directory and notice you can + Add directory. This lets you create a folder structure.
-
If you see an authorization error, select Switch Azure AD Account (or change the authentication method to Microsoft Entra user account) in the Storage browser toolbar.
-
Select Upload. Browse to a file of your choice, and then click Upload.
Note: You can view file shares and manage those shares in the Storage Browser. There are currently no restrictions.
Restrict network access to the storage account
-
In the portal, search for and select Network foundation.
-
Under
Virtual networksclick Create. On the Basics tab, set Resource group asaz104-rg7and give the virtual network a name,vnet1. -
Take the defaults for other parameters, select Review + create, and then Create.
-
Wait for the virtual network to deploy, and then select Go to resource.
- In the Settings section, select the Service endpoints blade.
- Select Add.
- In the Service drop-down select Microsoft.Storage.
- Leave the Service endpoint policies dropdown at its default of 0 selected.
- In the Subnets drop-down check the Default subnet.
- Click Add to save your changes.
-
Return to your storage account.
-
In the Security + networking blade, select Networking.
-
Under Public network access select Manage.
-
Select Add a virtual network and then Add existing network.
-
Select vnet1 and default subnet, select Add.
-
In the IPv4 Addresses section, Delete your machine IP address. Allowed traffic should only come from the virtual network.
-
Be sure to Save your changes.
Note: The storage account should now only be accessed from the virtual network you just created.
-
Select the Storage browser and Refresh the page. Navigate to your file share or blob content.
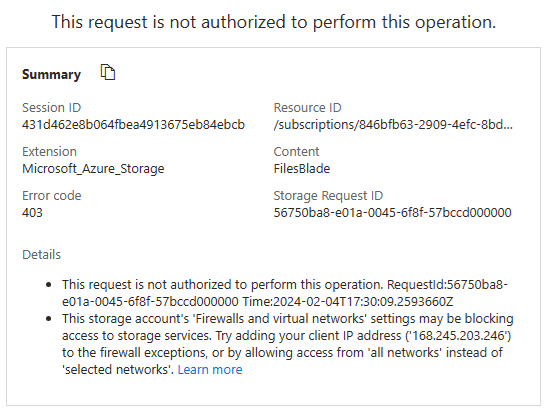
Note: You should receive a message not authorized to perform this operation. You are not connecting from the virtual network. It may take a couple of minutes for this to take effect. You may still be able to view the file share, but not the files or blobs in the storage account.
Cleanup your resources
If you are working with your own subscription take a minute to delete the lab resources. This will ensure resources are freed up and cost is minimized. The easiest way to delete the lab resources is to delete the lab resource group.
- In the Azure portal, select the resource group, select Delete the resource group, Enter resource group name, and then click Delete. When the second confirmation dialog appears stating that deleting the resource group and its dependent resources is a permanent action, click Delete again to complete the deletion.
- Using Azure PowerShell,
Remove-AzResourceGroup -Name resourceGroupName. - Using the CLI,
az group delete --name resourceGroupName.
Extend your learning with Copilot
Copilot can assist you in learning how to use the Azure scripting tools. Copilot can also assist in areas not covered in the lab or where you need more information. Open an Edge browser and choose Copilot (top right) or navigate to copilot.microsoft.com. Take a few minutes to try these prompts.
- Provide an Azure PowerShell script to create a storage account with a blob container.
- Provide a checklist I can use to ensure my Azure storage account is secure.
- Create a table to compare Azure storage redundancy models.
Learn more with self-paced training
- Guided Project - Azure Files and Azure Blobs. Practice storing business data securely by using Azure Blob Storage and Azure Files.
- Create an Azure Storage account. Create an Azure Storage account with the correct options for your business needs.
- Manage the Azure Blob storage lifecycle. Learn how to manage data availability throughout the Azure Blob storage lifecycle.
Key takeaways
Congratulations on completing the lab. Here are the main takeaways for this lab.
- An Azure storage account contains all your Azure Storage data objects: blobs, files, queues, and tables. The storage account provides a unique namespace for your Azure Storage data that is accessible from anywhere in the world over HTTP or HTTPS.
- Azure storage provides several redundancy models including Locally redundant storage (LRS), Zone-redundant storage (ZRS), and Geo-redundant storage (GRS).
- Azure blob storage allows you to store large amounts of unstructured data on Microsoft’s data storage platform. Blob stands for Binary Large Object, which includes objects such as images and multimedia files.
- Azure file Storage provides shared storage for structured data. The data can be organized in folders.
- Immutable storage provides the capability to store data in a write once, read many (WORM) state. Immutable storage policies can be time-based or legal-hold.