In this exercise, you learn how to add code to an ASP.NET Core Blazor Web app to create the HTTP client and perform GET, POST, PUT, and DELETE operations. This code is added to the .razor.cs code-behind files. The code to render the data in the .razor files is complete.
Objectives
After you complete this exercise, you will be able to:
- Implement
IHttpClientFactoryas the HTTP client - Implement HTTP operations in ASP.NET Blazor Web apps
Prerequisites
To complete the exercise you need to have the following installed on your system:
- Visual Studio Code
- The latest .NET 8.0 SDK
- The C# extension for Visual Studio Code
Estimated exercise completion time: 30 minutes
Exercise scenario
This exercise has two components:
- An app that sends HTTP requests to an API. The web app runs on
http://localhost:5010. - An API that responds to HTTP requests. The API runs on
http://localhost:5050.

Download the code
In this section you download the code for the Fruit web app and the Fruit API. You also run the Fruit API locally so it is available for the web app.
Task 1: Download and run the API code
-
Right-click the following link and select the Save link as option.
-
Launch File Explorer and navigate to the location the file was saved.
-
Unzip the file into it’s own folder.
-
Open Windows Terminal, or a Command Prompt, and navigate to the location you extracted the code for the API.
-
In Windows Terminal pane run the following
dotnetcommand:dotnet run -
Following is an example of the generated output. Note the
Now listening on: http://localhost:5050line in the output. It identifies the host and port for the API.info: Microsoft.EntityFrameworkCore.Update[30100] Saved 3 entities to in-memory store. info: Microsoft.Hosting.Lifetime[14] Now listening on: http://localhost:5050 info: Microsoft.Hosting.Lifetime[0] Application started. Press Ctrl+C to shut down. info: Microsoft.Hosting.Lifetime[0] Hosting environment: Development info: Microsoft.Hosting.Lifetime[0] Content root path: <project location>
Note: Leave the Fruit API running throughout the rest of the exercise.
Task 2: Download and open web app project
-
Right-click the following link and select the Save link as option.
-
Launch File Explorer and navigate to the location the file was saved.
-
Unzip the file into it’s own folder.
-
Launch Visual Studio Code and select File and then Open Folder… in the menu bar.
-
Navigate to the location where you unzipped the project files and select the FruitWebApp-codebehind folder.
-
The project structure in the Explorer pane should be similar the following screenshot. If the Explorer pane isn’t visible, select View then select Explorer in the menu bar.
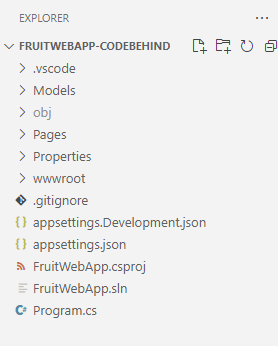
Note: Take time to review the code in each of the files being edited throughout this exercise. The code is heavily commented and can help you understand the code base.
Implement code for the HTTP client and HTTP operations
The Fruit web app displays the API sample data on the home page and has add, edit, and delete functionality. You need to add code to implement the HTTP client operations.
Task 1: Implement the HTTP client
-
Select the Program.cs file in the Explorer pane to open it for editing.
-
Add the following code between the
// Begin HTTP client codeand// End of HTTP client codecomments.// Add IHttpClientFactory to the container and set the name of the factory // to "FruitAPI". The base address for API requests is also set. builder.Services.AddHttpClient("FruitAPI", httpClient => { httpClient.BaseAddress = new Uri("http://localhost:5050/"); }); -
Save the changes to Program.cs.
Task 2: Implement the GET operation
-
Select the home.razor.cs file in the Explorer pane to open it for editing. It is located in the
Components/Pagesfolder. -
Add the following code between the
// Begin GET operation codeand// End GET operation codecomments.protected override async Task OnInitializedAsync() { // Create the HTTP client using the FruitAPI named factory var httpClient = HttpClientFactory.CreateClient("FruitAPI"); // Perform the GET request and store the response. The parameter // in GetAsync specifies the endpoint in the API using HttpResponseMessage response = await httpClient.GetAsync("/fruits"); // If the request is successful deserialize the results into the data model if (response.IsSuccessStatusCode) { using var contentStream = await response.Content.ReadAsStreamAsync(); _fruitList = await JsonSerializer.DeserializeAsync<IEnumerable<FruitModel>>(contentStream); } else { // If the request is unsuccessful, log the error message Console.WriteLine($"Failed to load fruit list. Status code: {response.StatusCode}"); } } -
Save the changes to Home.razor.cs.
-
Review the code in the Home.razor.cs file. Note where the
IHttpClientFactoryis added to the page with dependency injection.
Task 3: Implement the POST operation
-
Select the Add.razor.cs file in the Explorer pane to open it for editing.
-
Add the following code between the
// Begin POST operation codeand// End POST operation codecomments.private async Task Submit() { // Serialize the information to be added to the database var jsonContent = new StringContent(JsonSerializer.Serialize(_fruitList), Encoding.UTF8, "application/json"); // Create the HTTP client using the FruitAPI named factory var httpClient = HttpClientFactory.CreateClient("FruitAPI"); // Execute the POST request and store the response. The response will contain the new record's ID using HttpResponseMessage response = await httpClient.PostAsync("/fruits", jsonContent); // Check if the operation was successful, and navigate to the home page if it was if (response.IsSuccessStatusCode) { NavigationManager?.NavigateTo("/"); } else { Console.WriteLine("Failed to add fruit. Status code: {response.StatusCode}"); } } -
Save the changes to Add.razor.cs, and review the comments in the code.
Task 4: Implement the PUT operation
-
Select the Edit.razor.cs file in the Explorer pane to open it for editing.
-
Add the following code between the
// Begin PUT operation codeand// End PUT operation codecomments.private async Task Submit() { // Create the HTTP client using the FruitAPI named factory var httpClient = HttpClientFactory.CreateClient("FruitAPI"); // Store the updated data in a JSON object var jsonContent = new StringContent(JsonSerializer.Serialize(_fruitList), Encoding.UTF8, "application/json"); // Execute the PUT request using HttpResponseMessage response = await httpClient.PutAsync($"/fruits/{Id}", jsonContent); // If the response is successful, navigate back to the home page if (response.IsSuccessStatusCode) { NavigationManager?.NavigateTo("/"); } else { Console.WriteLine("Failed to update fruit with edits. Status code: {response.StatusCode}"); } } -
Save the changes to Edit.razor.cs, and review the comments in the code.
Task 5: Implement the DELETE operation
-
Select the Delete.razor.cs file in the Explorer pane to open it for editing.
-
Add the following code between the
// Begin DELETE operation codeand// End DELETE operation codecomments.private async Task Submit() { // Create the HTTP client using the FruitAPI named factory var httpClient = HttpClientFactory.CreateClient("FruitAPI"); // Execute the DELETE request and store the response using HttpResponseMessage response = await httpClient.DeleteAsync("/fruits/" + Id.ToString()); // Return to the home page if (response.IsSuccessStatusCode) { NavigationManager?.NavigateTo("/"); } else { Console.WriteLine("Failed to delete fruit. Status code: {response.StatusCode}"); } } -
Save the changes to Delete.razor.cs, and review the comments in the code.
Run and test the web app
Task 1: Run the web app
-
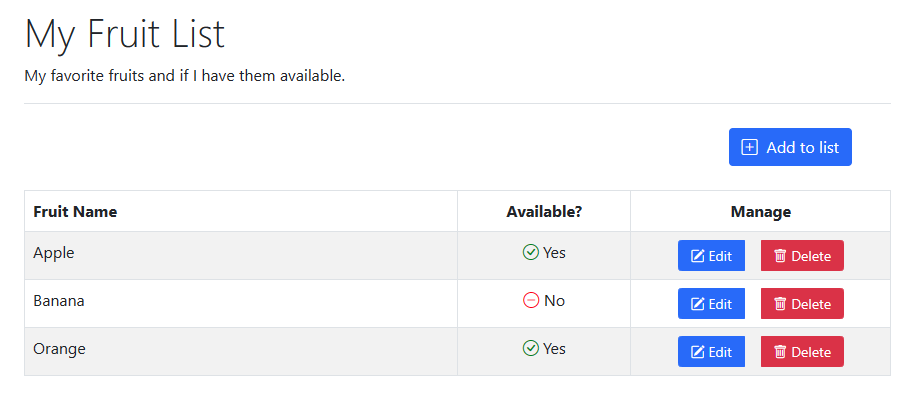
In the Visual Studio Code top menu select Run | Start debugging, or select F5. After the project is finished building a browser window should launch with the web app running and displaying the API sample data as shown in the following screenshot.
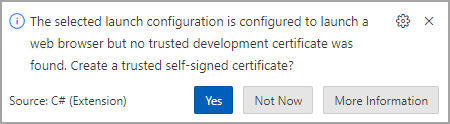
Note: You can safely ignore the prompt below if it appears when you run the app.
Task 1: Test the web app
-
Select the Add to list button and fill in the generated the form. Then select the Create button.
-
Verify that your addition appears at the bottom of the list.
- Choose an item in the list to edit and select the Edit button.
-
Edit the Fruit Name and the Available? field, then select Update.
-
Verify that your changes appear in the list.
-
Choose an item in the list to delete and select the Delete button.
-
On the Delete page, verify that the item you selected is displayed, and click the Delete button.
- Verify that the item no longer appears in the list.
When you are ready to end the exercise:
-
Close the browser, or browser tab, and in Visual Studio Code select Run | Stop debugging or Shift + F5.
-
Stop the Fruit API by entering Ctrl + C in the terminal it’s running in.
Review
In this exercise you learned how to:
- Implement
IHttpClientFactoryas the HTTP client - Implement HTTP operations in ASP.NET Core Blazor code-behind files