Explore language understanding
Note To complete this lab, you will need an Azure subscription in which you have administrative access.
Increasingly, we expect computers to be able to use AI in order to understand spoken or typed commands in natural language. For example, you might want to implement a home automation system that enables you to control devices in your home by using voice commands such as “switch on the light” or “put the fan on”, and have an AI-powered device understand the command and take appropriate action.
To test the capabilities of the Conversational Language Understanding service, we’ll use a command-line application that runs in the Cloud Shell. The same principles and functionality apply in real-world solutions, such as web sites or phone apps.
Create a Language service resource
You can use the Conversational Language Understanding service by creating a Language service resource.
If you haven’t already done so, create a Language service resource in your Azure subscription.
-
In another browser tab, open the Azure portal at https://portal.azure.com, signing in with your Microsoft account.
- Click the +Create a resource button, search for Language service, and create a Language service resource with the following settings:
- Select additional features: Keep the default features and click Continue to create your resource
- Subscription: Your Azure subscription.
- Resource group: Select or create a resource group with a unique name.
- Region: East US 2
- Name: Enter a unique name.
- Pricing tier: S (1K Calls per minute)
- By checking this box I certify that I have reviewed and acknowledge the terms in the Responsible AI Notice.: Selected.
- Review and create the resource, and wait for deployment to complete.
Create a Conversational Language Understanding App
To implement natural language understanding with Conversational Language Understanding, you create an app; and then add entities, intents, and utterances to define the commands you want the app to execute.
-
In a new browser tab, open the Language Studio portal at https://language.azure.com and sign in using the Microsoft account associated with your Azure subscription.
- If prompted to choose a Language resource, select the following settings:
- Azure directory: The Azure directory containing your subscription.
- Azure subscription: Your Azure subscription.
- Language resource: The Language resource you created previously.
Tip If you are not prompted to choose a language resource, it may be because you have multiple Language resources in your subscription; in which case:
- On the bar at the top if the page, click the Settings (⚙) button.
- On the Settings page, view the Resources tab.
- Select your language resource, and click Switch resource.
- At the top of the page, click Language Studio to return to the Language Studio home page.
-
At the top of the portal, in the Create new menu, select Conversational language understanding.
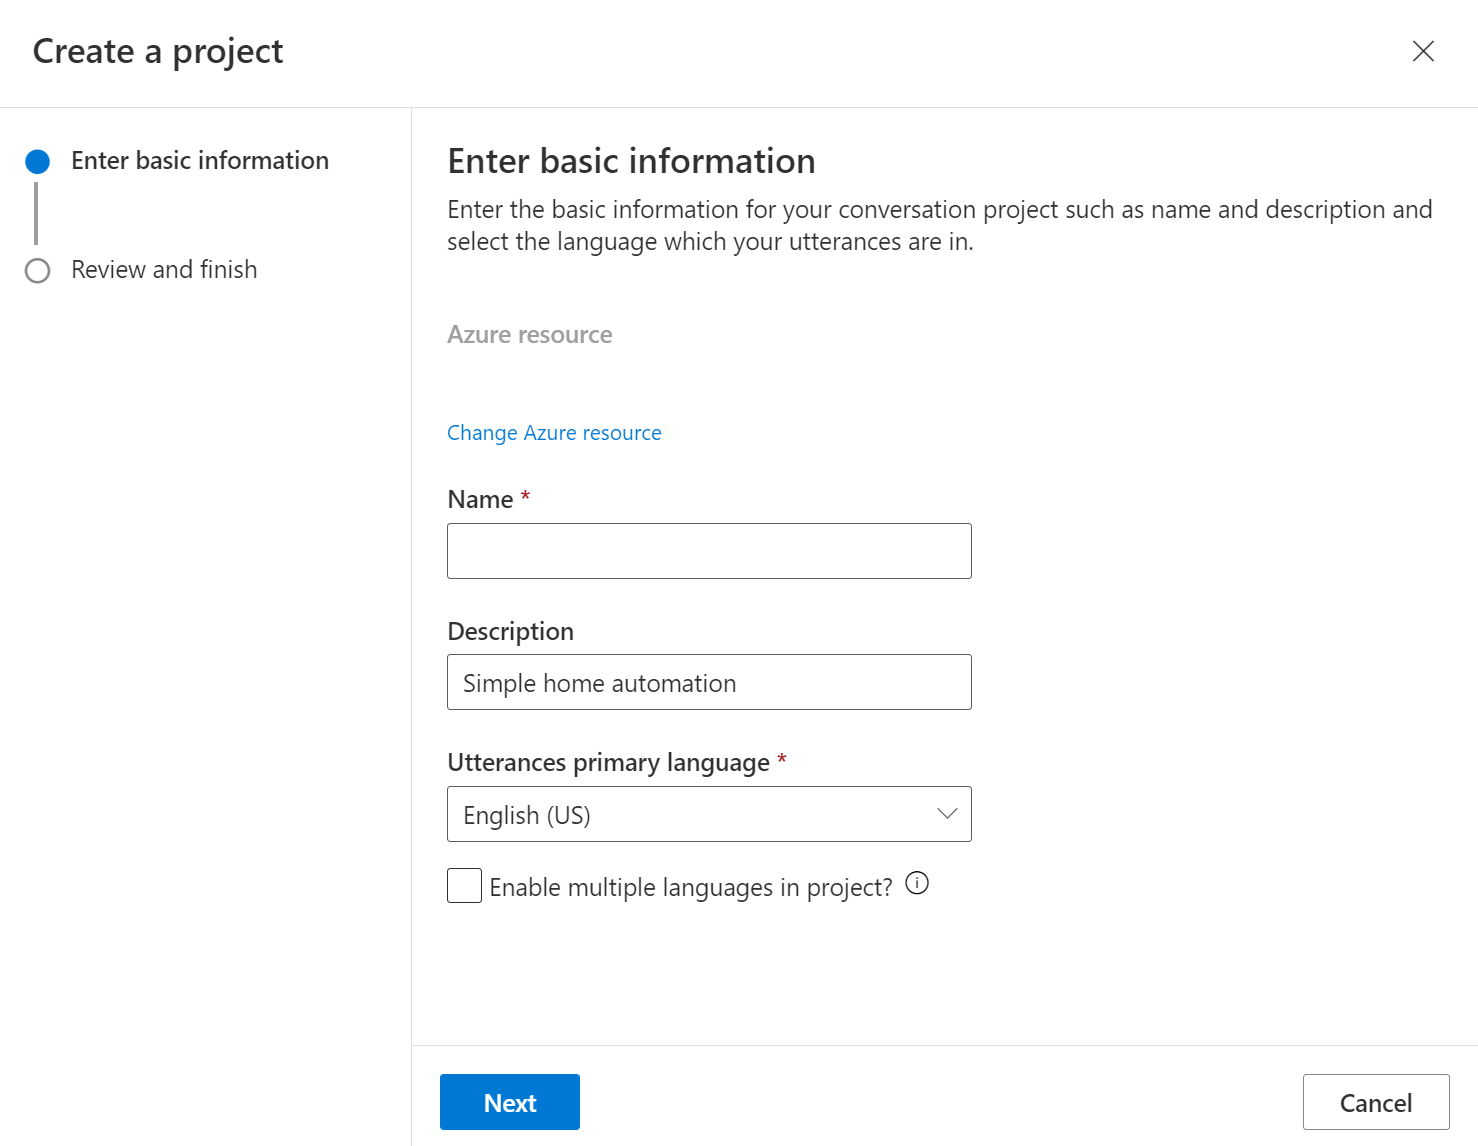
- In the Create a project dialog box, on the Enter basic information page, enter the following details and click Next:
- Name: Create a unique name
- Description: Simple home automation
- Utterances primary language: English
- Enable multiple languages in project: Do not select
Tip Write down your project name, you will use it later.
- On the Review and finish page, click Create.
Create intents, utterances, and entities
An intent is an action you want to perform - for example, you might want to switch on a light, or turn off a fan. In this case, you’ll define two intents: one to switch on a device, and another to switch off a device. For each intent, you’ll specify sample utterances that indicate the kind of language used to indicate the intent.
-
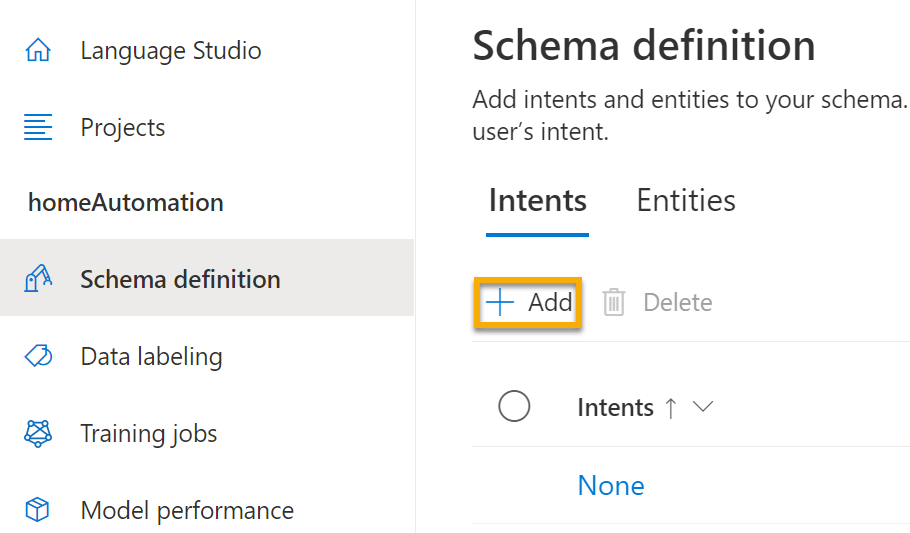
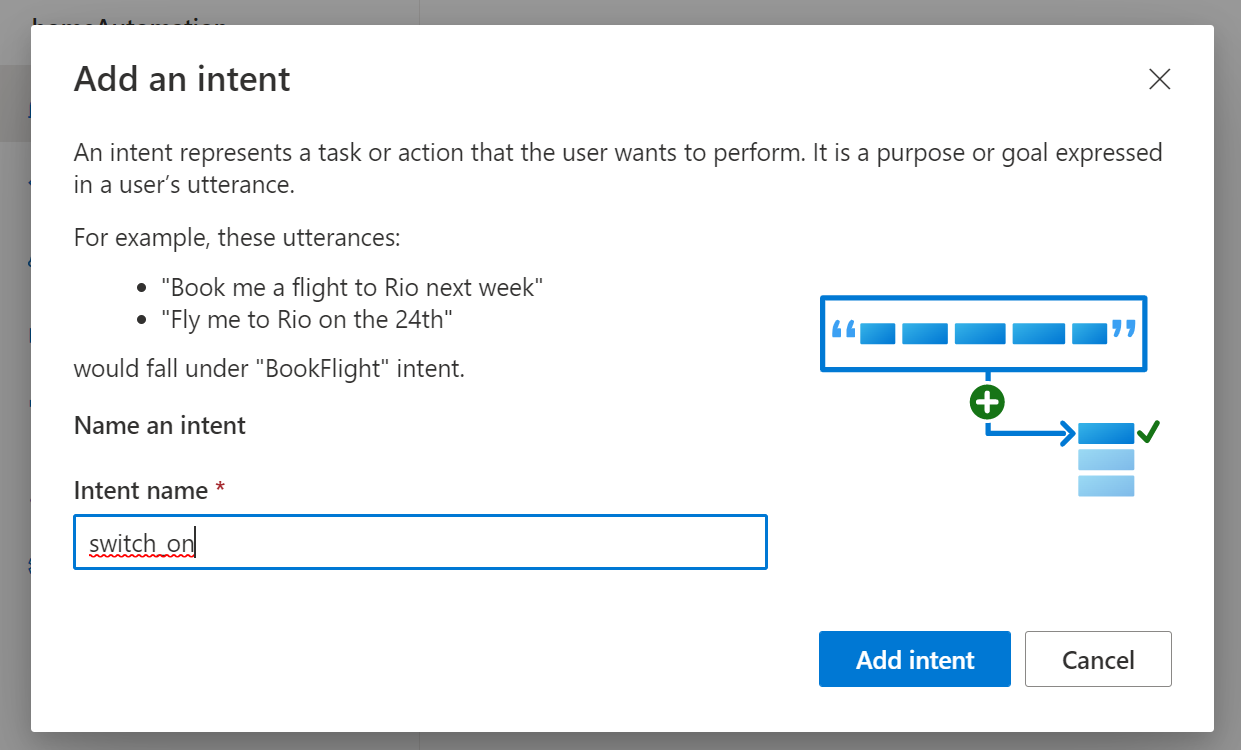
In the Schema definition pane, ensure that Intents is selected Then click Add, and add an intent with the name switch_on (in lower-case) and click Add intent.
-
Select the switch_on intent. It will take you to the Data labeling page. In the Intent drop down, select switch_on. Next to the switch_on intent, type the utterance turn the light on and press Enter to submit this utterance to the list.
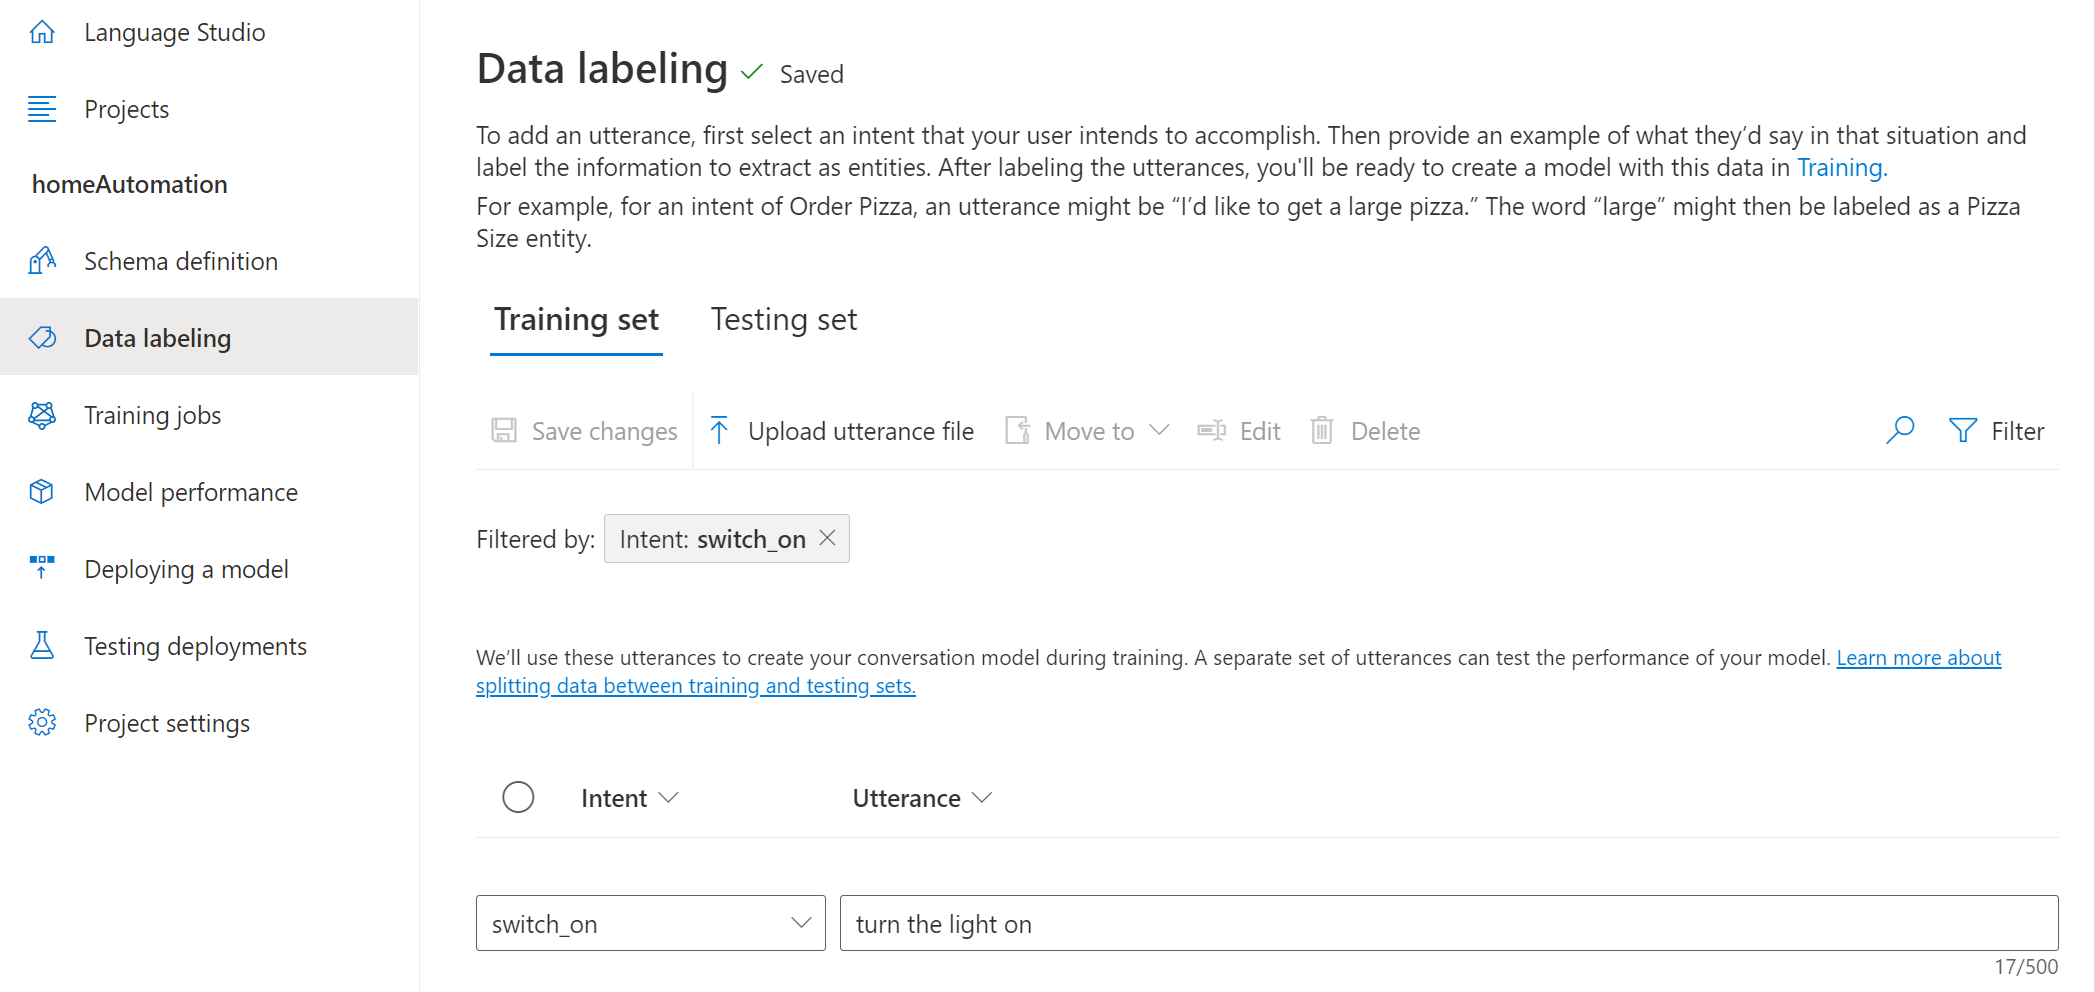
- The language service needs at least five different utterance examples for each intent to sufficiently train the language model. Add five more utterance examples for the switch_on intent:
- switch on the fan
- put the fan on
- put the light on
- switch on the light
- turn the fan on
-
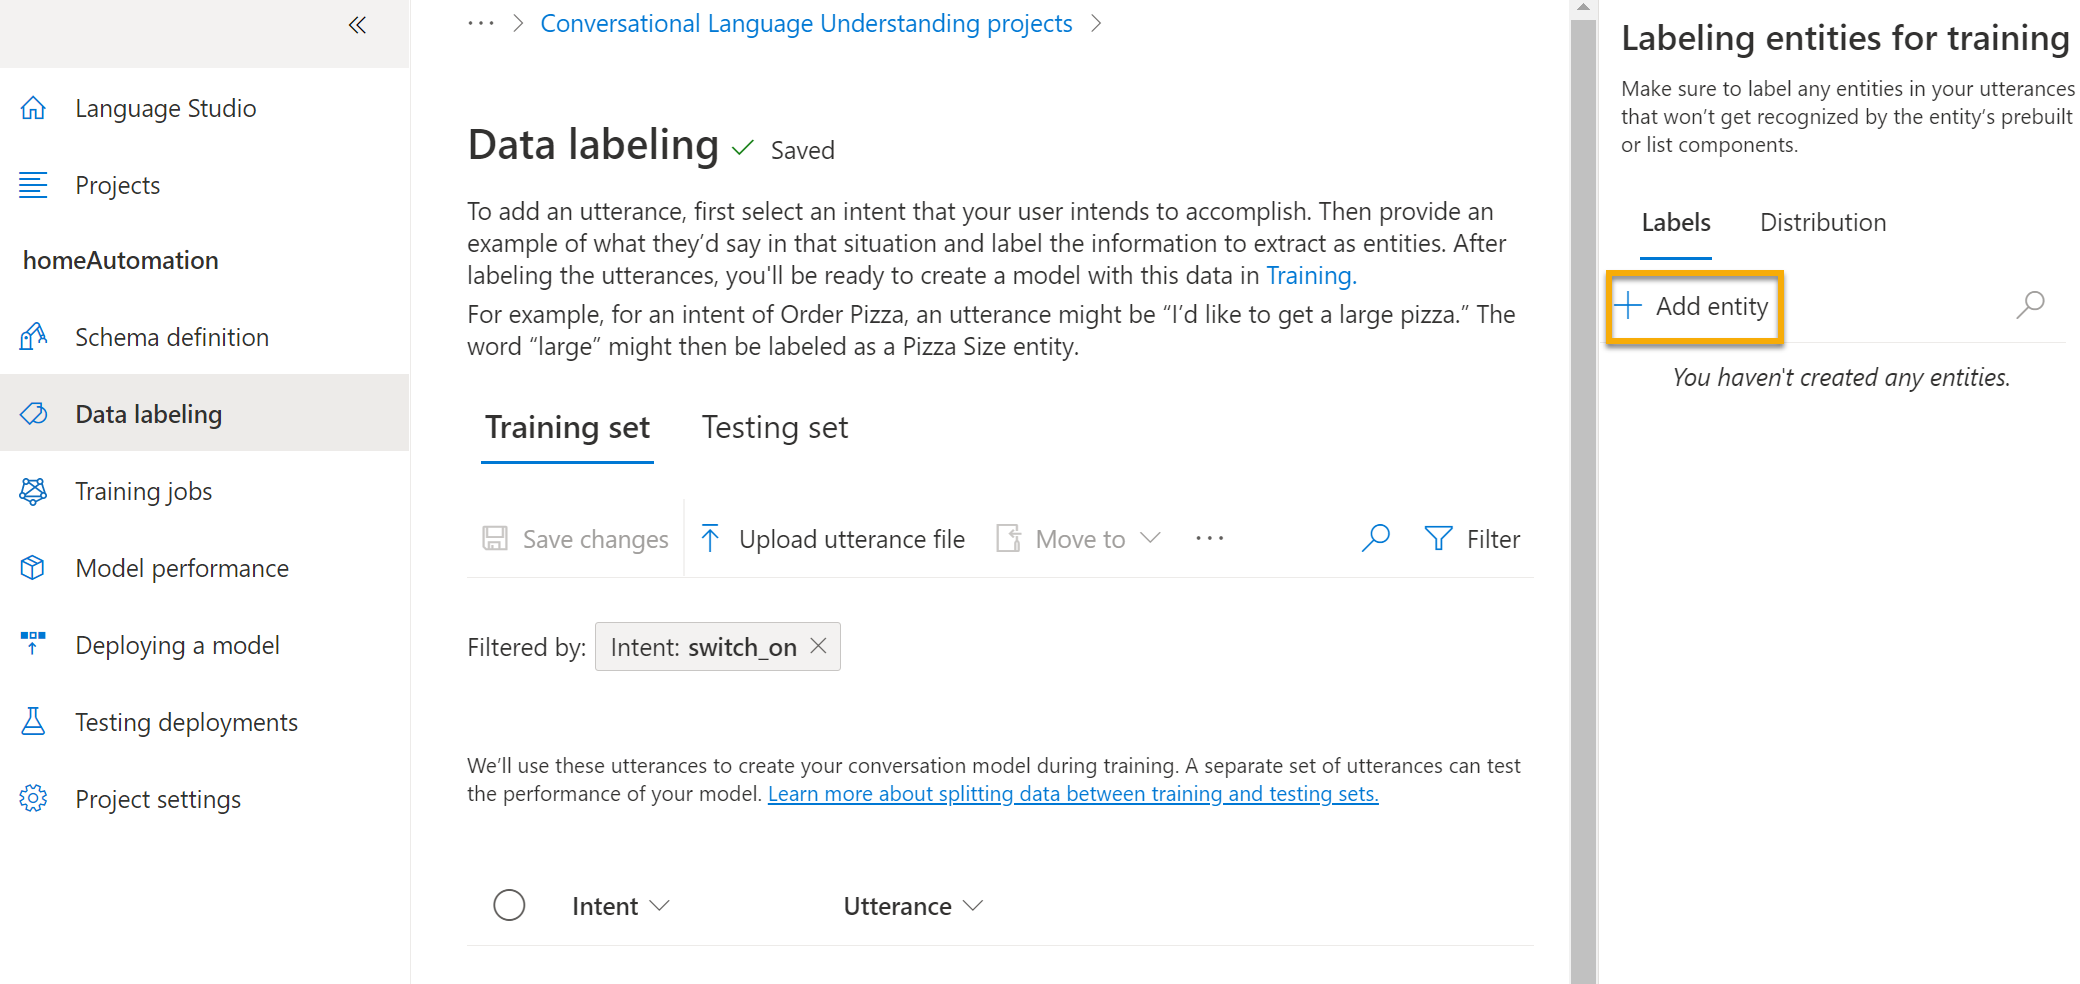
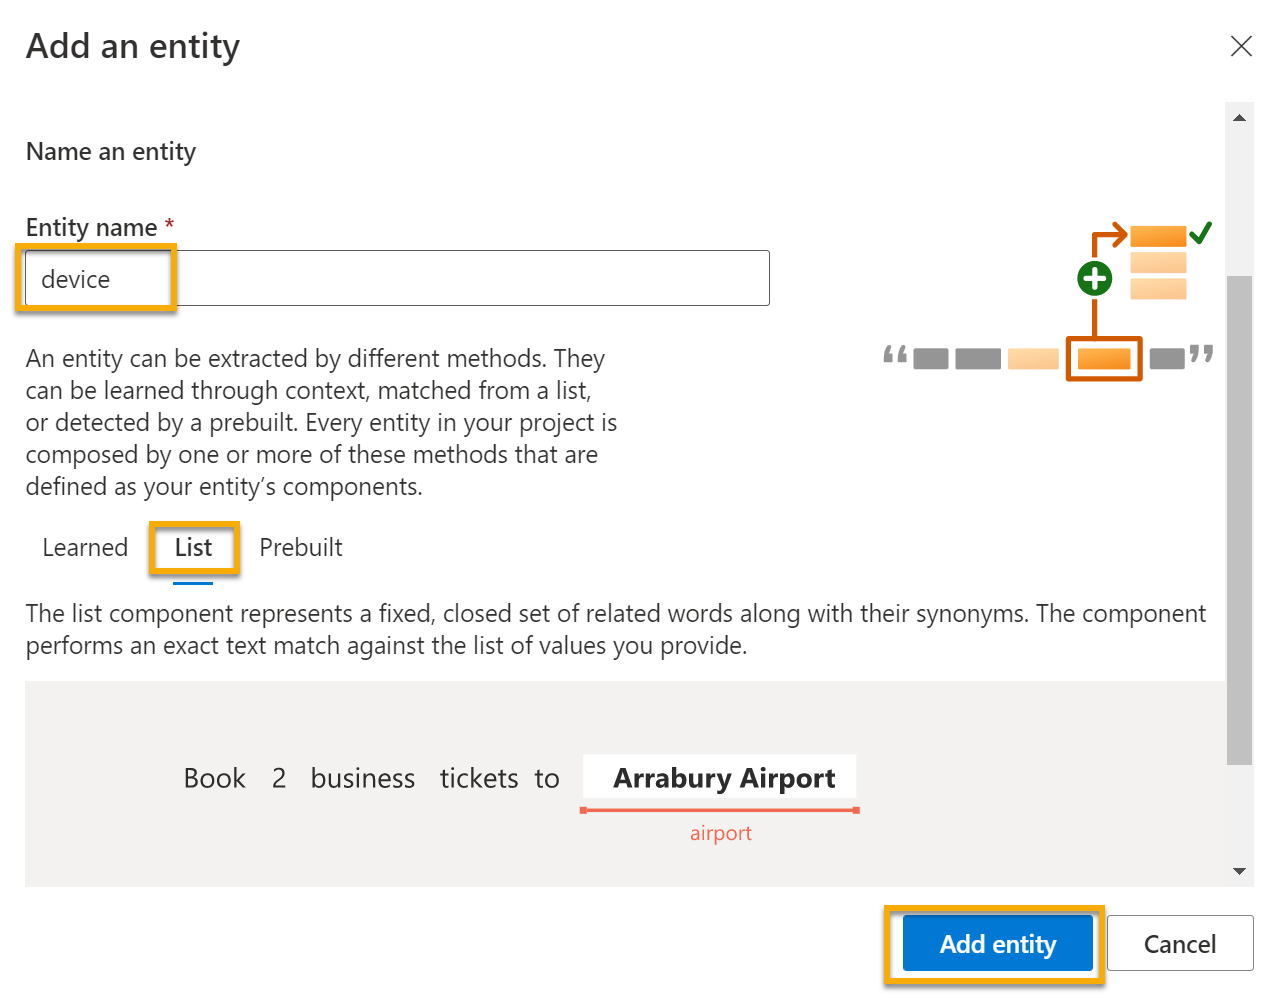
On the Labeling entities for training pane on the right-hand side of the screen, select Labels, then select Add entity. Type device (in lower-case), select List and select Add entity.
-
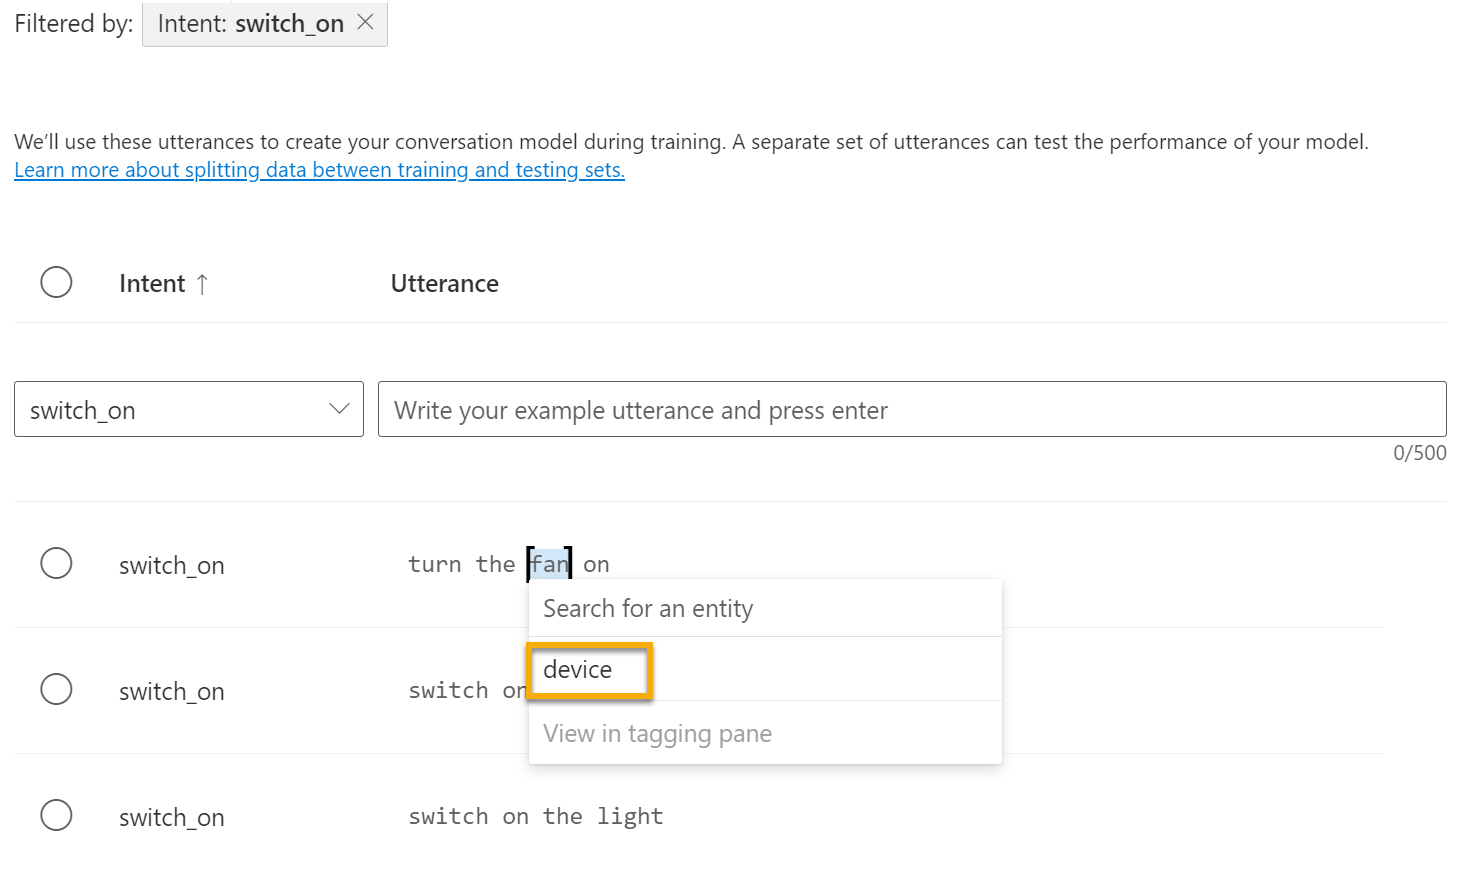
In the turn the fan on utterance, highlight the word “fan”. Then in the list that appears, in the Search for an entity box select device.
-
Do the same for all the utterances. Label the rest of the fan or light utterances with the device entity. When you’re finished, verify that you have the following utterances and make sure to select Save changes:
intent utterance entity switch_on Put on the fan Device - select fan switch_on Put on the light Device - select light switch_on Switch on the light Device - select light switch_on Turn the fan on Device - select fan switch_on Switch on the fan Device - select fan switch_on Turn the light on Device - select light 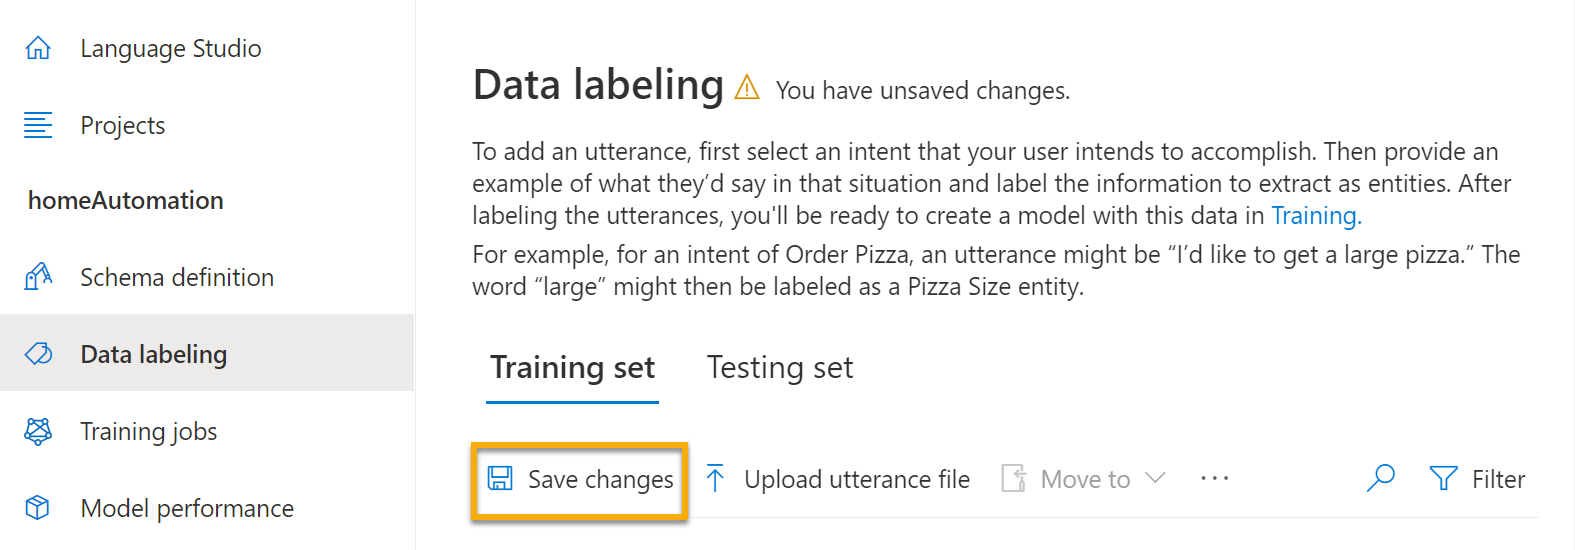
-
In the pane on the left, click Schema definition and verify that your switch_on intent is listed. Then click Add and add a new intent with the name switch_off (in lower-case).

-
Click on the switch_off intent. It will take you to the Data labeling page. In the Intent drop down, select switch_off. Next to the switch_off intent, add the utterance turn the light off.
- Add five more utterance examples to the switch_off intent.
- switch off the fan
- put the fan off
- put the light off
- turn off the light
- switch the fan off
-
Label the words light or fan with the device entity. When you’re finished, verify that you have the following utterances and make sure to select Save changes:
intent utterance entity switch_off Put the fan off Device - select fan switch_off Put the light off Device - select light switch_off Turn off the light Device - select light switch_off Switch the fan off Device - select fan switch_off Switch off the fan Device - select fan switch_off Turn the light off Device - select light
Train the model
Now you’re ready to use the intents and entities you have defined to train the conversational language model for your app.
- On the left hand side of Language Studio, select Training jobs, then select Start a training job. Use the following settings:
- Train a new model: Selected and choose a model name
- Training mode: Standard training (free)
- Data Splitting: select Automatically split the testing set from the training data, keep default percentages
- Click Train at the bottom of the page.
- Wait for training to complete.
Deploy and test the model
To use your trained model in a client application, you must deploy it as an endpoint to which the client applications can send new utterances; from which intents and entities will be predicted.
-
On the left-hand side of Language Studio, click Deploying a model.
- Select your model name and click Add deployment. Use these settings:
- Create or select an existing deployment name: Select create a new deployment name. Add a unique name.
- Assign trained model to your deployment name: Select the name of the trained model.
- Click Deploy
Tip Write down your deployment name, you will use it later.
-
When the model is deployed, click Testing deployments on the left-hand side of the page, and then select your deployed model under Deployment name.
-
Enter the following text, and then select Run the test:
switch the light on
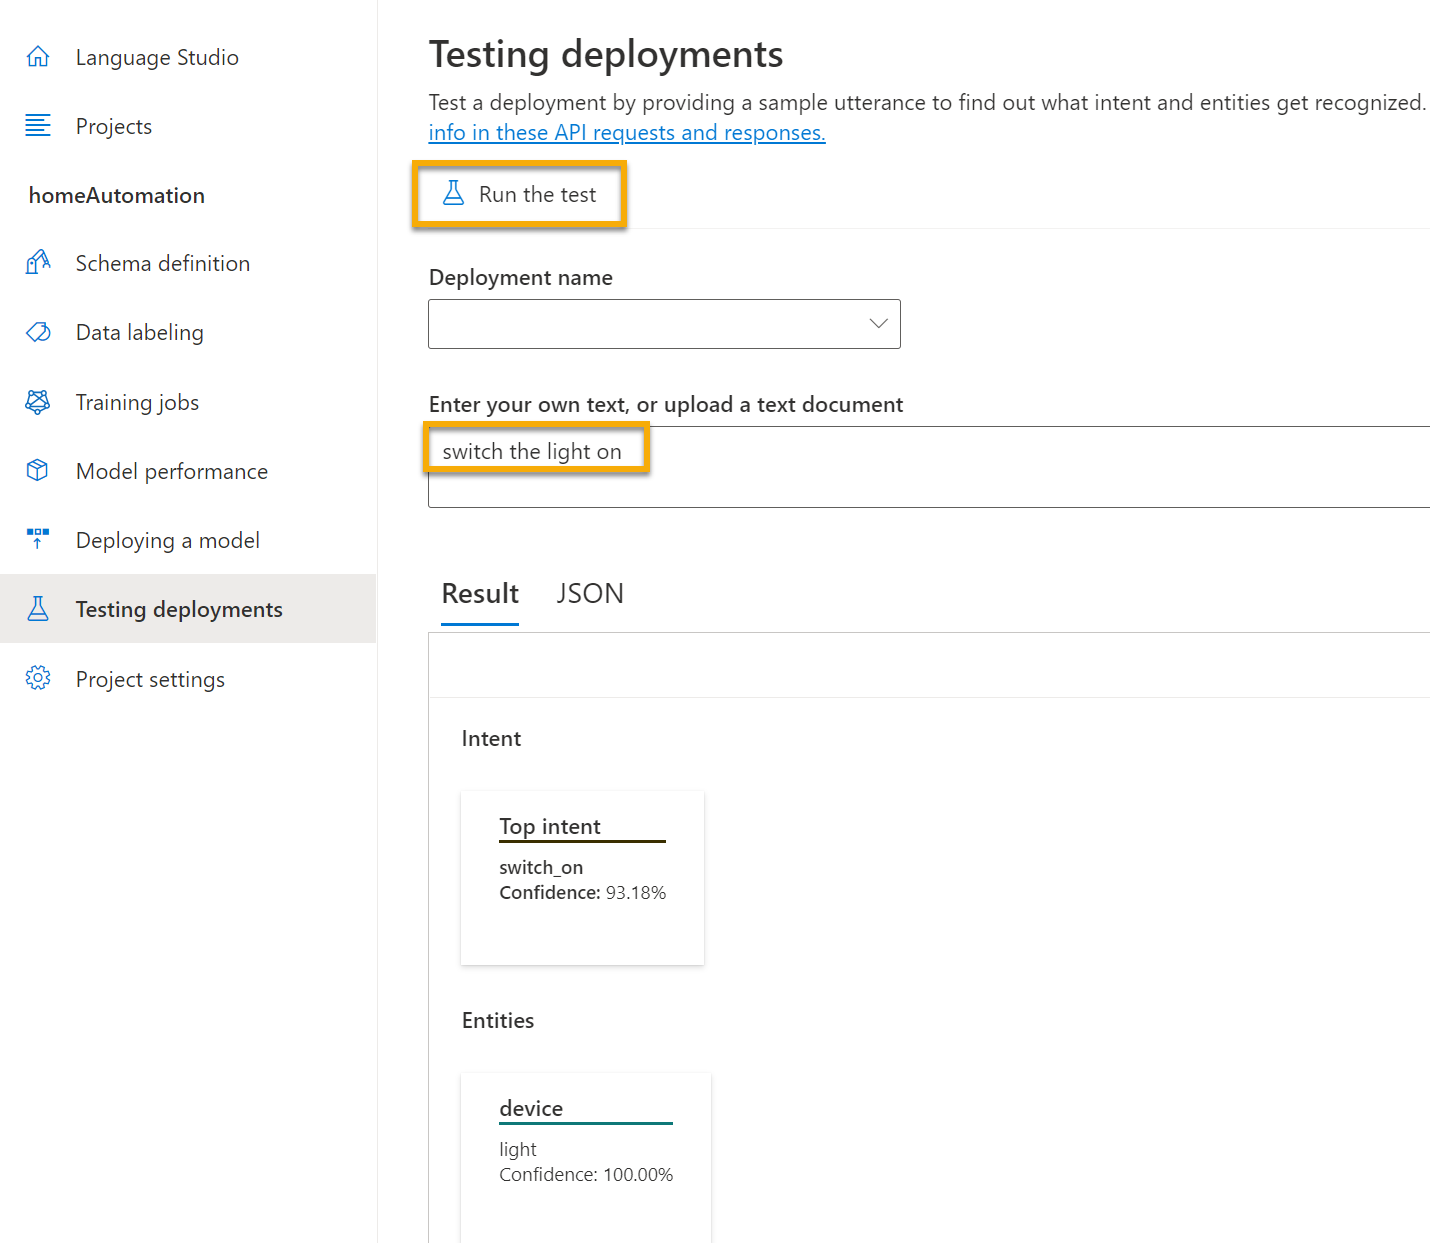
Review the result that is returned, noting that it includes the predicted intent (which should be switch_on) and the predicted entity (device) with confidence scores that indicates the probability the model calculated for the predicted intent and entity. The JSON tab shows the comparative confidence for each potential intent (the one with the highest confidence score is the predicted intent)
- Clear the text box and test the model with the following utterances under Enter your own text, or upload a text document:
- turn off the fan
- put the light on
- put the fan off
Run Cloud Shell
Now let’s try out your deployed model. To do so, we’ll use a command-line application that runs in the Cloud Shell on Azure.
-
Leaving the browser tab with Language Studio open, switch back to browser tab containing the Azure portal.
-
In the Azure portal, select the [>_] (Cloud Shell) button at the top of the page to the right of the search box. Clicking the button opens a Cloud Shell pane at the bottom of the portal.

-
The first time you open the Cloud Shell, you may be prompted to choose the type of shell you want to use (Bash or PowerShell). Select PowerShell. If you do not see this option, skip the step.
-
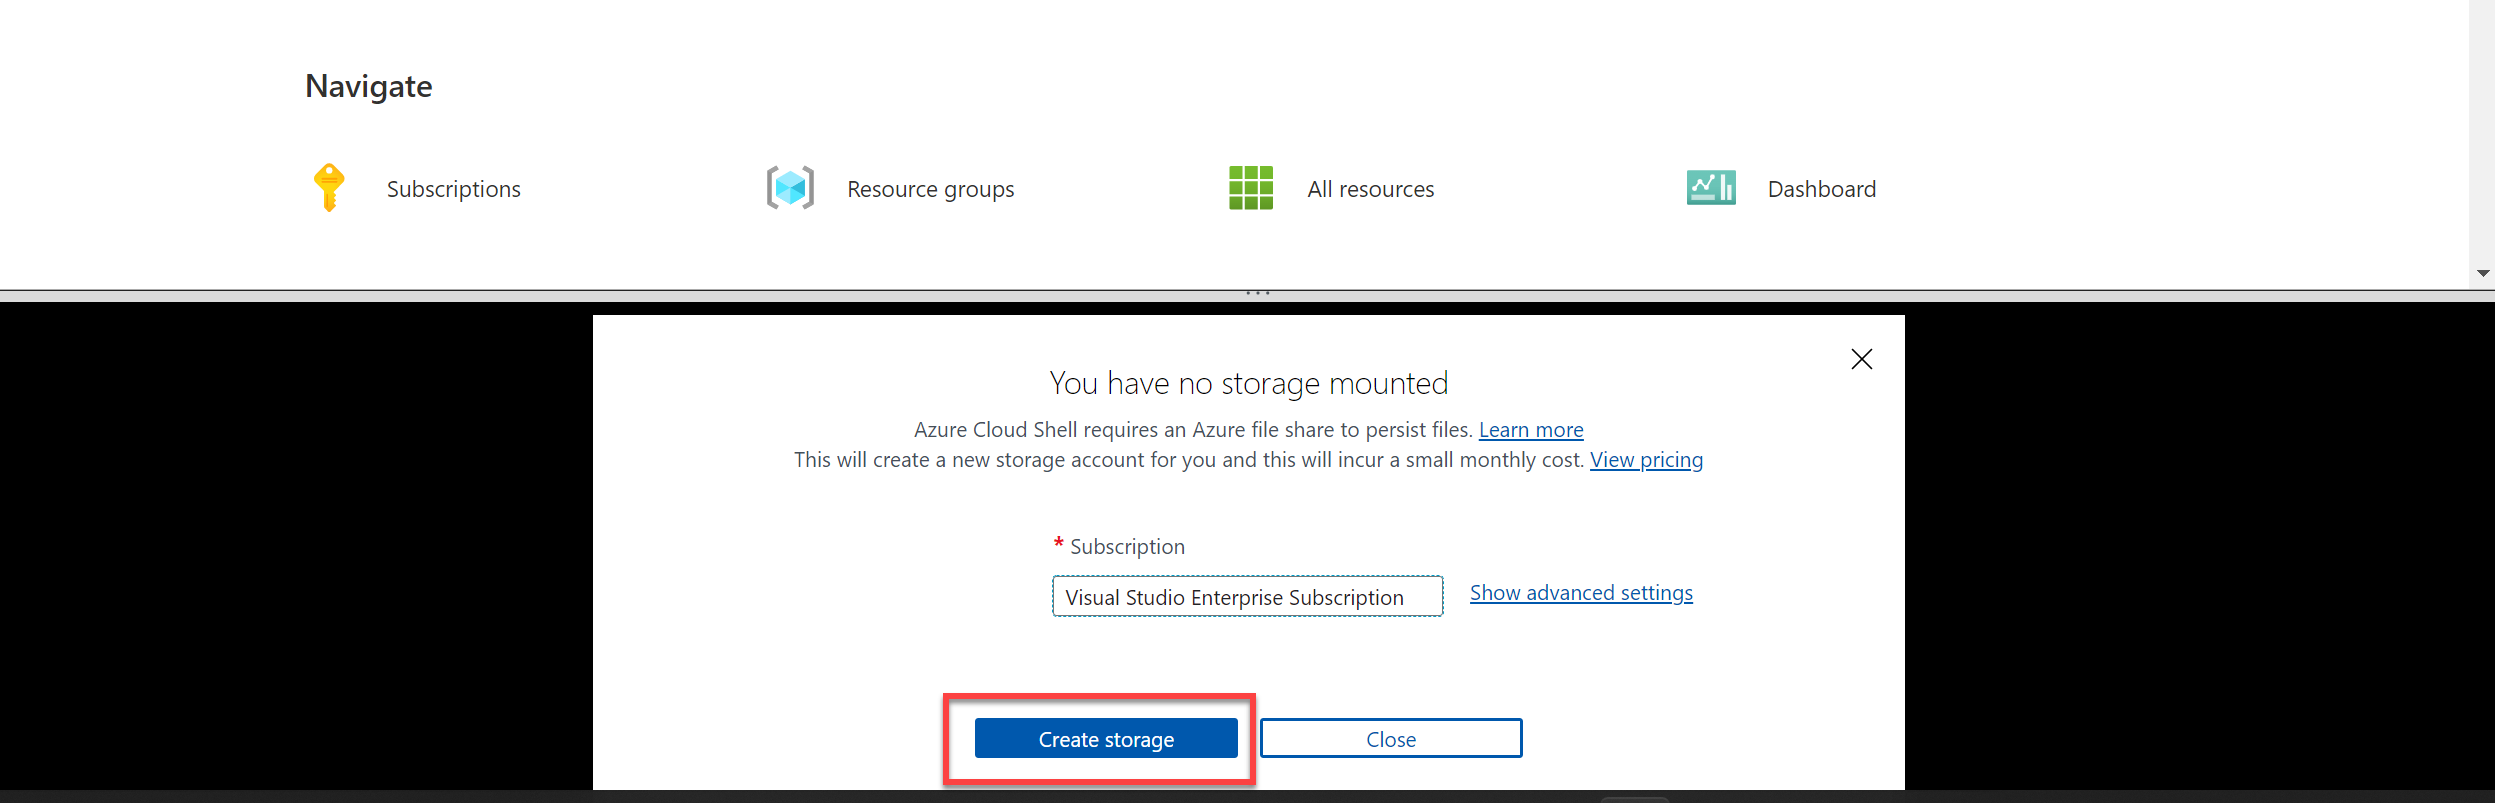
If you are prompted to create storage for your Cloud Shell, ensure your subscription is specified and select Create storage. Then wait a minute or so for the storage to be created.
-
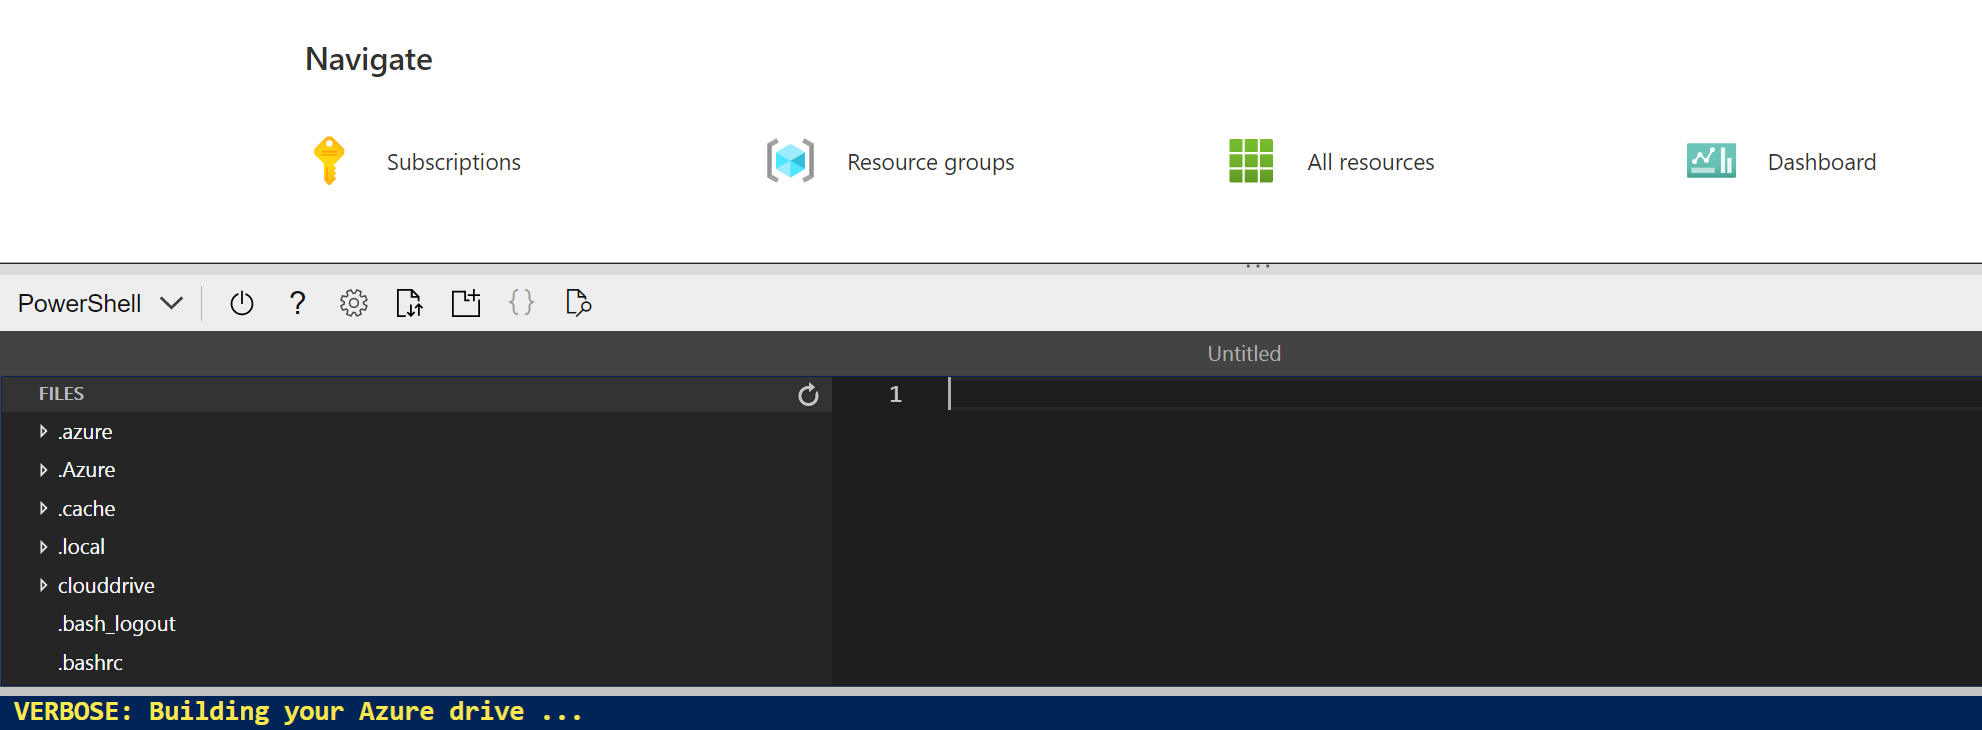
Make sure the type of shell indicated on the top left of the Cloud Shell pane is switched to PowerShell. If it is Bash, switch to PowerShell by using the drop-down menu.

-
Wait for PowerShell to start. You should see the following screen in the Azure portal:

Configure and run a client application
Now let’s open and edit a pre-written script, which will run the client application.
-
In the command shell, enter the following command to download the sample application and save it to a folder called ai-900.
git clone https://github.com/MicrosoftLearning/AI-900-AIFundamentals ai-900Note If you already used this command in another lab to clone the ai-900 repository, you can skip this step.
-
The files are downloaded to a folder named ai-900. Now we want to see all of the files in this folder and work with them. Type the following commands into the shell:
 cd ai-900
 code .
Notice how the script opens up an editor like the one in the image below:
-
In the Files pane on the left, select the understand.ps1 file in the ai-900 folder. This file contains some code that uses your Conversational Language Understanding model.
Don’t worry too much about the details of the code. The important thing is that you’ll use the instructions below to modify the file to specify the language model you trained.
- Switch back to the browser tab containing Language Studio. Then in Language Studio, open the Deploying a model page and select your model. Then click the Get prediction URL button. The two pieces of information you need are in this dialog box:
- The endpoint for your model - you can copy the endpoint from the Prediction URL box.
- The key for your model - the key is in the Sample request as the value for the Ocp-Apim-Subscription-Key parameter, and looks similar to 0ab1c23de4f56gh7i8901234jkl567m8.
-
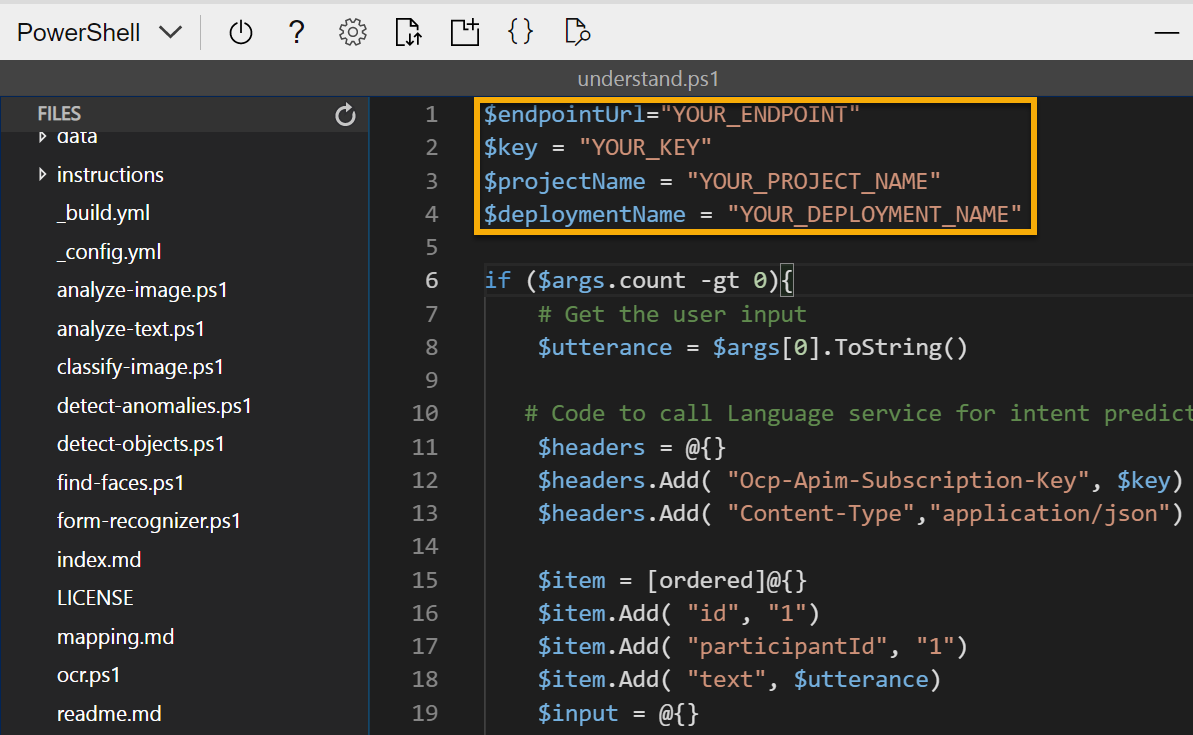
Copy the endpoint value, then switch back to the browser tab containing the Cloud Shell and paste it into the code editor, replacing YOUR_ENDPOINT (within the quotation marks). The repeat that process for the key, replacing YOUR_KEY.
-
Next, replace YOUR_PROJECT_NAME with the name of your project, and replace YOUR_DEPLOYMENT_NAME with the name of your deployed model. The first lines of code should look similar to what you see below:
$endpointUrl="https://some-name.cognitiveservices.azure.com/language/..." $key = "0ab1c23de4f56gh7i8901234jkl567m8" $projectName = "name" $deploymentName = "name" -
At the top right of the editor pane, use the … button to open the menu and select Save to save your changes. Then open the menu again and select Close Editor.
-
In the PowerShell pane, enter the following command to run the code:
./understand.ps1 "Turn on the light" -
Review the results. The app should have predicted that the intended action is to switch on the light.
-
Now try another command:
./understand.ps1 "Switch the fan off" -
Review the results from this command. The app should have predicted that the intended action is to switch off the fan.
- Experiment with a few more commands; including commands that the model was not trained to support, such as “Hello” or “switch on the oven”. The app should generally understand commands for which its language model is defined, and fail gracefully for other input.
Note Each time you will need to start with ./understand.ps1 followed by the phrase. Include quotation marks around your phrase.
Learn more
This app shows only some of the capabilities of the Conversational Language Understanding feature of the Language service. To learn more about what you can do with this service, see the Conversational Language Understanding page.