Explore optical character recognition
Note To complete this lab, you will need an Azure subscription in which you have administrative access.
A common computer vision challenge is to detect and interpret text in an image. This kind of processing is often referred to as optical character recognition (OCR). Microsoft’s Read API provides access to OCR capabilities.
To test the capabilities of the Read API, we’ll use a simple command-line application that runs in the Cloud Shell. The same principles and functionality apply in real-world solutions, such as web sites or phone apps.
Use the Azure AI Vision service to Read Text in an Image
The Azure AI Vision service provides support for OCR tasks, including:
- A Read API that is optimized for larger documents. This API is used asynchronously, and can be used for both printed and handwritten text.
Create an Azure AI services resource
You can use the Azure AI Vision service by creating either a Computer Vision resource or an Azure AI services resource.
If you haven’t already done so, create an Azure AI services resource in your Azure subscription.
-
In another browser tab, open the Azure portal at https://portal.azure.com, signing in with your Microsoft account.
- Click the +Create a resource button and search for Azure AI services. Select create an Azure AI services plan. You will be taken to a page to create an Azure AI services resource. Configure it with the following settings:
- Subscription: Your Azure subscription.
- Resource group: Select or create a resource group with a unique name.
- Region: Choose any available region.
- Name: Enter a unique name.
- Pricing tier: Standard S0
- By checking this box I acknowledge that I have read and understood all the terms below: Selected.
-
Review and create the resource, and wait for deployment to complete. Then go to the deployed resource.
- View the Keys and Endpoint page for your Azure AI services resource. You will need the endpoint and keys to connect from client applications.
Run Cloud Shell
To test the capabilities of the Custom Vision service, we’ll use a simple command-line application that runs in the Cloud Shell on Azure.
-
In the Azure portal, select the [>_] (Cloud Shell) button at the top of the page to the right of the search box. This opens a Cloud Shell pane at the bottom of the portal.

-
The first time you open the Cloud Shell, you may be prompted to choose the type of shell you want to use (Bash or PowerShell). Select PowerShell. If you do not see this option, skip the step.
-
If you are prompted to create storage for your Cloud Shell, ensure your subscription is specified and select Create storage. Then wait a minute or so for the storage to be created.

-
Make sure the the type of shell indicated on the top left of the Cloud Shell pane is switched to PowerShell. If it is Bash, switch to PowerShell by using the drop-down menu.

-
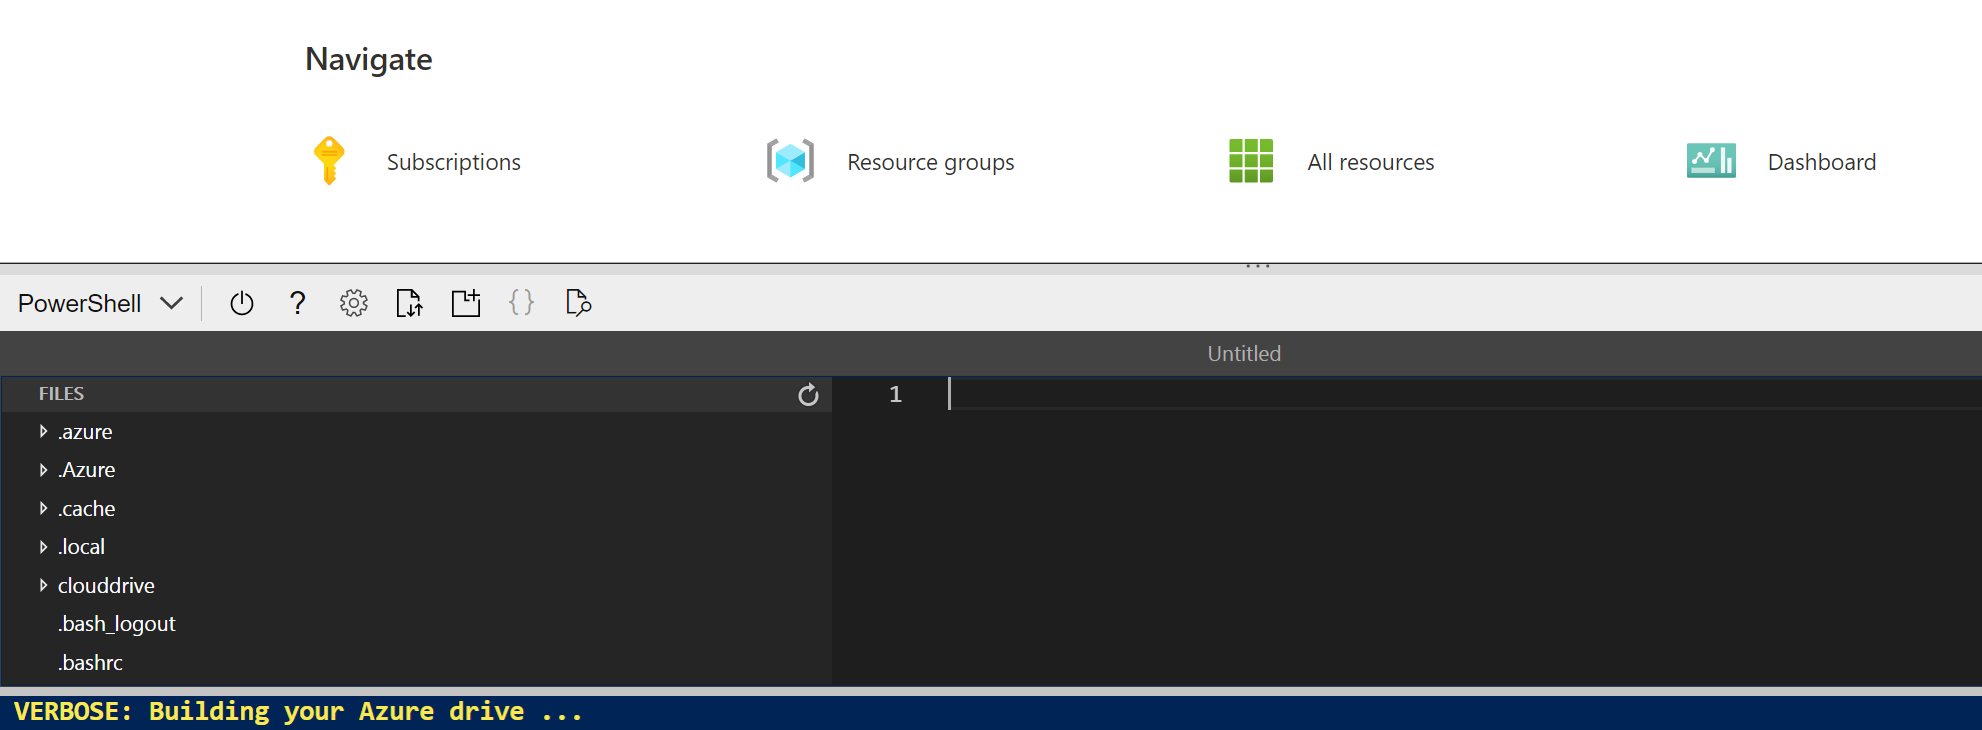
Wait for PowerShell to start. You should see the following screen in the Azure portal:

Configure and run a client application
Now that you have a custom model, you can run a simple client application that uses the OCR service.
-
In the command shell, enter the following command to download the sample application and save it to a folder called ai-900.
git clone https://github.com/MicrosoftLearning/AI-900-AIFundamentals ai-900Tip If you already used this command in another lab to clone the ai-900 repository, you can skip this step.
-
The files are downloaded to a folder named ai-900. Now we want to see all of the files in your Cloud Shell storage and work with them. Type the following command into the shell:
code .Notice how this opens up an editor like the one in the image below:
-
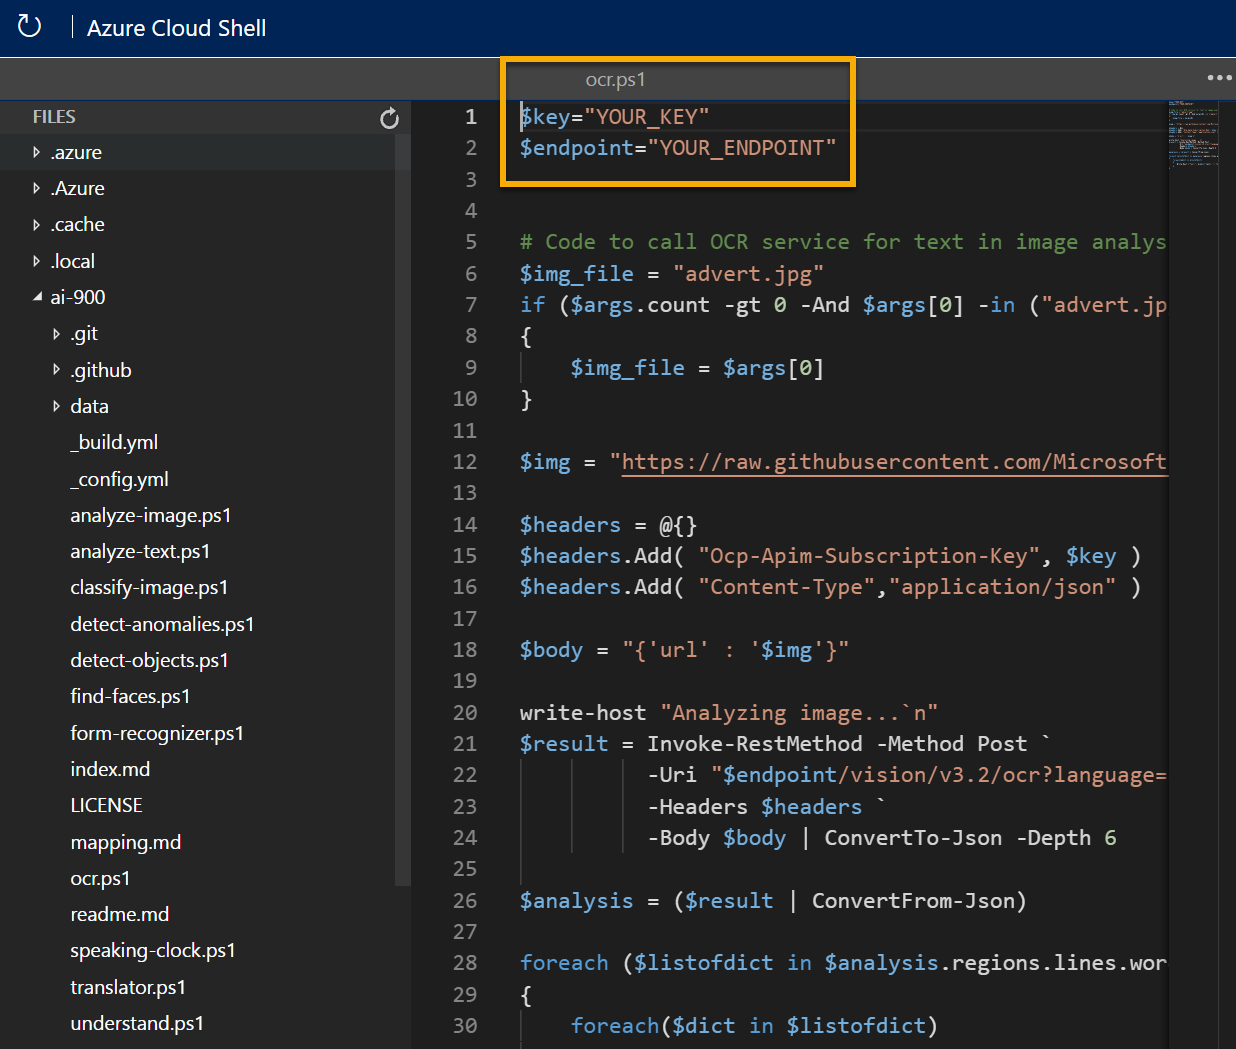
In the Files pane on the left, expand ai-900 and select ocr.ps1. This file contains some code that uses the Computer Vision service to detect and analyze text in an image, as shown here:
-
Don’t worry too much about the details of the code, the important thing is that it needs the endpoint URL and either of the keys for your Azure AI services resource. Copy these from the Keys and Endpoints page for your resource from the Azure portal and paste them into the code editor, replacing the YOUR_KEY and YOUR_ENDPOINT placeholder values respectively.
Tip You may need to use the separator bar to adjust the screen area as you work with the Keys and Endpoint and Editor panes.
After pasting the key and endpoint values, the first two lines of code should look similar to this:
$key="1a2b3c4d5e6f7g8h9i0j...." $endpoint="https..." -
At the top right of the editor pane, use the … button to open the menu and select Save to save your changes. Then open the menu again and select Close Editor. Now that you’ve set up the key and endpoint, you can use your Azure AI services resource to extract text from an image.
Let’s use the Read API. In this case, you have an advertising image for the fictional Northwind Traders retail company that includes some text.
The sample client application will analyze the following image:

-
In the PowerShell pane, enter the following commands to run the code to read the text:
cd ai-900 ./ocr.ps1 advert.jpg -
Review the details found in the image. The text found in the image is organized into a hierarchical structure of regions, lines, and words, and the code reads these to retrieve the results.
Note that the location of text is indicated by the top- left coordinates, and the width and height of a bounding box, as shown here:

-
Now let’s try another image:
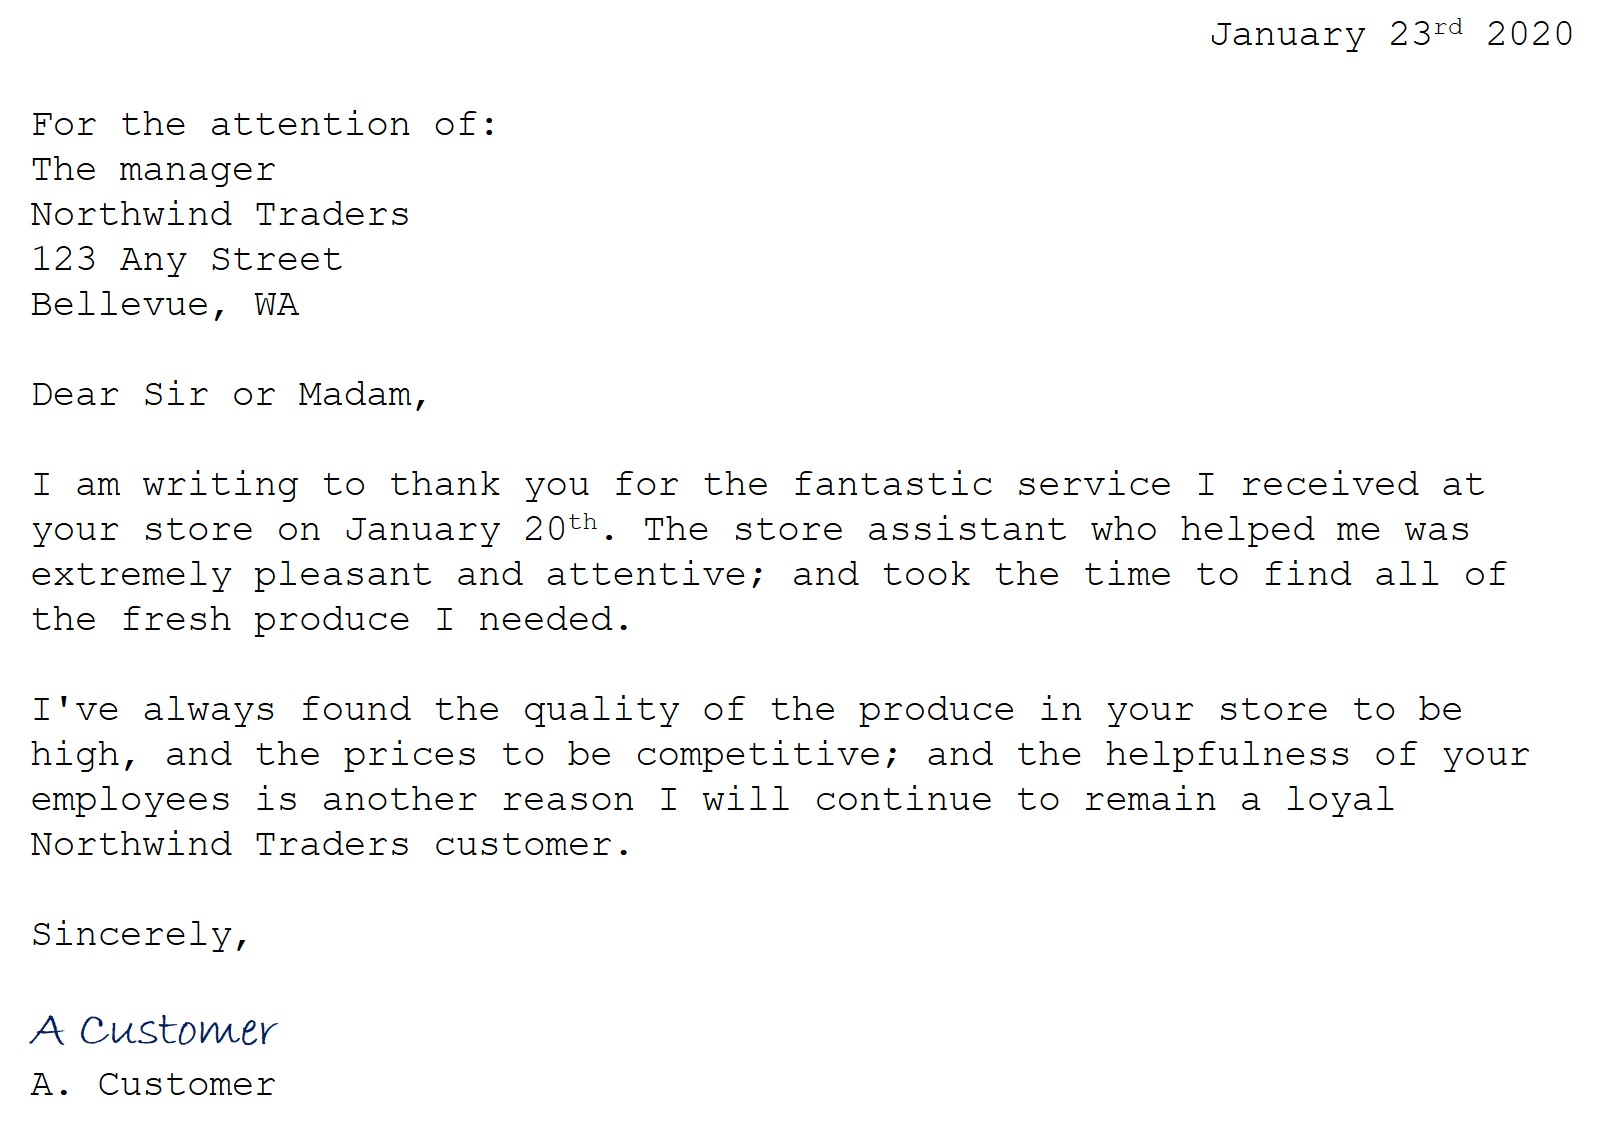
To analyze the second image, enter the following command:
./ocr.ps1 letter.jpg -
Review the results of the analysis for the second image. It should also return the text and bounding boxes of the text.
Learn more
This simple app shows only some of the OCR capabilities of the Computer Vision service. To learn more about what you can do with this service, see the OCR page.