Extract Data from Forms
Suppose a company currently requires employees to manually purchase order sheets and enter the data into a database. They would like you to utilize AI services to improve the data entry process. You decide to build a machine learning model that will read the form and produce structured data that can be used to automatically update a database.
Azure AI Document Intelligence is an Azure AI service that enables users to build automated data processing software. This software can extract text, key/value pairs, and tables from form documents using optical character recognition (OCR). Azure AI Document Intelligence has pre-built models for recognizing invoices, receipts, and business cards. The service also provides the capability to train custom models. In this exercise, we will focus on building custom models.
Clone the repository for this course
If you have not already done so, you must clone the code repository for this course:
- Start Visual Studio Code.
- Open the palette (SHIFT+CTRL+P) and run a Git: Clone command to clone the
https://github.com/MicrosoftLearning/AI-102-AIEngineerrepository to a local folder (it doesn’t matter which folder). - When the repository has been cloned, open the folder in Visual Studio Code.
-
Wait while additional files are installed to support the C# code projects in the repo.
Note: If you are prompted to add required assets to build and debug, select Not Now.
Create a Azure AI Document Intelligence resource
To use the Azure AI Document Intelligence service, you need a Azure AI Document Intelligence or Azure AI Services resource in your Azure subscription. You’ll use the Azure portal to create a resource.
-
Open the Azure portal at
https://portal.azure.com, and sign in using the Microsoft account associated with your Azure subscription. - In the top search bar, search for Document intelligence, select Document intelligence, and create a resource with the following settings:
- Subscription: Your Azure subscription
- Resource group: Choose or create a resource group (if you are using a restricted subscription, you may not have permission to create a new resource group - use the one provided)
- Region: Choose any available region
- Name: Enter a unique name
- Pricing tier: F0
Note: If you already have an F0 Document Intelligence service in your subscription, select S0 for this one.
- When the resource has been deployed, go to it and view its Keys and Endpoint page. You will need the endpoint and one of the keys from this page to manage access from your code later on.
Gather documents for training
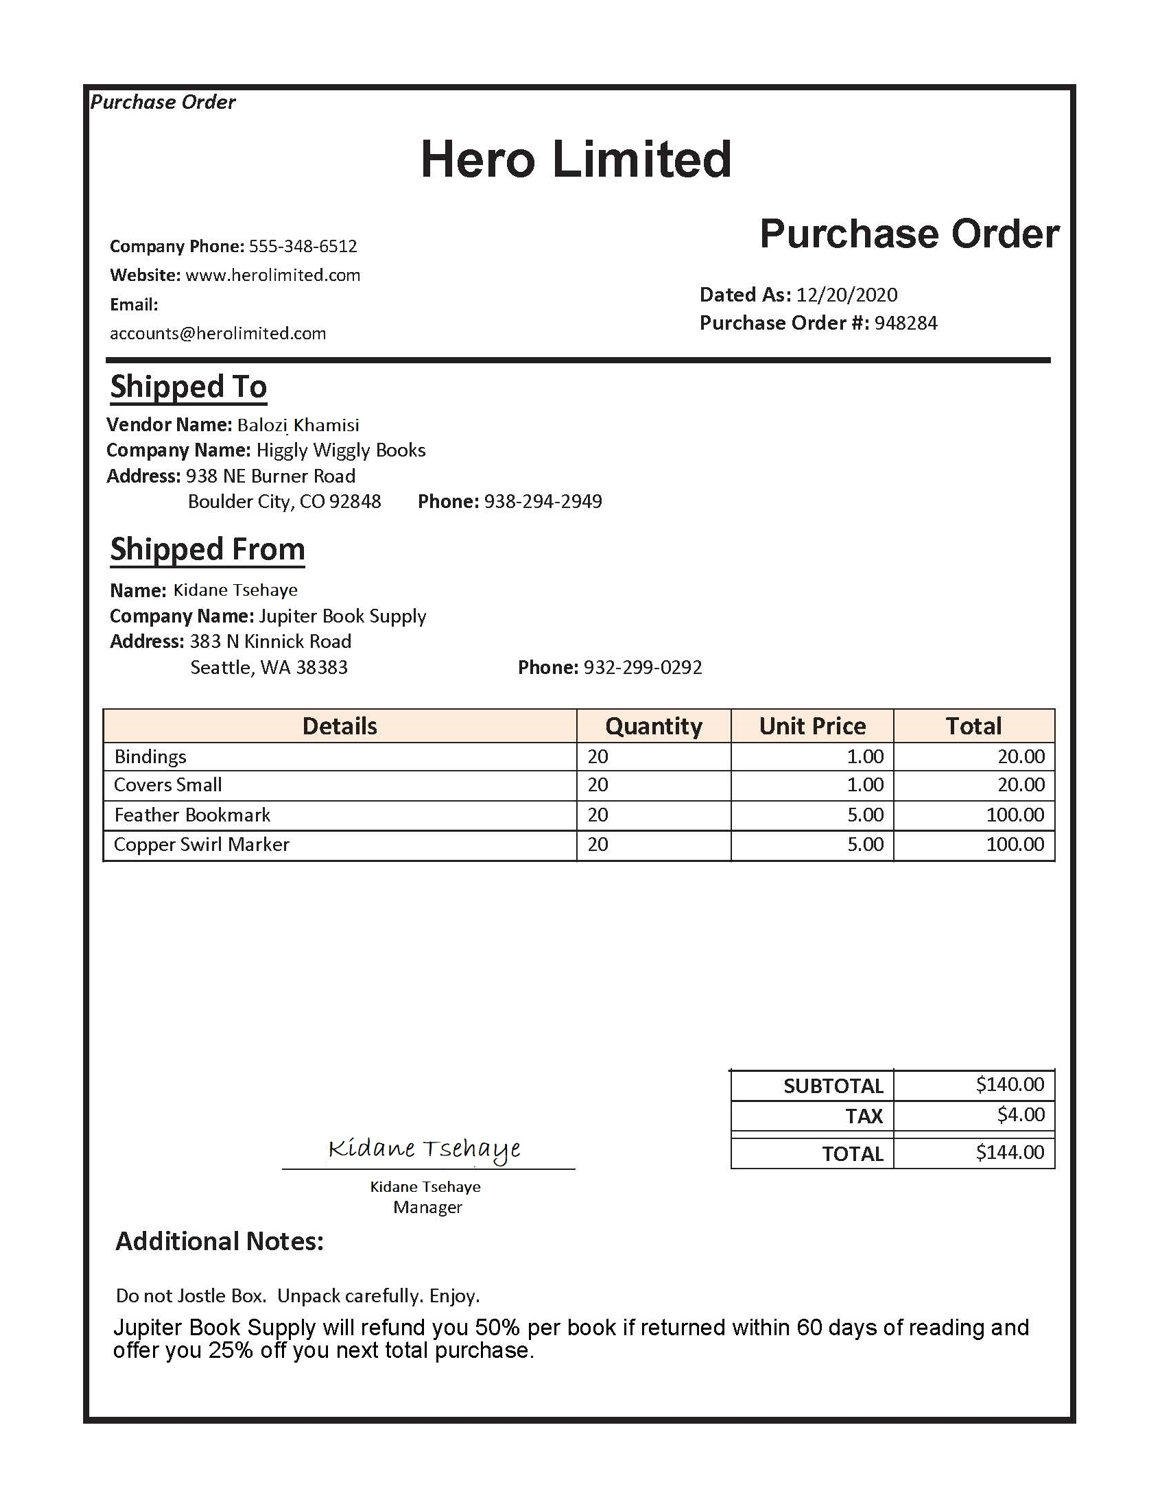
You’ll use the sample forms from the 21-custom-form/sample-forms folder in this repo, which contain all the files you’ll need to train and test a model.
-
In Visual Studio Code, in the 21-custom-form folder, expand the sample-forms folder. Notice there are files ending in .json and .jpg in the folder.
You will use the .jpg files to train your model.
The .json files have been generated for you and contain label information. The files will be uploaded into your blob storage container alongside the forms.
-
Return to the Azure portal at https://portal.azure.com.
-
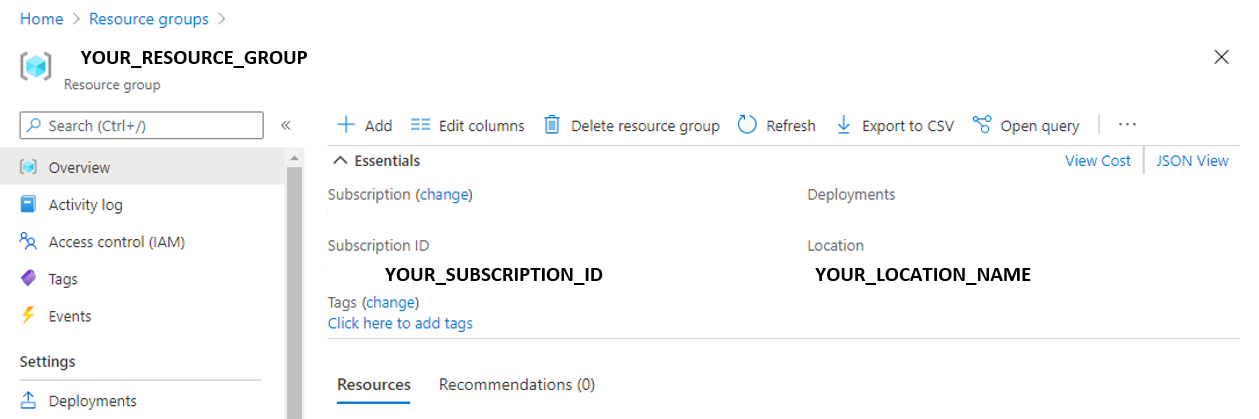
View the Resource group in which you created the Document Intelligence resource previously.
-
On the Overview page for your resource group, note the Subscription ID and Location. You will need these values, along with your resource group name in subsequent steps.
-
In Visual Studio Code, in the Explorer pane, right-click the the 21-custom-form folder and select Open in Integrated Terminal.
-
In the terminal pane, enter the following command to establish an authenticated connection to your Azure subscription.
az login --output none
-
When prompted, sign into your Azure subscription. Then return to Visual Studio Code and wait for the sign-in process to complete.
-
Run the following command to list Azure locations.
az account list-locations -o table
-
In the output, find the Name value that corresponds with the location of your resource group (for example, for East US the corresponding name is eastus).
Important: Record the Name value and use it in Step 12.
-
In the Explorer pane, in the 21-custom-form folder, select setup.cmd. You will use this batch script to run the Azure command line interface (CLI) commands required to create the other Azure resources you need.
- In the setup.cmd script, review the rem commands. These comments outline the program the script will run. The program will:
- Create a storage account in your Azure resource group
- Upload files from your local sampleforms folder to a container called sampleforms in the storage account
- Print a Shared Access Signature URI
-
Modify the subscription_id, resource_group, and location variable declarations with the appropriate values for the subscription, resource group, and location name where you deployed the Document Intelligence resource. Then save your changes.
Leave the expiry_date variable as it is for the exercise. This variable is used when generating the Shared Access Signature (SAS) URI. In practice, you will want to set an appropriate expiry date for your SAS. You can learn more about SAS here.
- In the terminal for the 21-custom-form folder, enter the following command to run the script:
setup
- When the script completes, review the displayed output and note your Azure resource’s SAS URI.
Important: Before moving on, paste the SAS URI somewhere you will be able to retrieve it again later (for example, in a new text file in Visual Studio Code).
- In the Azure portal, refresh the resource group and verify that it contains the Azure Storage account just created. Open the storage account and in the pane on the left, select Storage Browser (preview). Then in Storage Browser, expand BLOB CONTAINERS and select the sampleforms container to verify that the files have been uploaded from your local 21-custom-form/sample-forms folder.
Train a model using the Document Intelligence SDK
Now you will train a model using the .jpg and .json files.
- In Visual Studio Code, in the 21-custom-form/sample-forms folder, open fields.json and review the JSON document it contains. This file defines the fields that you will train a model to extract from the forms.
- Open Form_1.jpg.labels.json and review the JSON it contains. This file identifies the location and values for named fields in the Form_1.jpg training document.
-
Open Form_1.jpg.ocr.json and review the JSON it contains. This file contains a JSOn representation of the text layout of Form_1.jpg, including the location of all text areas found in the form.
The field information files have been provided for you in this exercise. For your own projects, you can create these files using the Document Intelligence Studio. As you use the tool, your field information files are automatically created and stored in your connected storage account.
- In Visual Studio Code, in the 21-custom-form folder, expand the C-Sharp or Python folder depending on your language preference.
-
Right-click the train-model folder and open an integrated terminal.
- Install the Document Intelligence package by running the appropriate command for your language preference:
C#
dotnet add package Azure.AI.FormRecognizer --version 3.0.0
Python
pip install azure-ai-formrecognizer==3.0.0
- View the contents of the train-model folder, and note that it contains a file for configuration settings:
- C#: appsettings.json
- Python: .env
- Edit the configuration file, modifying the settings to reflect:
- The endpoint for your Document Intelligence resource.
- A key for your Document Intelligence resource.
- The SAS URI for your blob container.
-
Note that the train-model folder contains a code file for the client application:
- C#: Program.cs
- Python: train-model.py
Open the code file and review the code it contains, noting the following details:
- Namespaces from the package you installed are imported
- The Main function retrieves the configuration settings, and uses the key and endpoint to create an authenticated Client.
- The code uses the the training client to train a model using the images in your blob storage container, which is accessed using the SAS URI you generated.
-
In the train-model folder, open the code file for the training application:
- C#: Program.cs
- Python: train-model.py
- Return the integrated terminal for the train-model folder, and enter the following command to run the program:
C#
dotnet run
Python
python train-model.py
- Wait for the program to end, then review the model output.
- Write down the Model ID in the terminal output. You will need it for the next part of the lab.
Test your custom Document Intelligence model
-
In the 21-custom-form folder, in the subfolder for your preferred language (C-Sharp or Python), expand the test-model folder.
-
Right-click the test-model folder and select open an integrated terminal.
-
In the terminal for the test-model folder, install the Document Intelligence package by running the appropriate command for your language preference:
C#
dotnet add package Azure.AI.FormRecognizer --version 3.0.0
Python
pip install azure-ai-formrecognizer==3.0.0
This isn’t strictly necessary if you previously used pip to install the package into Python environment; but it does no harm to ensure it’s installed!
- In the same terminal for the test-model folder, install the Tabulate library. This will provide your output in a table:
C#
dotnet add package Tabulate.NET --version 1.0.5
Python
pip install tabulate
- In the test-model folder, edit the configuration file (appsettings.json or .env, depending on your language preference) to add the following values:
- Your Document Intelligence endpoint.
- Your Document Intelligence key.
- The Model ID generated when you trained the model (you can find this by switching the terminal back to the cmd console for the train-model folder). Save your changes.
- In the test-model folder, open the code file for your client application (Program.cs for C#, test-model.py for Python) and review the code it contains, noting the following details:
- Namespaces from the package you installed are imported
- The Main function retrieves the configuration settings, and uses the key and endpoint to create an authenticated Client.
- The client is then used to extract form fields and values from the test1.jpg image.
- Return the integrated terminal for the test-model folder, and enter the following command to run the program:
C#
dotnet run
Python
python test-model.py
- View the output and observe how the output for the model provides field names like “CompanyPhoneNumber” and “DatedAs”.
More information
For more information about the Document Intelligence service, see the Document Intelligence documentation.