Detect Objects in Images with Custom Vision
In this exercise, you will use the Custom Vision service to train an object detection model that can detect and locate three classes of fruit (apple, banana, and orange) in an image.
Clone the repository for this course
If you have already cloned AI-102-AIEngineer code repository to the environment where you’re working on this lab, open it in Visual Studio Code; otherwise, follow these steps to clone it now.
- Start Visual Studio Code.
- Open the palette (SHIFT+CTRL+P) and run a Git: Clone command to clone the
https://github.com/MicrosoftLearning/AI-102-AIEngineerrepository to a local folder (it doesn’t matter which folder). - When the repository has been cloned, open the folder in Visual Studio Code.
-
Wait while additional files are installed to support the C# code projects in the repo.
Note: If you are prompted to add required assets to build and debug, select Not Now.
Create Custom Vision resources
If you already have Custom Vision resources for training and prediction in your Azure subscription, you can use them in this exercise. If not, use the following instructions to create them.
- In a new browser tab, open the Azure portal at
https://portal.azure.com, and sign in using the Microsoft account associated with your Azure subscription. - Select the +Create a resource button, search for custom vision, and create a Custom Vision resource with the following settings:
- Create options: Both
- Subscription: Your Azure subscription
- Resource group: Choose or create a resource group (if you are using a restricted subscription, you may not have permission to create a new resource group - use the one provided)
- Region: Choose any available region
- Name: Enter a unique name
- Training pricing tier: F0
- Prediction pricing tier: F0
Note: If you already have an F0 custom vision service in your subscription, select S0 for this one.
- Wait for the resources to be created, and then view the deployment details and note that two Custom Vision resources are provisioned; one for training, and another for prediction (evident by the -Prediction suffix). You can view these by navigating to the resource group where you created them.
Important: Each resource has its own endpoint and keys, which are used to manage access from your code. To train an image classification model, your code must use the training resource (with its endpoint and key); and to use the trained model to predict image classes, your code must use the prediction resource (with its endpoint and key).
Create a Custom Vision project
To train an object detection model, you need to create a Custom Vision project based on your training resource. To do this, you’ll use the Custom Vision portal.
- In a new browser tab, open the Custom Vision portal at
https://customvision.ai, and sign in using the Microsoft account associated with your Azure subscription. - Create a new project with the following settings:
- Name: Detect Fruit
- Description: Object detection for fruit.
- Resource: The Custom Vision resource you created previously
- Project Types: Object Detection
- Domains: General
- Wait for the project to be created and opened in the browser.
Add and tag images
To train an object detection model, you need to upload images that contain the classes you want the model to identify, and tag them to indicate bounding boxes for each object instance.
- In Visual Studio Code, view the training images in the 18-object-detection/training-images folder where you cloned the repository. This folder contains images of fruit.
- In the Custom Vision portal, in your object detection project, select Add images and upload all of the images in the extracted folder.
- After the images have been uploaded, select the first one to open it.
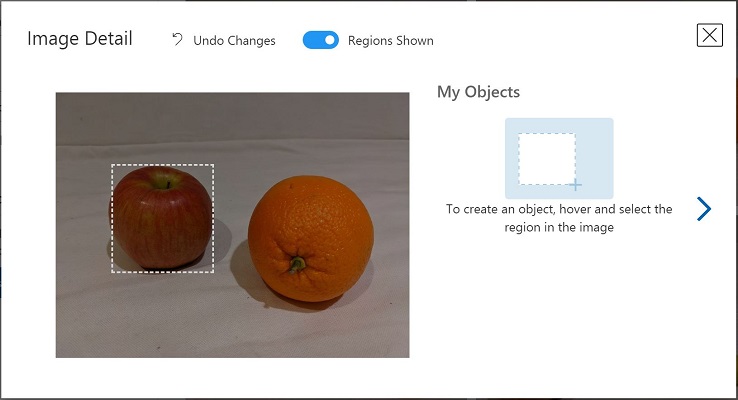
- Hold the mouse over any object in the image until an automatically detected region is displayed like the image below. Then select the object, and if necessary resize the region to surround it.

Alternatively, you can simply drag around the object to create a region.
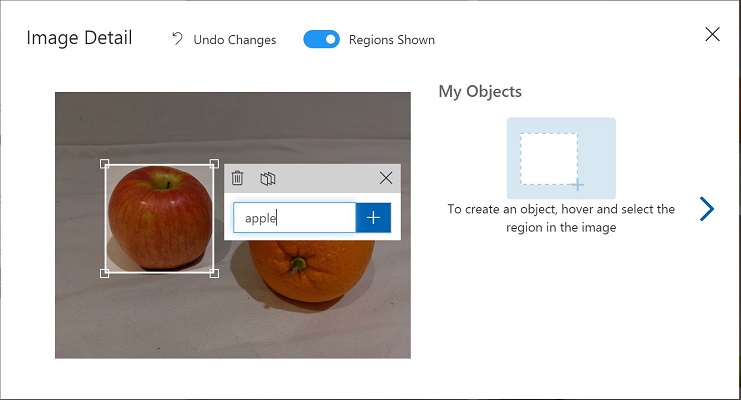
- When the region surrounds the object, add a new tag with the appropriate object type (apple, banana, or orange) as shown here:

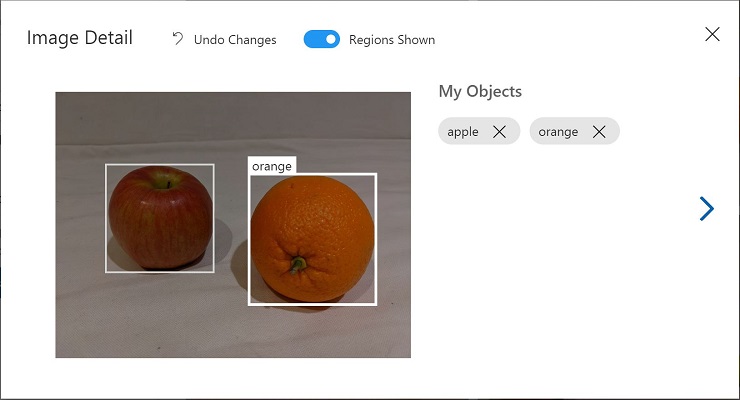
- Select and tag each other object in the image, resizing the regions and adding new tags as required.

-
Use the > link on the right to go to the next image, and tag its objects. Then just keep working through the entire image collection, tagging each apple, banana, and orange.
-
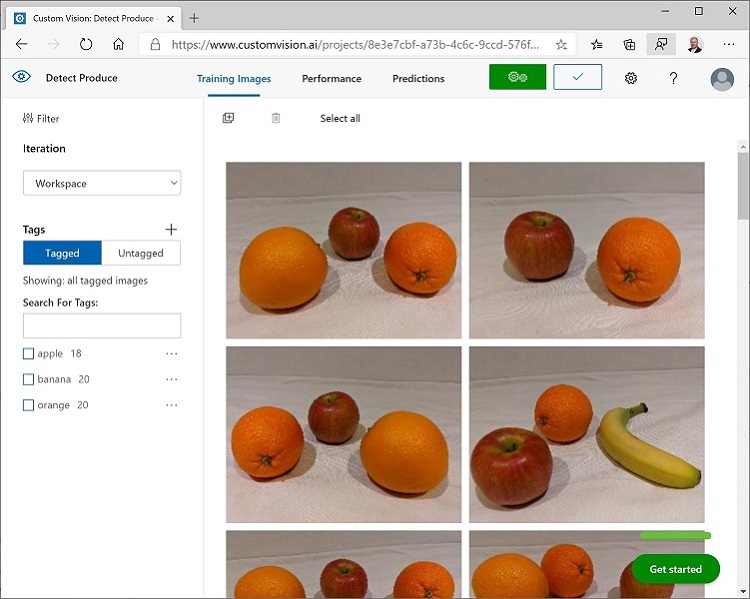
When you have finished tagging the last image, close the Image Detail editor and on the Training Images page, under Tags, select Tagged to see all of your tagged images:

Use the Training API to upload images
You can use the graphical tool in the Custom Vision portal to tag your images, but many AI development teams use other tools that generate files containing information about tags and object regions in images. In scenarios like this, you can use the Custom Vision training API to upload tagged images to the project.
Note: In this exercise, you can choose to use the API from either the C# or Python SDK. In the steps below, perform the actions appropriate for your preferred language.
- Click the settings (⚙) icon at the top right of the Training Images page in the Custom Vision portal to view the project settings.
- Under General (on the left), note the Project Id that uniquely identifies this project.
- On the right, under Resources note that the key and endpoint are shown. These are the details for the training resource (you can also obtain this information by viewing the resource in the Azure portal).
- In Visual Studio Code, under the 18-object-detection folder, expand the C-Sharp or Python folder depending on your language preference.
- Right-click the train-detector folder and open an integrated terminal. Then install the Custom Vision Training package by running the appropriate command for your language preference:
C#
dotnet add package Microsoft.Azure.CognitiveServices.Vision.CustomVision.Training --version 2.0.0
Python
pip install azure-cognitiveservices-vision-customvision==3.1.0
- View the contents of the train-detector folder, and note that it contains a file for configuration settings:
- C#: appsettings.json
- Python: .env
Open the configuration file and update the configuration values it contains to reflect the endpoint and key for your Custom Vision training resource, and the project ID for the object detection project you created previously. Save your changes.
-
In the train-detector folder, open tagged-images.json and examine the JSON it contains. The JSON defines a list of images, each containing one or more tagged regions. Each tagged region includes a tag name, and the top and left coordinates and width and height dimensions of the bounding box containing the tagged object.
Note: The coordinates and dimensions in this file indicate relative points on the image. For example, a height value of 0.7 indicates a box that is 70% of the height of the image. Some tagging tools generate other formats of file in which the coordinate and dimension values represent pixels, inches, or other units of measurements.
-
Note that the train-detector folder contains a subfolder in which the image files referenced in the JSON file are stored.
-
Note that the train-detector folder contains a code file for the client application:
- C#: Program.cs
- Python: train-detector.py
Open the code file and review the code it contains, noting the following details:
- Namespaces from the package you installed are imported
- The Main function retrieves the configuration settings, and uses the key and endpoint to create an authenticated CustomVisionTrainingClient, which is then used with the project ID to create a Project reference to your project.
- The Upload_Images function extracts the tagged region information from the JSON file and uses it to create a batch of images with regions, which it then uploads to the project.
- Return the integrated terminal for the train-detector folder, and enter the following command to run the program:
C#
dotnet run
Python
python train-detector.py
- Wait for the program to end. Then return to your browser and view the Training Images page for your project in the Custom Vision portal (refreshing the browser if necessary).
- Verify that some new tagged images have been added to the project.
Train and test a model
Now that you’ve tagged the images in your project, you’re ready to train a model.
- In the Custom Vision project, click Train to train an object detection model using the tagged images. Select the Quick Training option.
- Wait for training to complete (it might take ten minutes or so), and then review the Precision, Recall, and mAP performance metrics - these measure the prediction accuracy of the classification model, and should all be high.
- At the top right of the page, click Quick Test, and then in the Image URL box, enter
https://aka.ms/apple-orangeand view the prediction that is generated. Then close the Quick Test window.
Publish the object detection model
Now you’re ready to publish your trained model so that it can be used from a client application.
- In the Custom Vision portal, on the Performance page, click 🗸 Publish to publish the trained model with the following settings:
- Model name: fruit-detector
- Prediction Resource: The prediction resource you created previously which ends with “-Prediction” (not the training resource).
- At the top left of the Project Settings page, click the Projects Gallery (👁) icon to return to the Custom Vision portal home page, where your project is now listed.
- On the Custom Vision portal home page, at the top right, click the settings (⚙) icon to view the settings for your Custom Vision service. Then, under Resources, find your prediction resource which ends with “-Prediction” (not the training resource) to determine its Key and Endpoint values (you can also obtain this information by viewing the resource in the Azure portal).
Use the image classifier from a client application
Now that you’ve published the image classification model, you can use it from a client application. Once again, you can choose to use C# or Python.
- In Visual Studio Code, browse to the 18-object-detection folder and in the folder for your preferred language (C-Sharp or Python), expand the test-detector folder.
- Right-click the test-detector folder and open an integrated terminal. Then enter the following SDK-specific command to install the Custom Vision Prediction package:
C#
dotnet add package Microsoft.Azure.CognitiveServices.Vision.CustomVision.Prediction --version 2.0.0
Python
pip install azure-cognitiveservices-vision-customvision==3.1.0
Note: The Python SDK package includes both training and prediction packages, and may already be installed.
- Open the configuration file for your client application (appsettings.json for C# or .env for Python) and update the configuration values it contains to reflect the endpoint and key for your Custom Vision prediction resource, the project ID for the object detection project, and the name of your published model (which should be fruit-detector). Save your changes.
- Open the code file for your client application (Program.cs for C#, test-detector.py for Python) and review the code it contains, noting the following details:
- Namespaces from the package you installed are imported
- The Main function retrieves the configuration settings, and uses the key and endpoint to create an authenticated CustomVisionPredictionClient.
- The prediction client object is used to get object detection predictions for the produce.jpg image, specifying the project ID and model name in the request. The predicted tagged regions are then drawn on the image, and the result is saved as output.jpg.
- Return to the integrated terminal for the test-detector folder, and enter the following command to run the program:
C#
dotnet run
Python
python test-detector.py
- After the program has completed, view the resulting output.jpg file to see the detected objects in the image.
More information
For more information about object detection with the Custom Vision service, see the Custom Vision documentation.